

1973 Volkswagen Bus Type II Remodel- PART ONE!!
As many of you know, I've been the owner of a VW bus for a few months now! I absolutely love this vehicle. I never thought that I would EVER own one of these, but hey, look at me now!
When I moved back to the states I had this dream in my head about not looking forward to owning a house, but owning a bus/van to travel with and make art and live out of. After looking at the VW busses for about two weeks I had given up. The prices were wayyyy too high. So that was it, I gave up. I then decided on trying to find a cargo van to redo-- as it seemed like the best option.
Then one day I was driving home from my sisters house and I look across the bayou and I see a flash of teal. I literally *screamed* and called my sister-- because she knows the person who was selling it. We went to look at it the following day-- and I was prepared for it to be fully out of my price range.

LUCKILY, it was within a reasonable amount, and a family friend was selling it not looking to profit off of it-- as it is a collectors item. I remember on the way home after looking at it I started crying. I felt like somehow a major dream of mine was coming into my life. How? I don't know. But after a long ass fucking year in Amsterdam- I was ready.
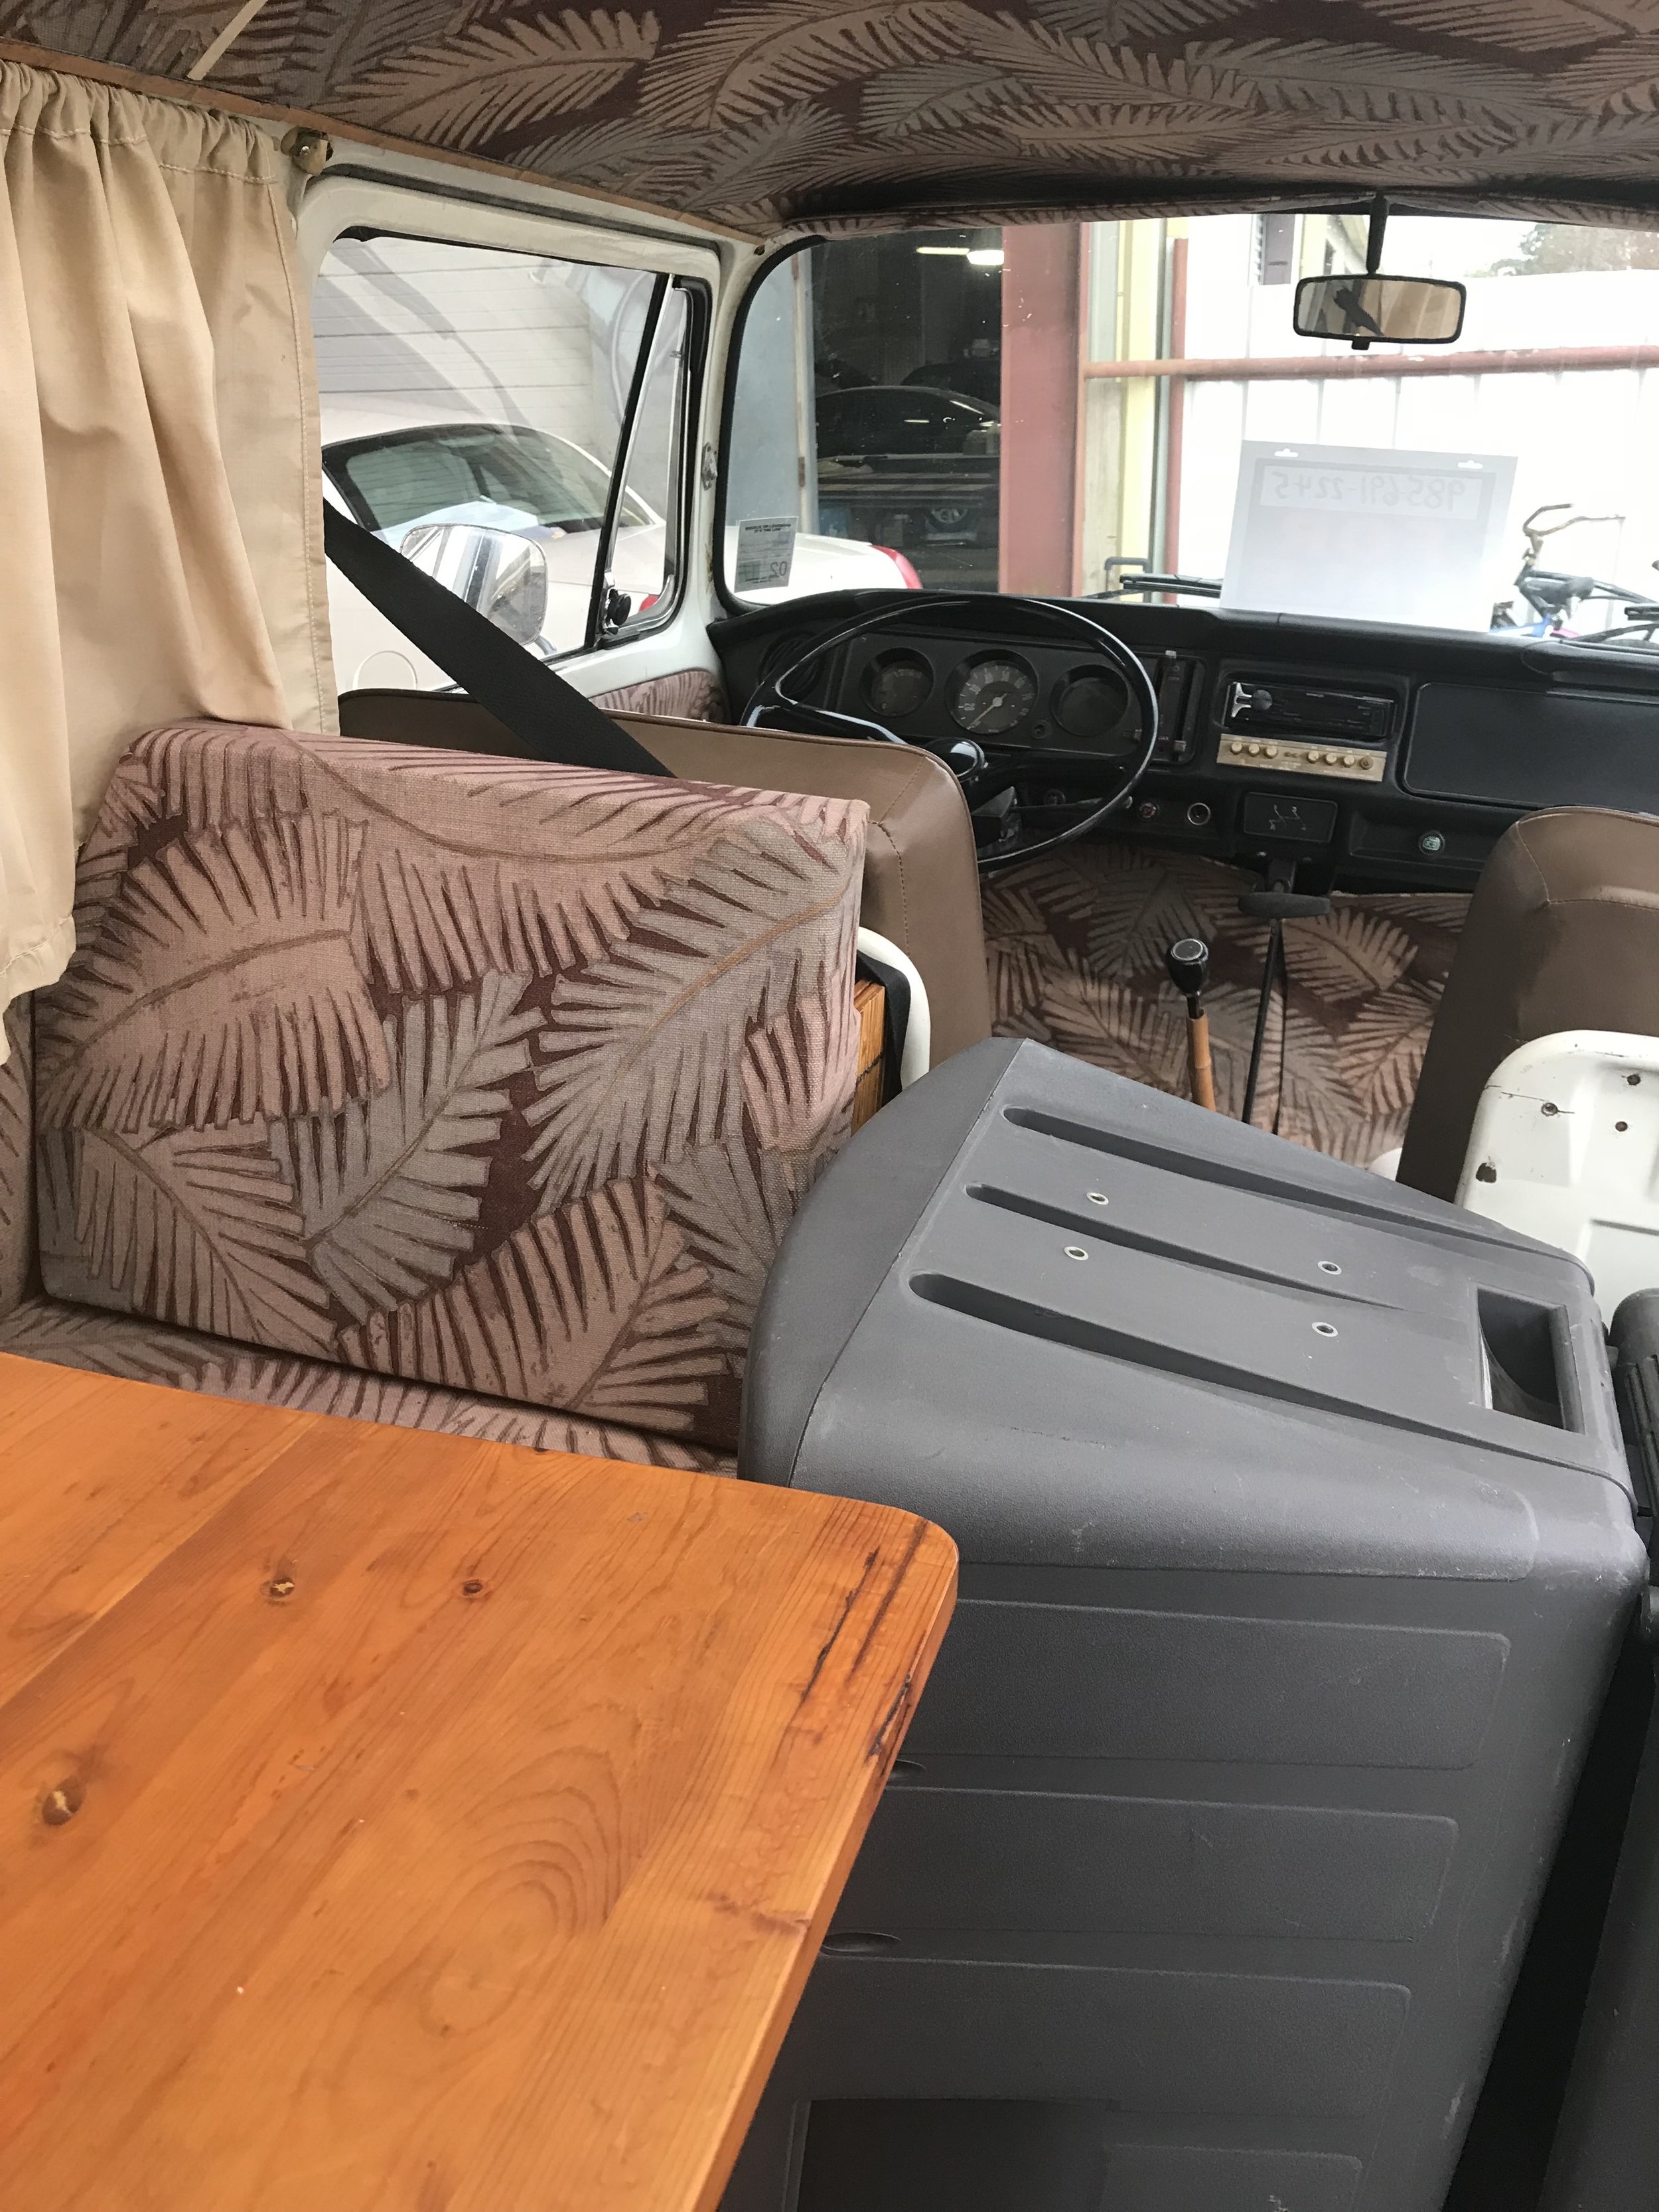
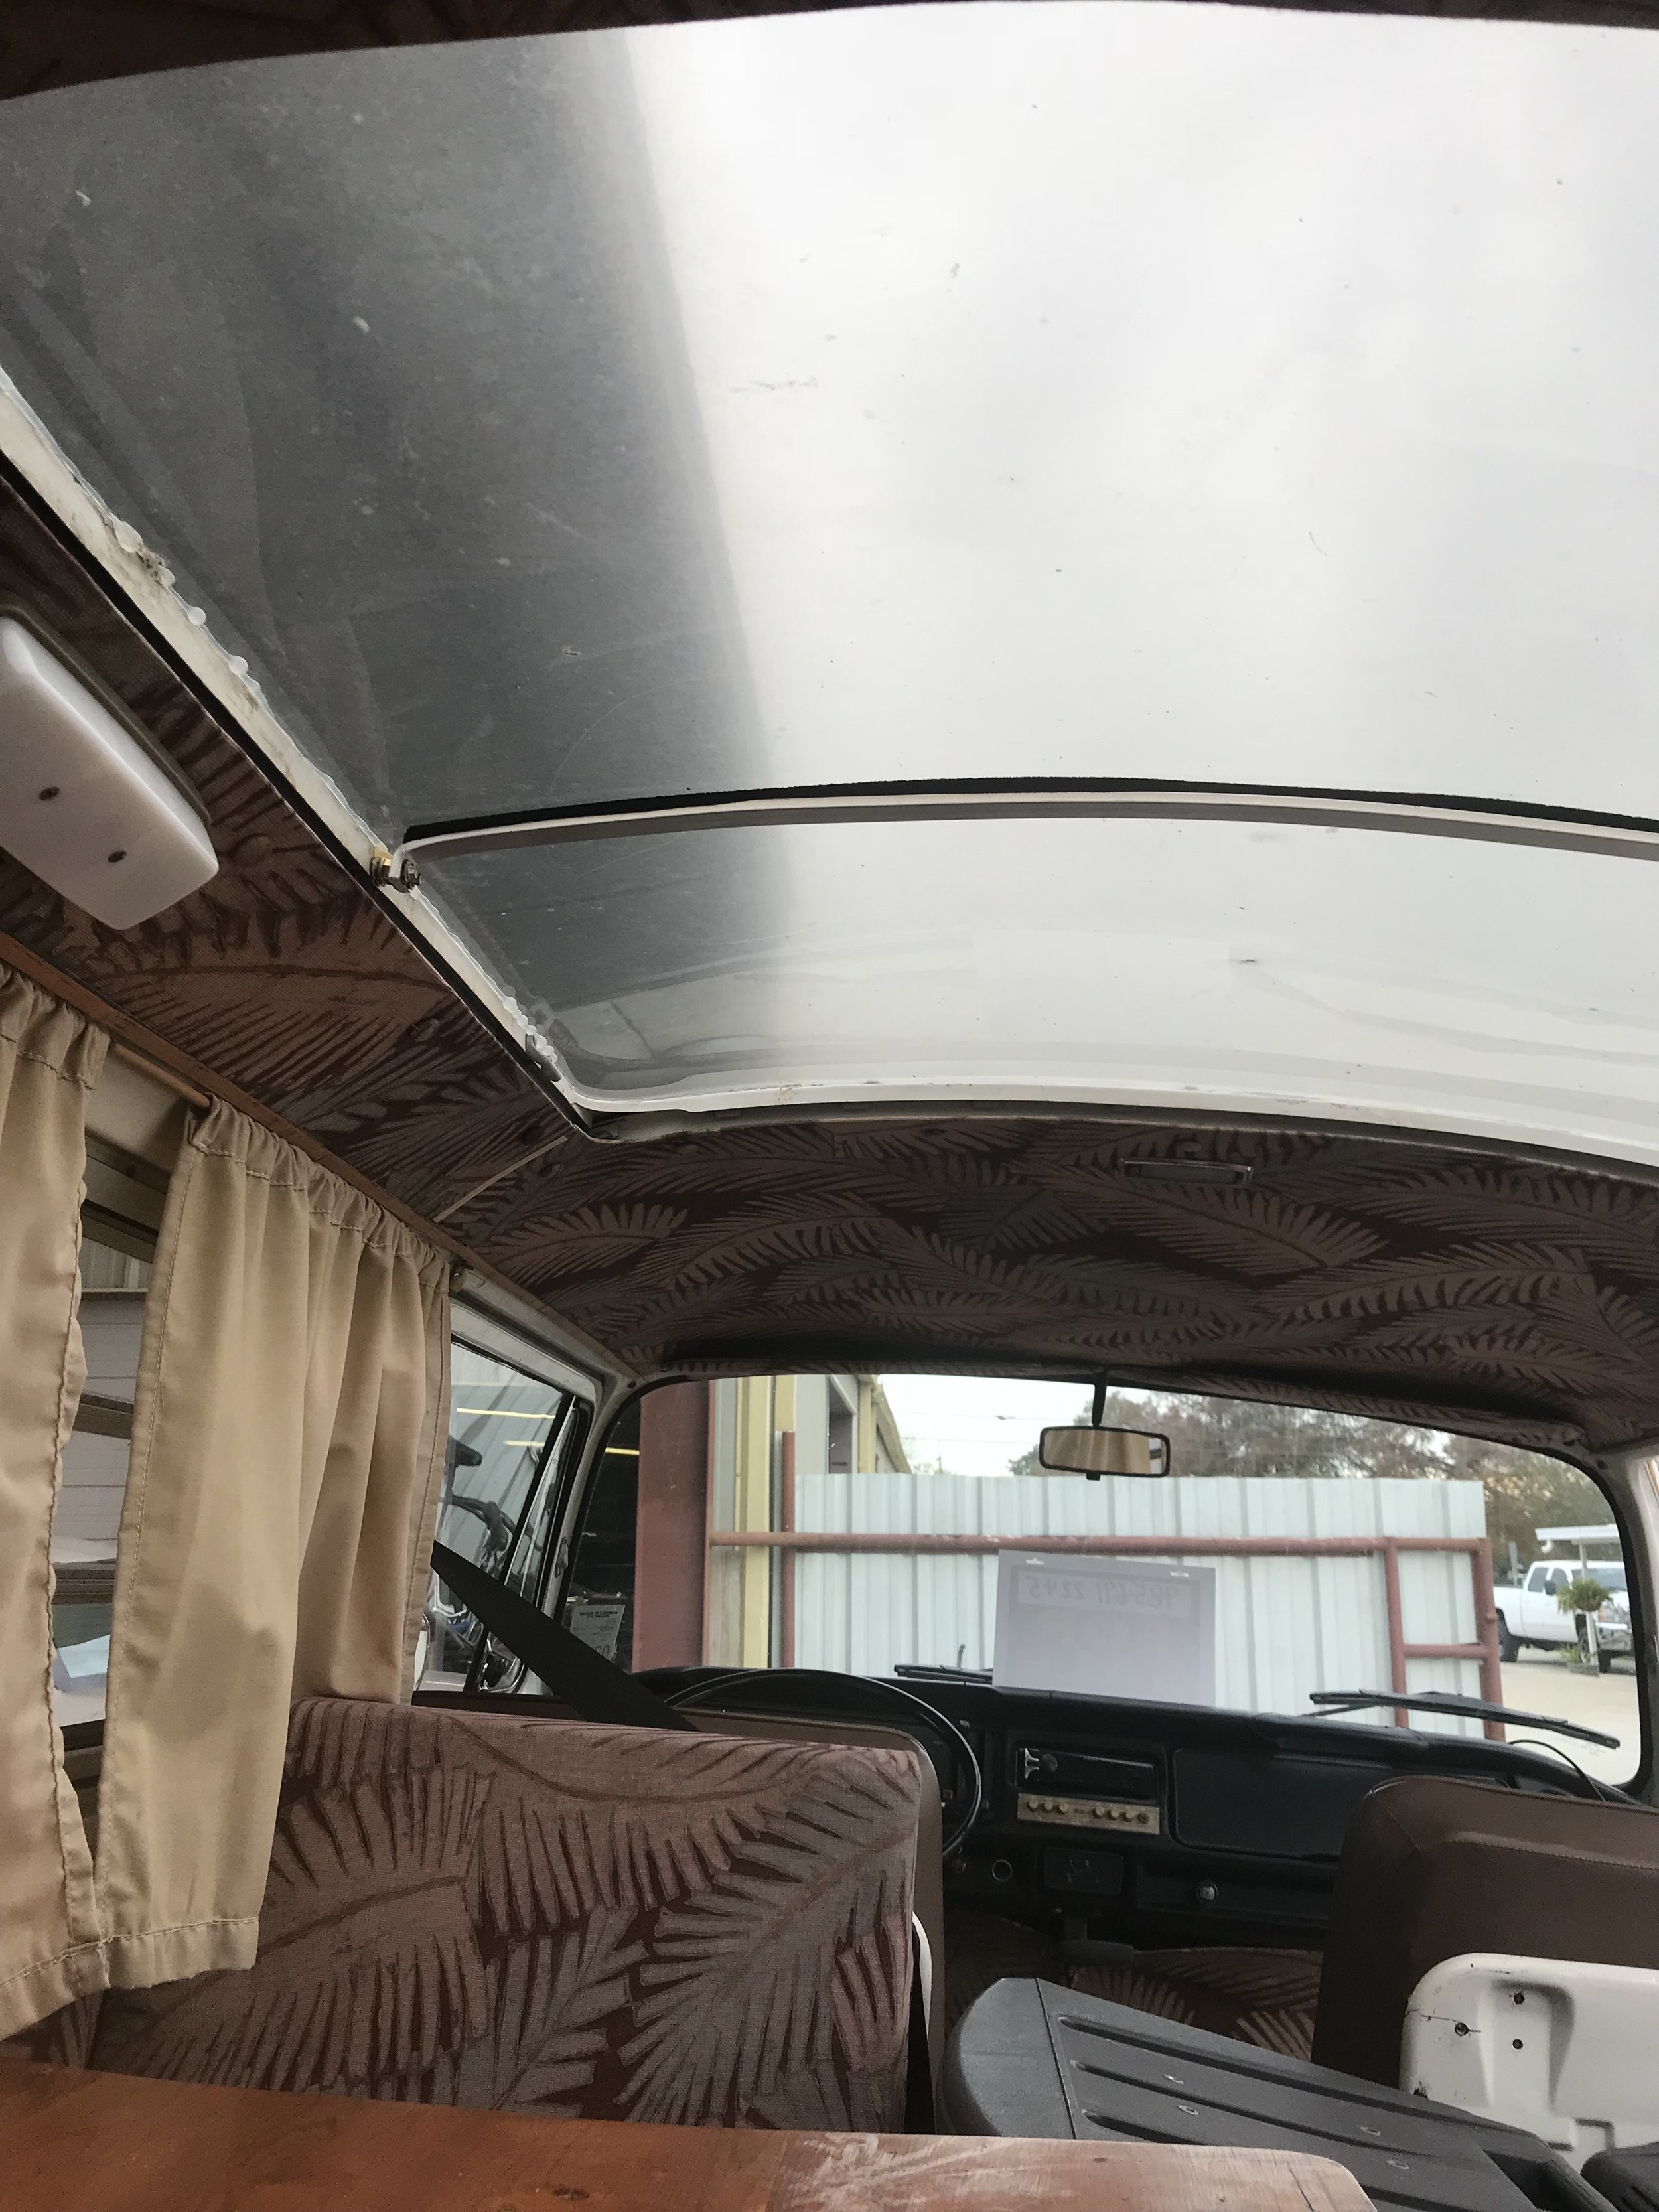
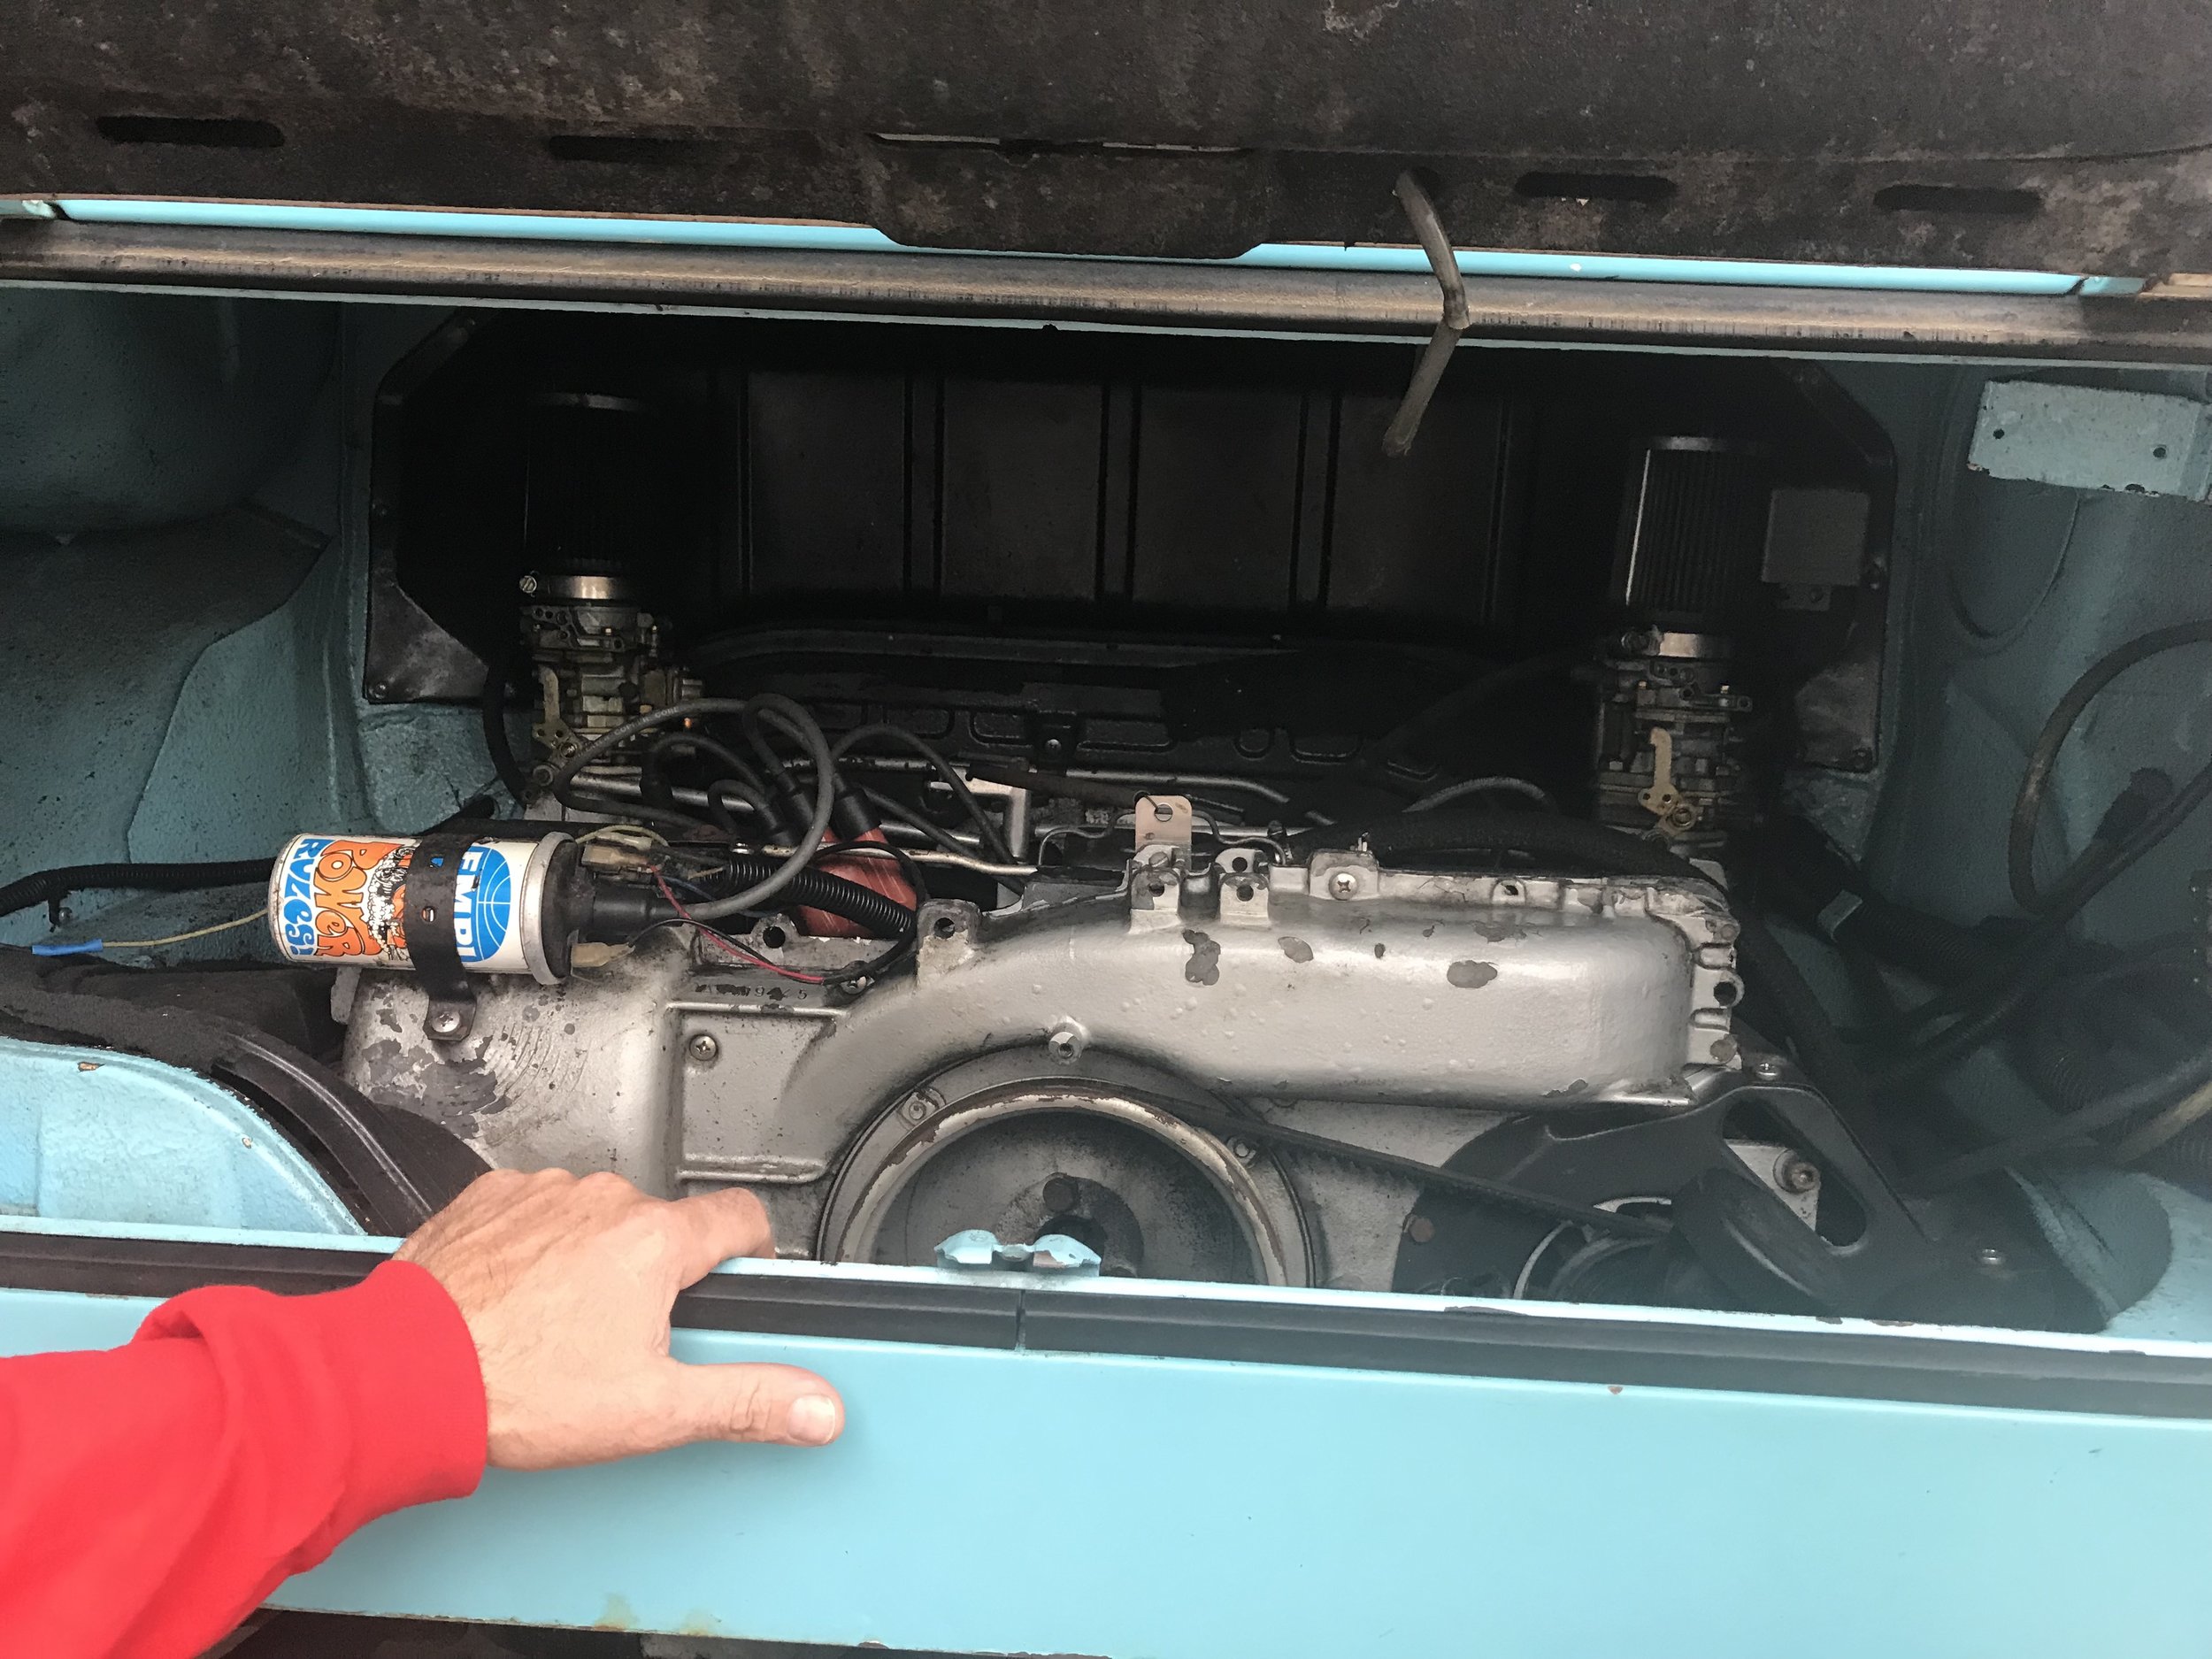

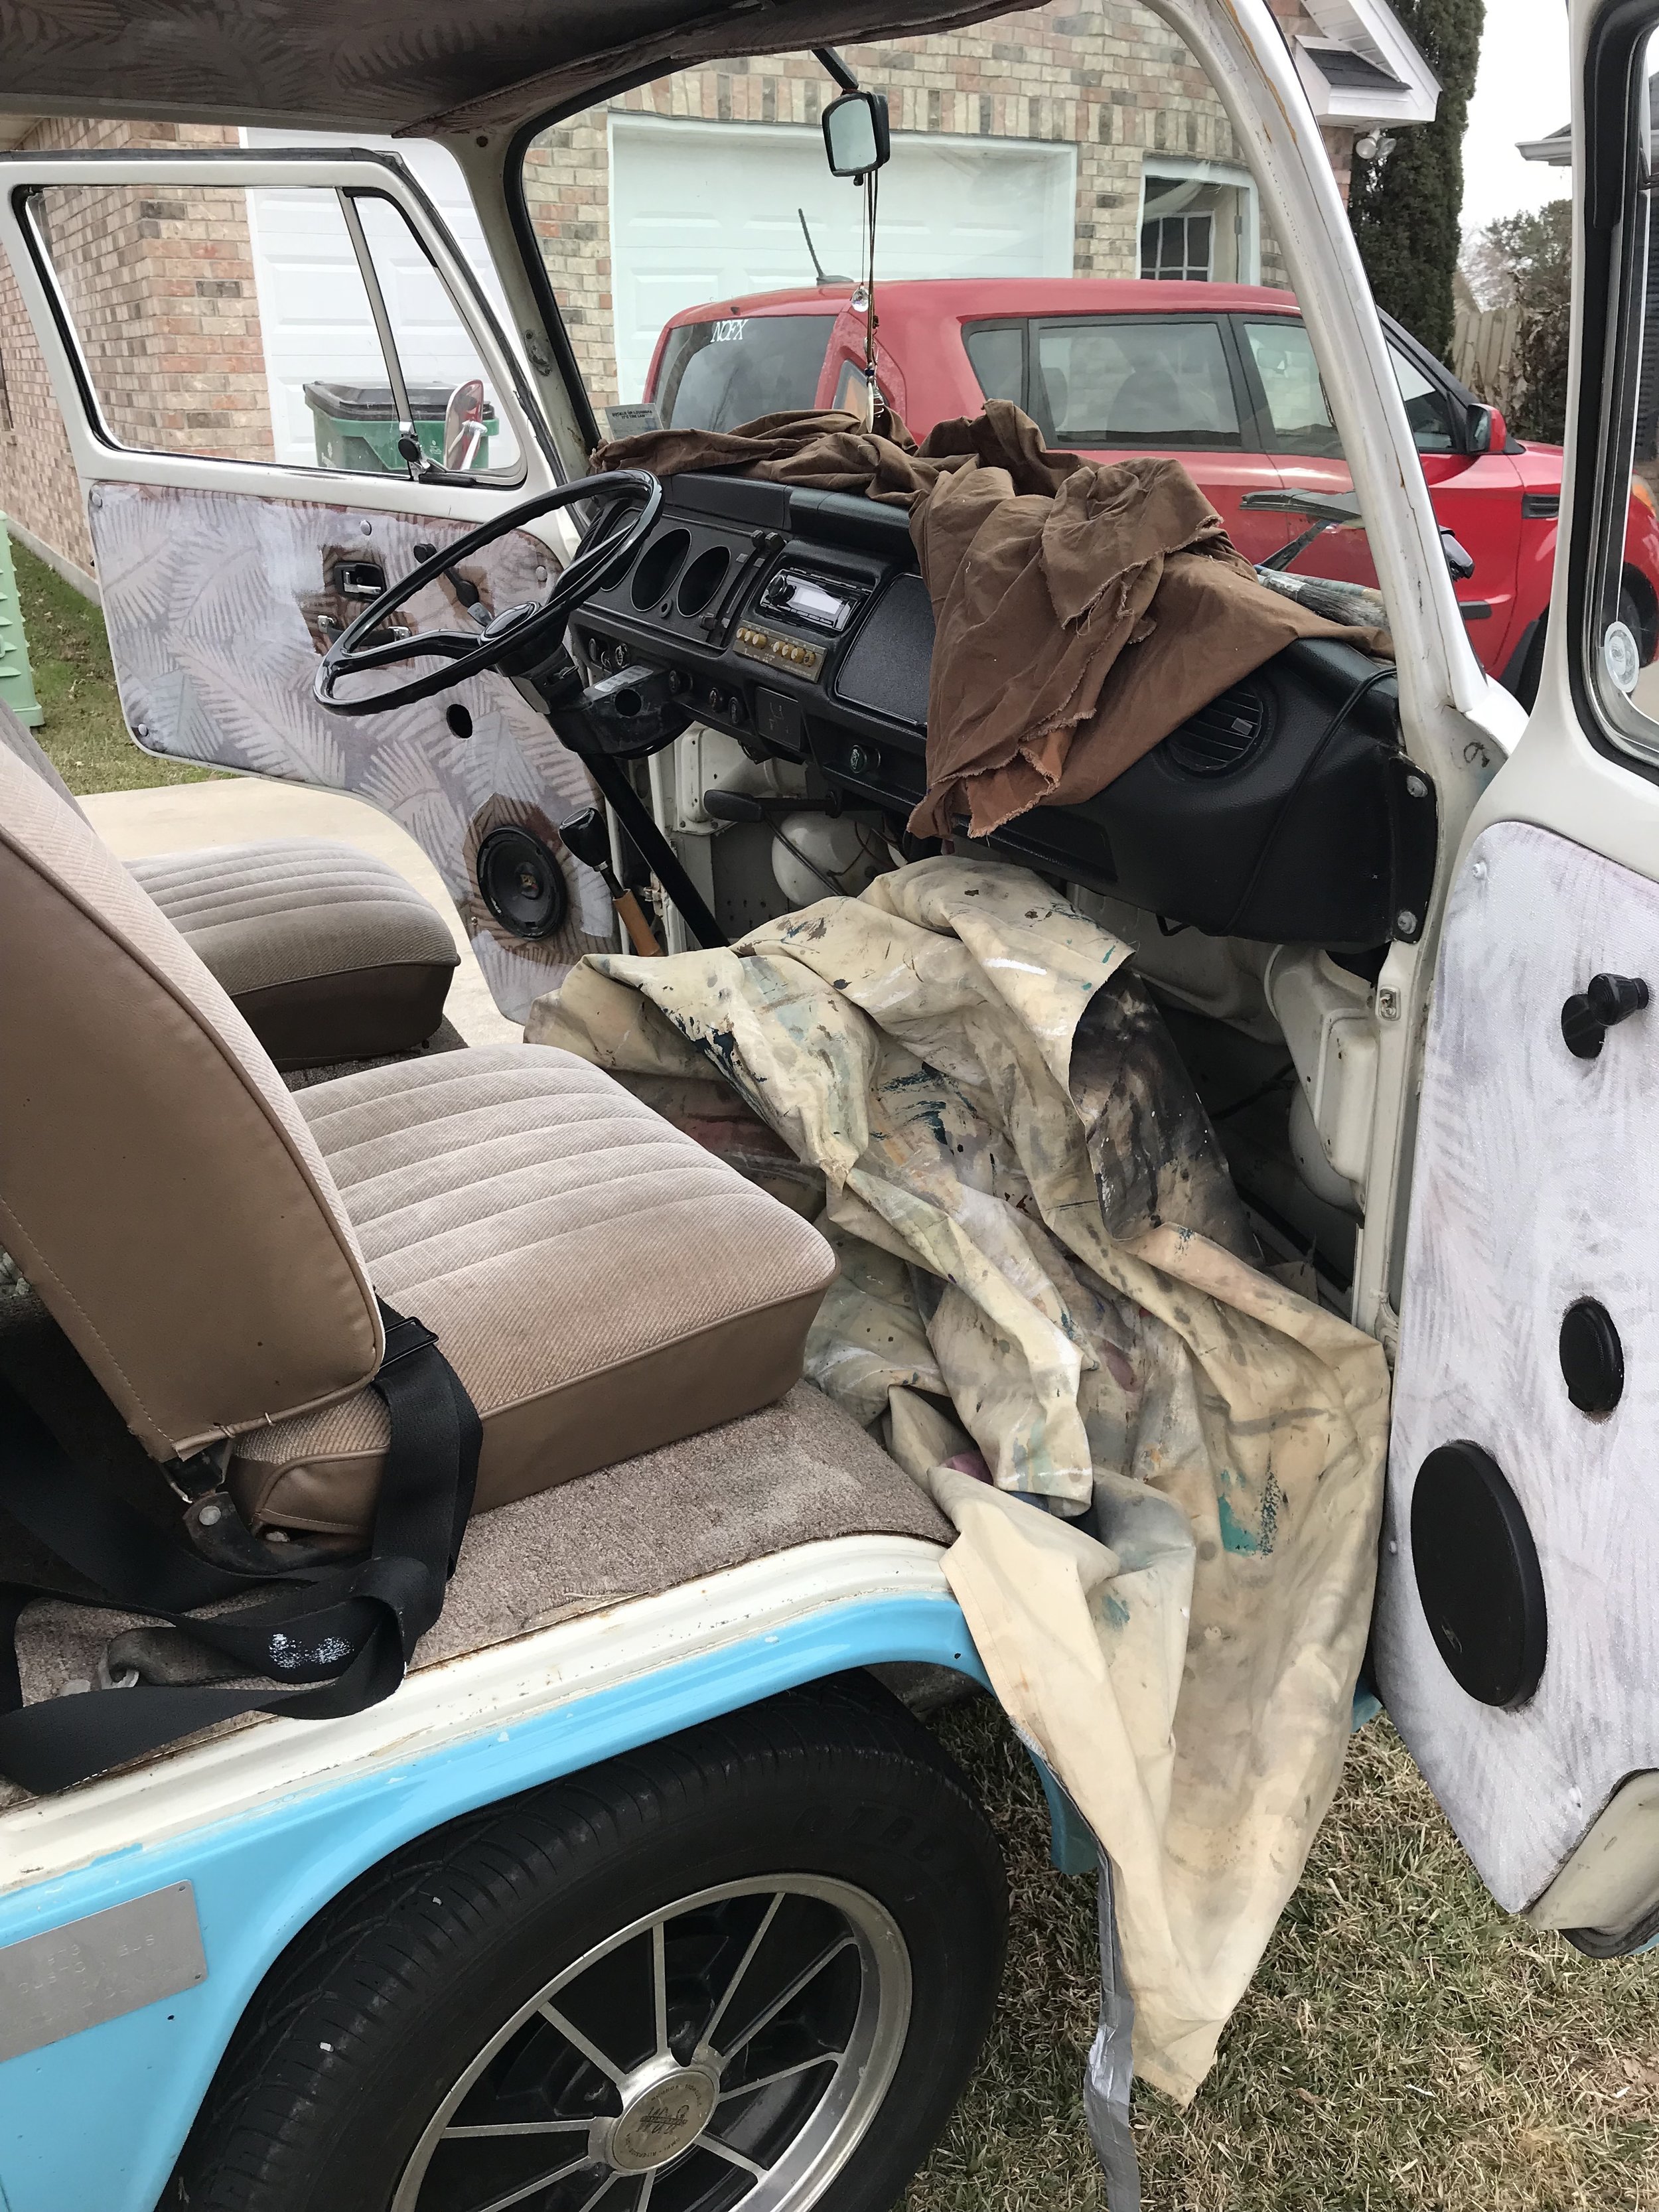
Above are a few images from the first day I went to see it. It is originally from California, then had an owner in Arizona, and then eventually made its way to Louisiana where it had an owner here for 10 years. In very... "California" manner it's very beachy beach surfer dude brah. Which, if you know anything about me-- you know I am NOT into. Lol. But I saw potential. And not to mention that the engine is in almost complete perfect condition.

First up on the list was getting it road legal. There were some wiring harness issues along with a broken taillight-- so even though it was freezing ass cold I could not wait to drive it. Or -- learn how to drive it rather because at this point I had no idea how to drive a stick shift. My brother in law taught me how to change some wiring and helped me with the lights and my sister taught me how to drive it in her neighborhood.

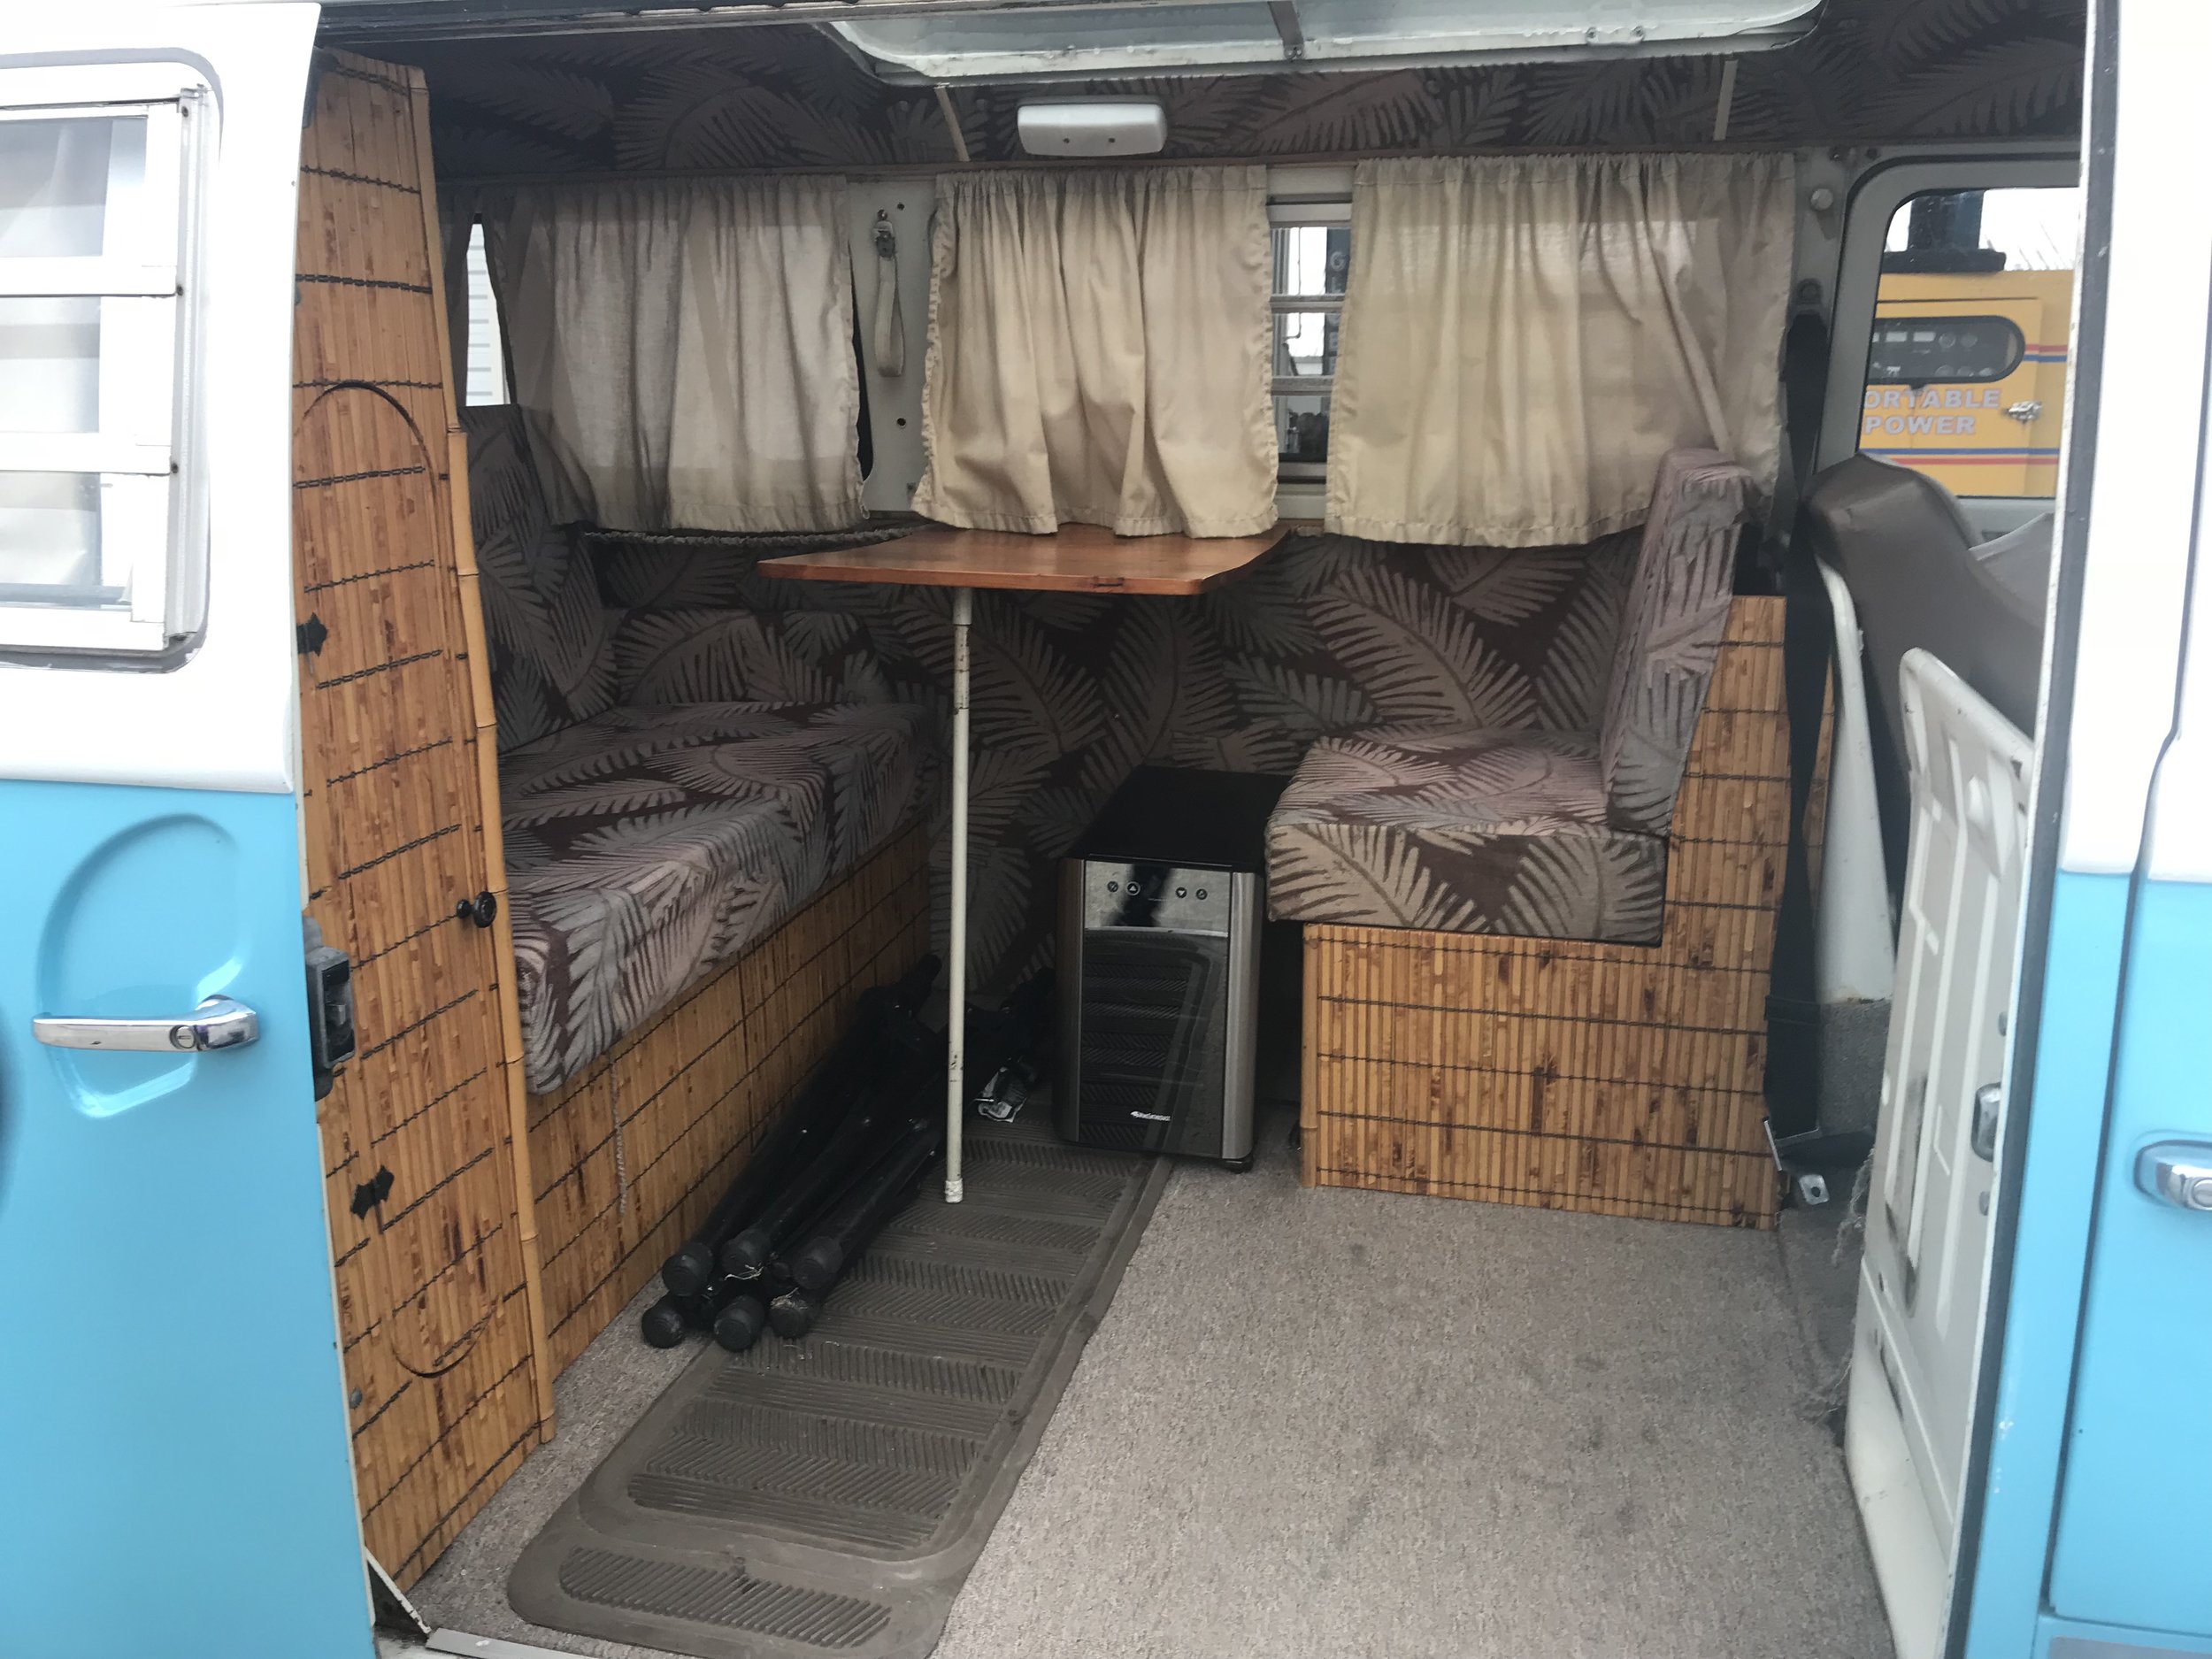
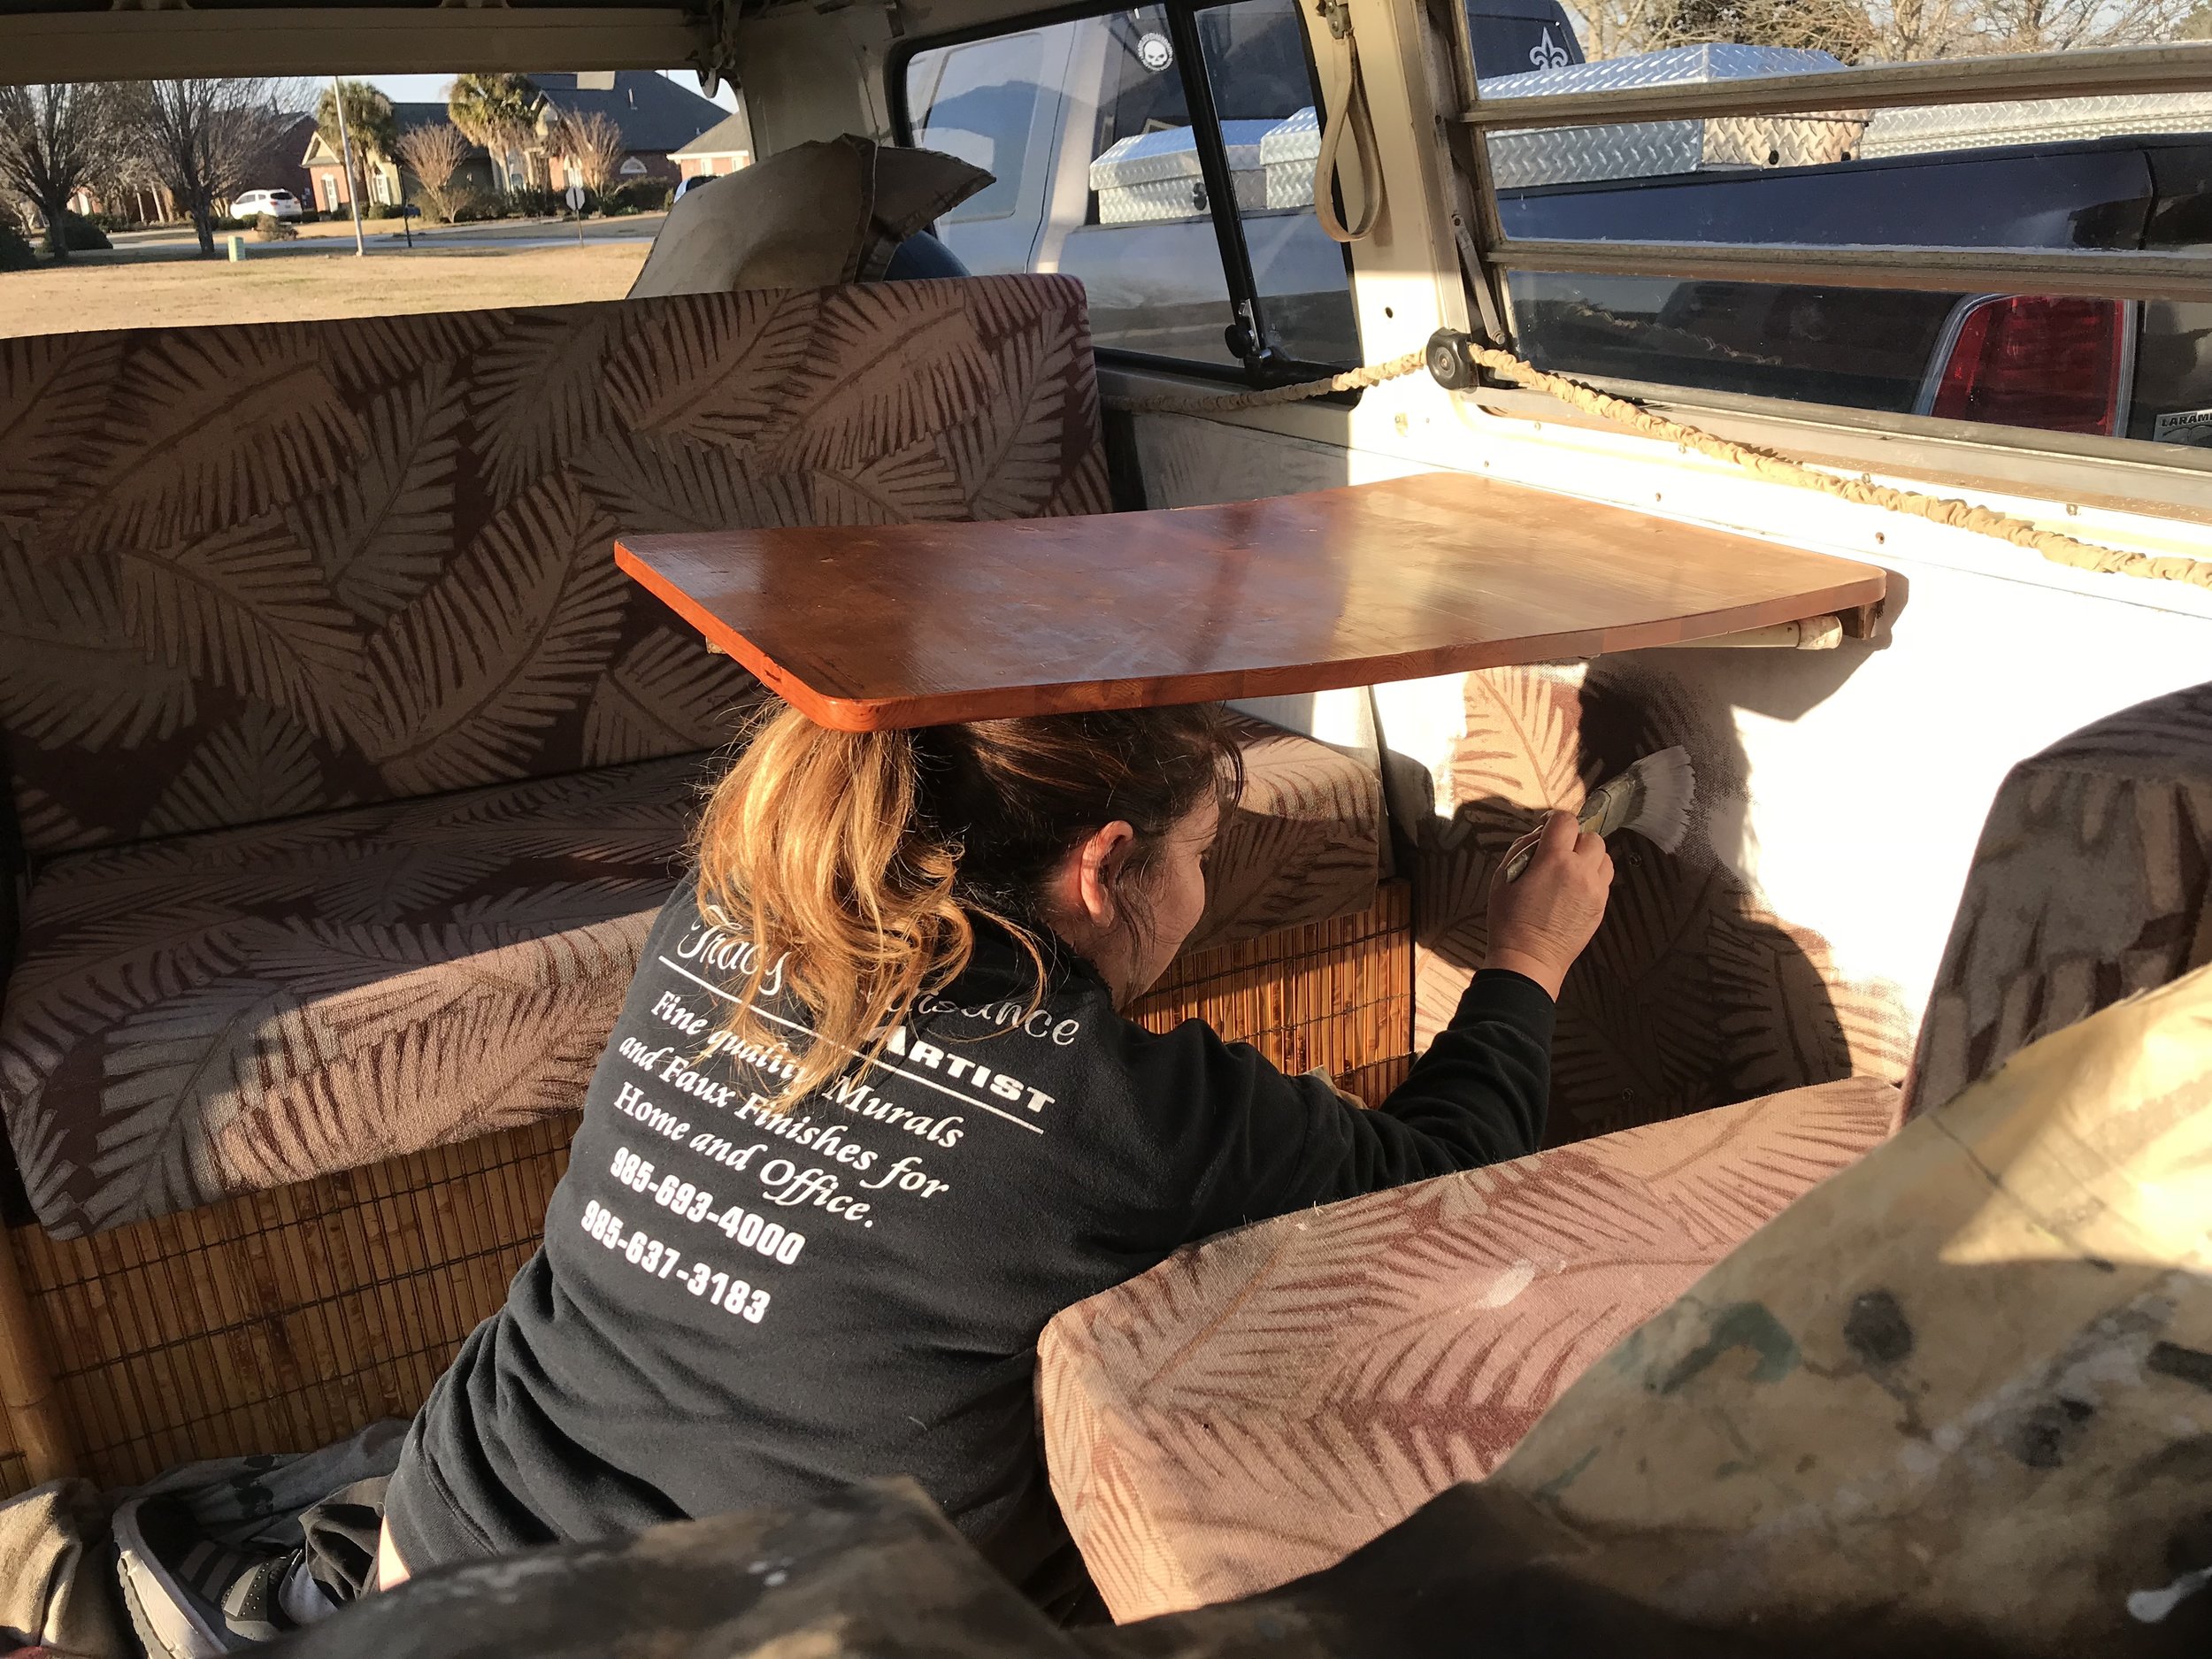
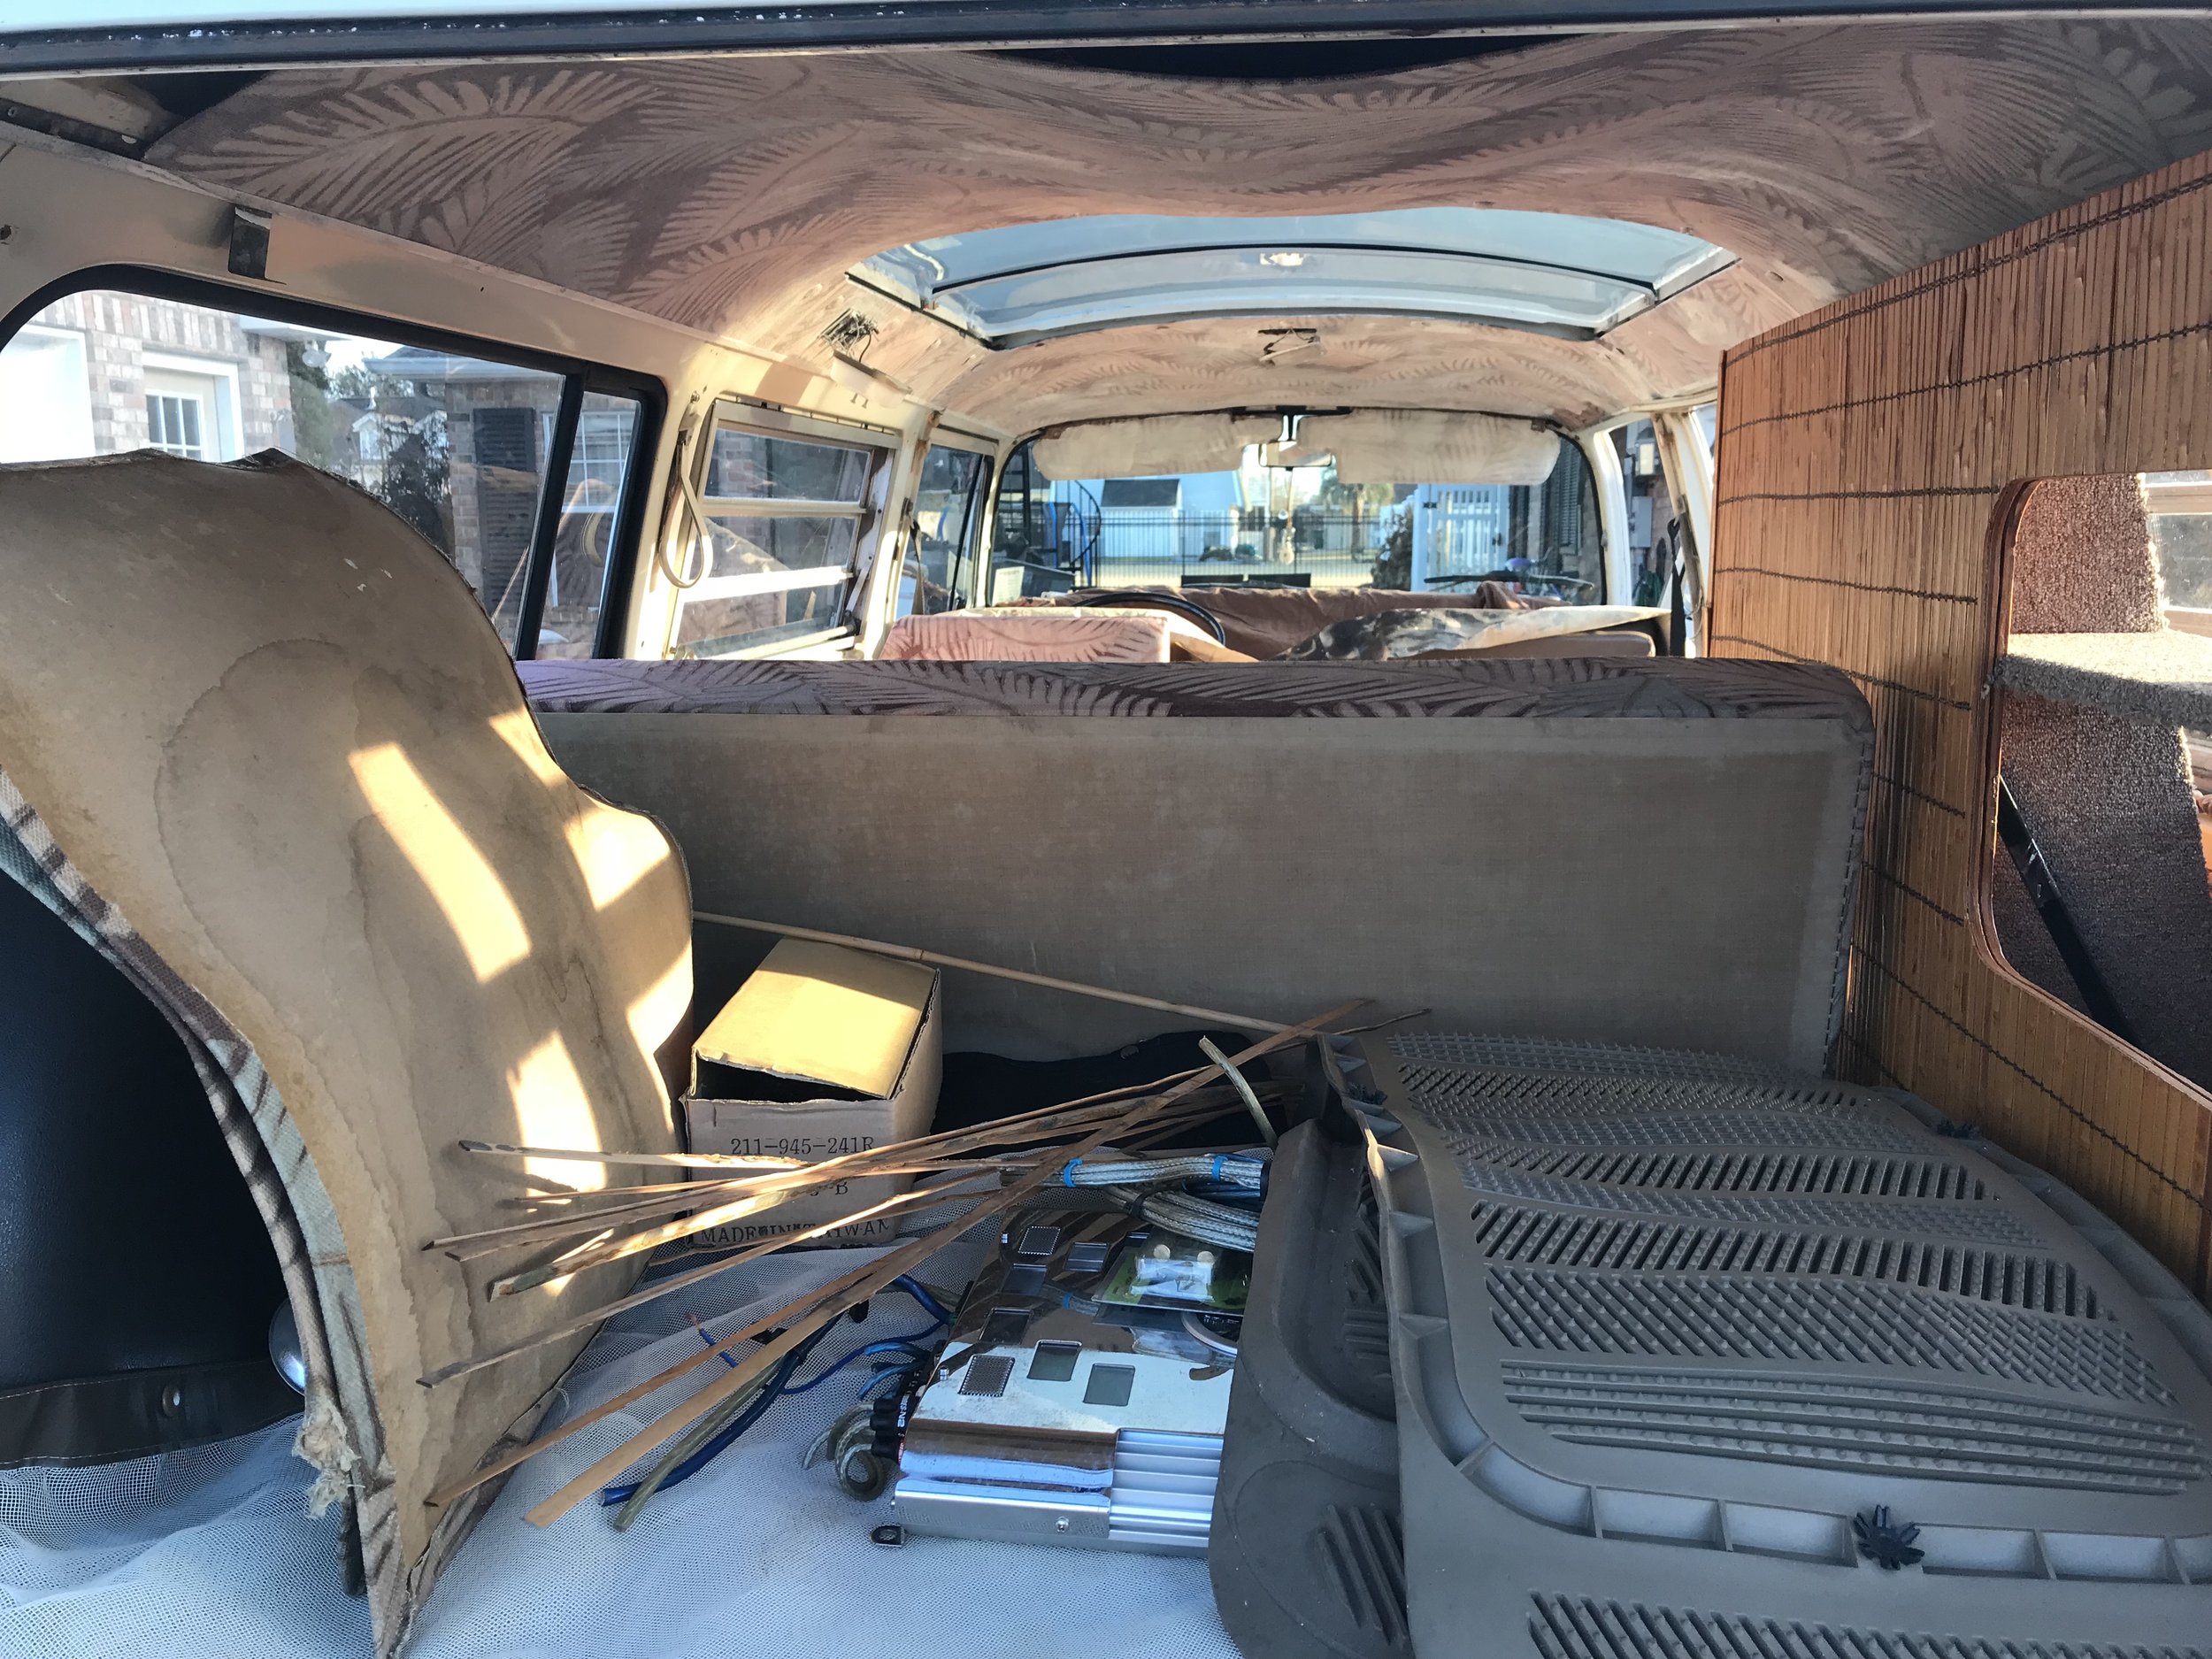
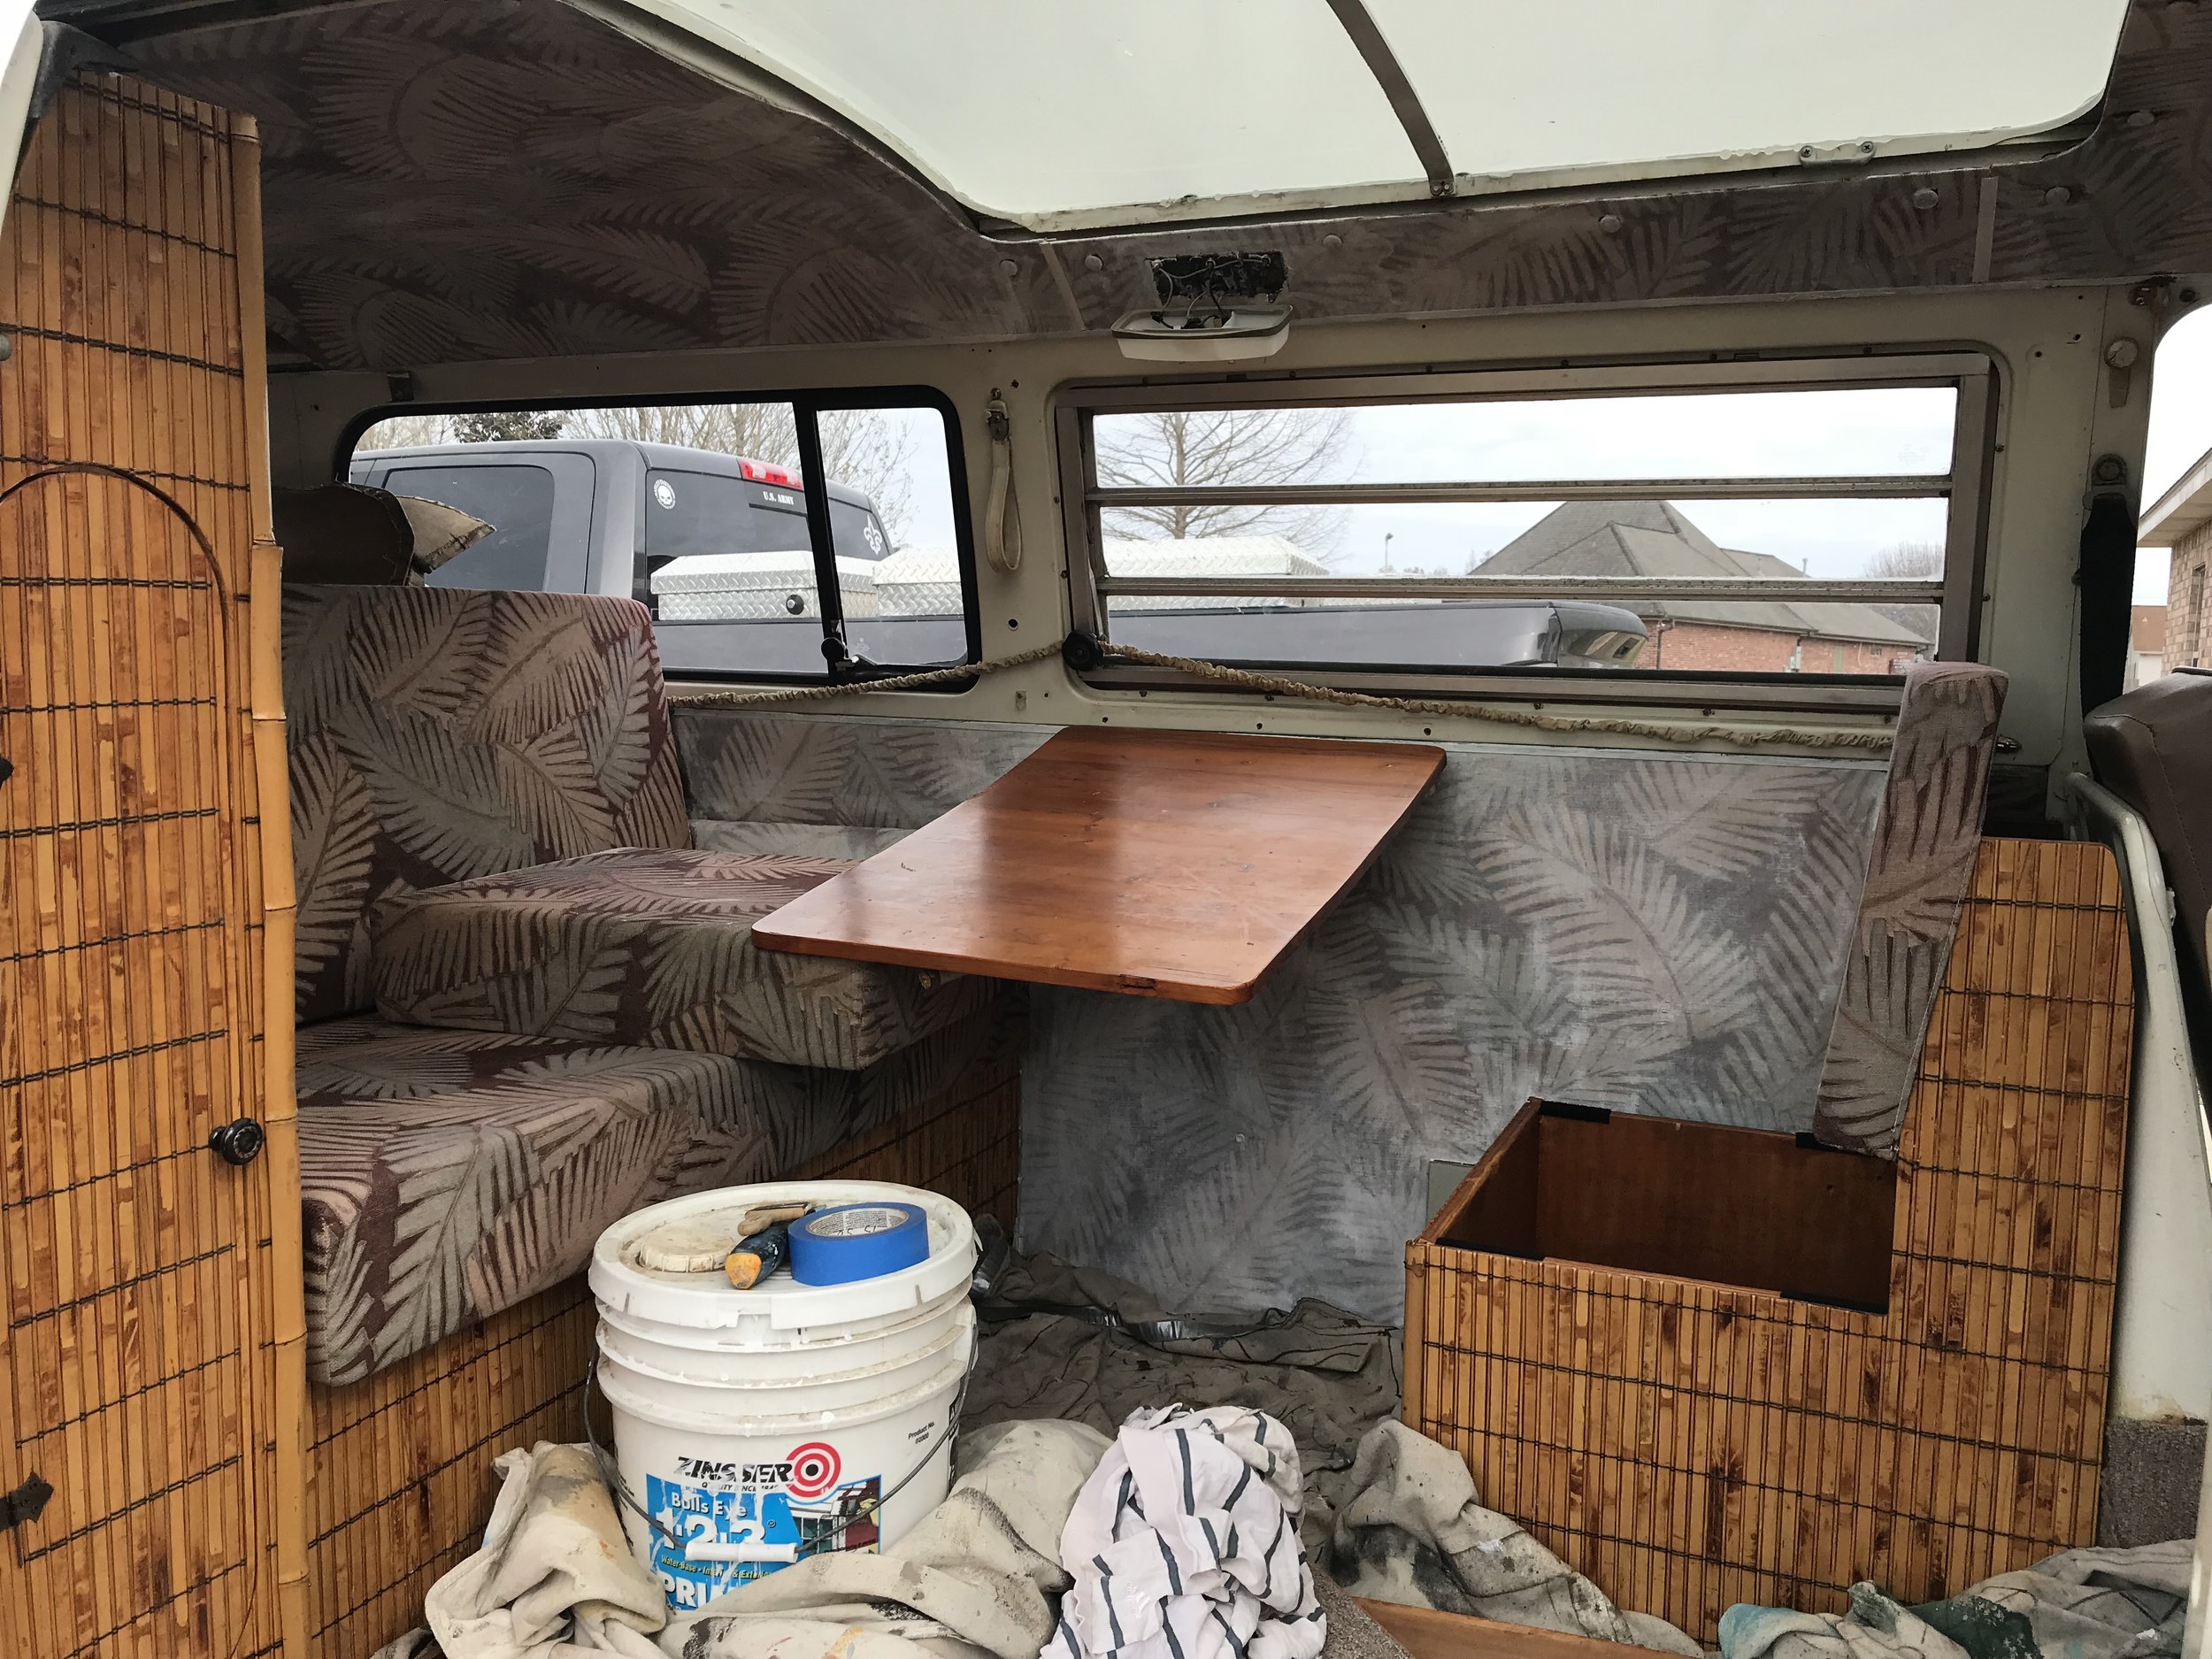
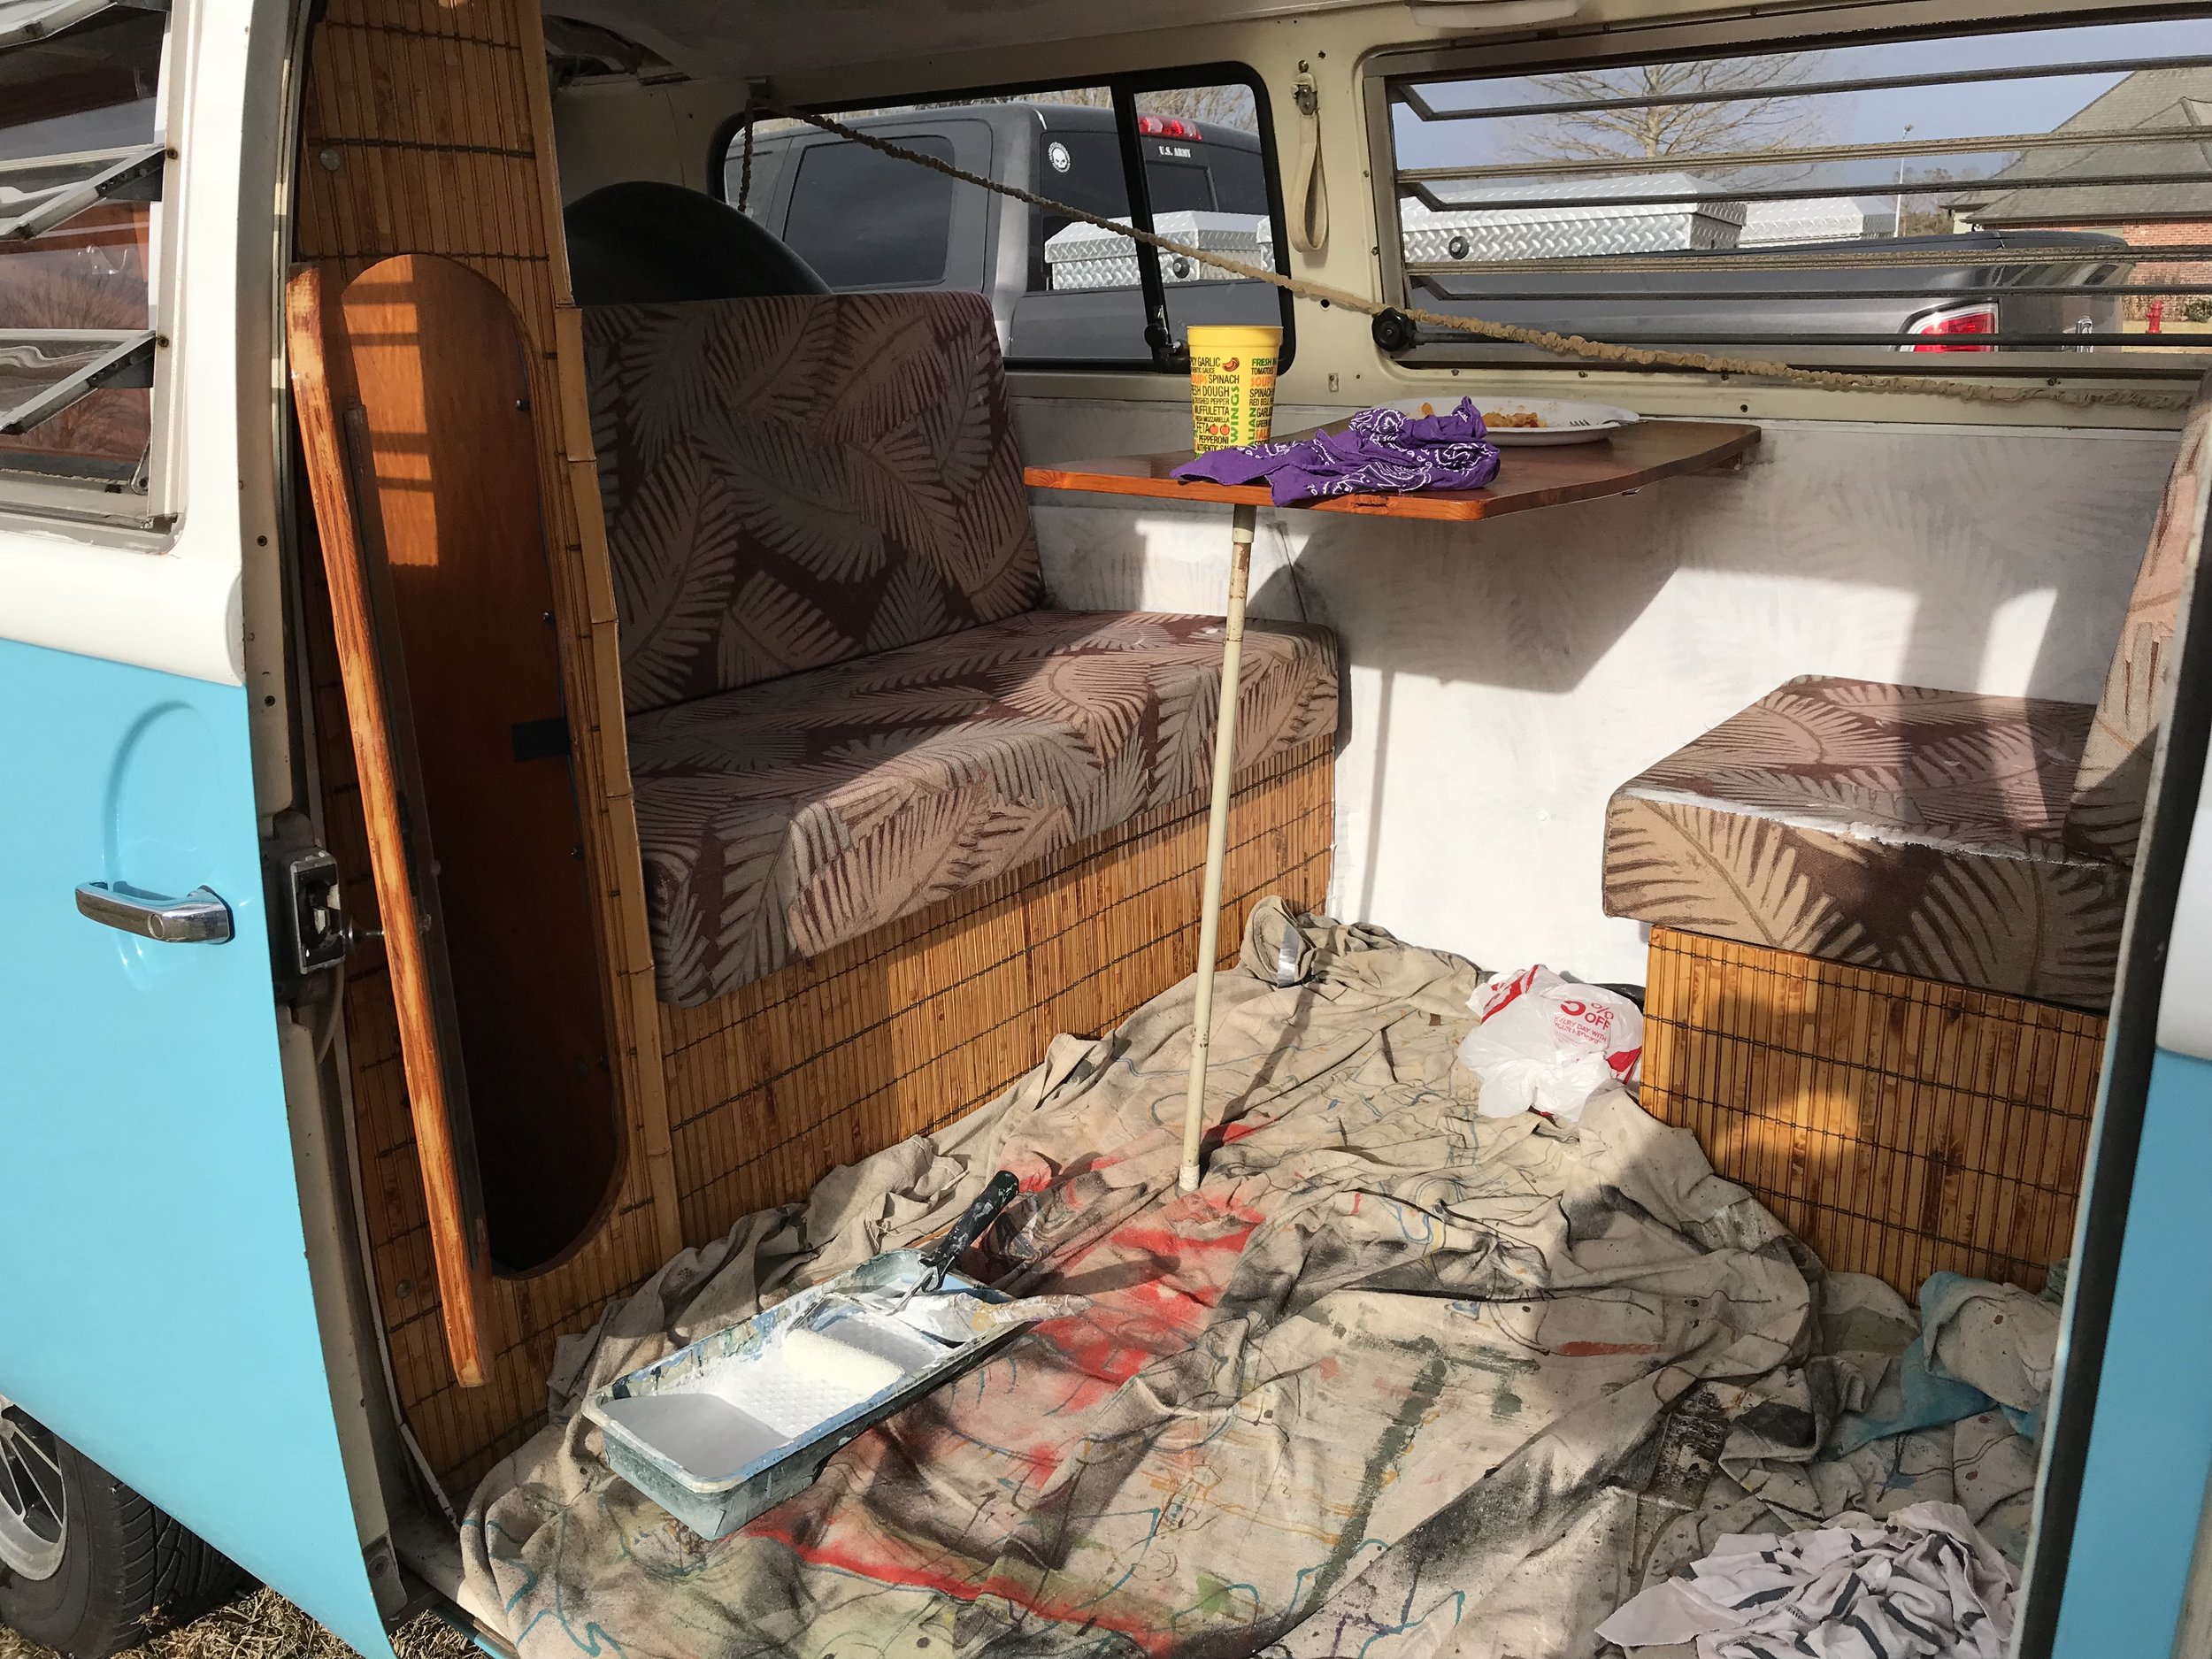
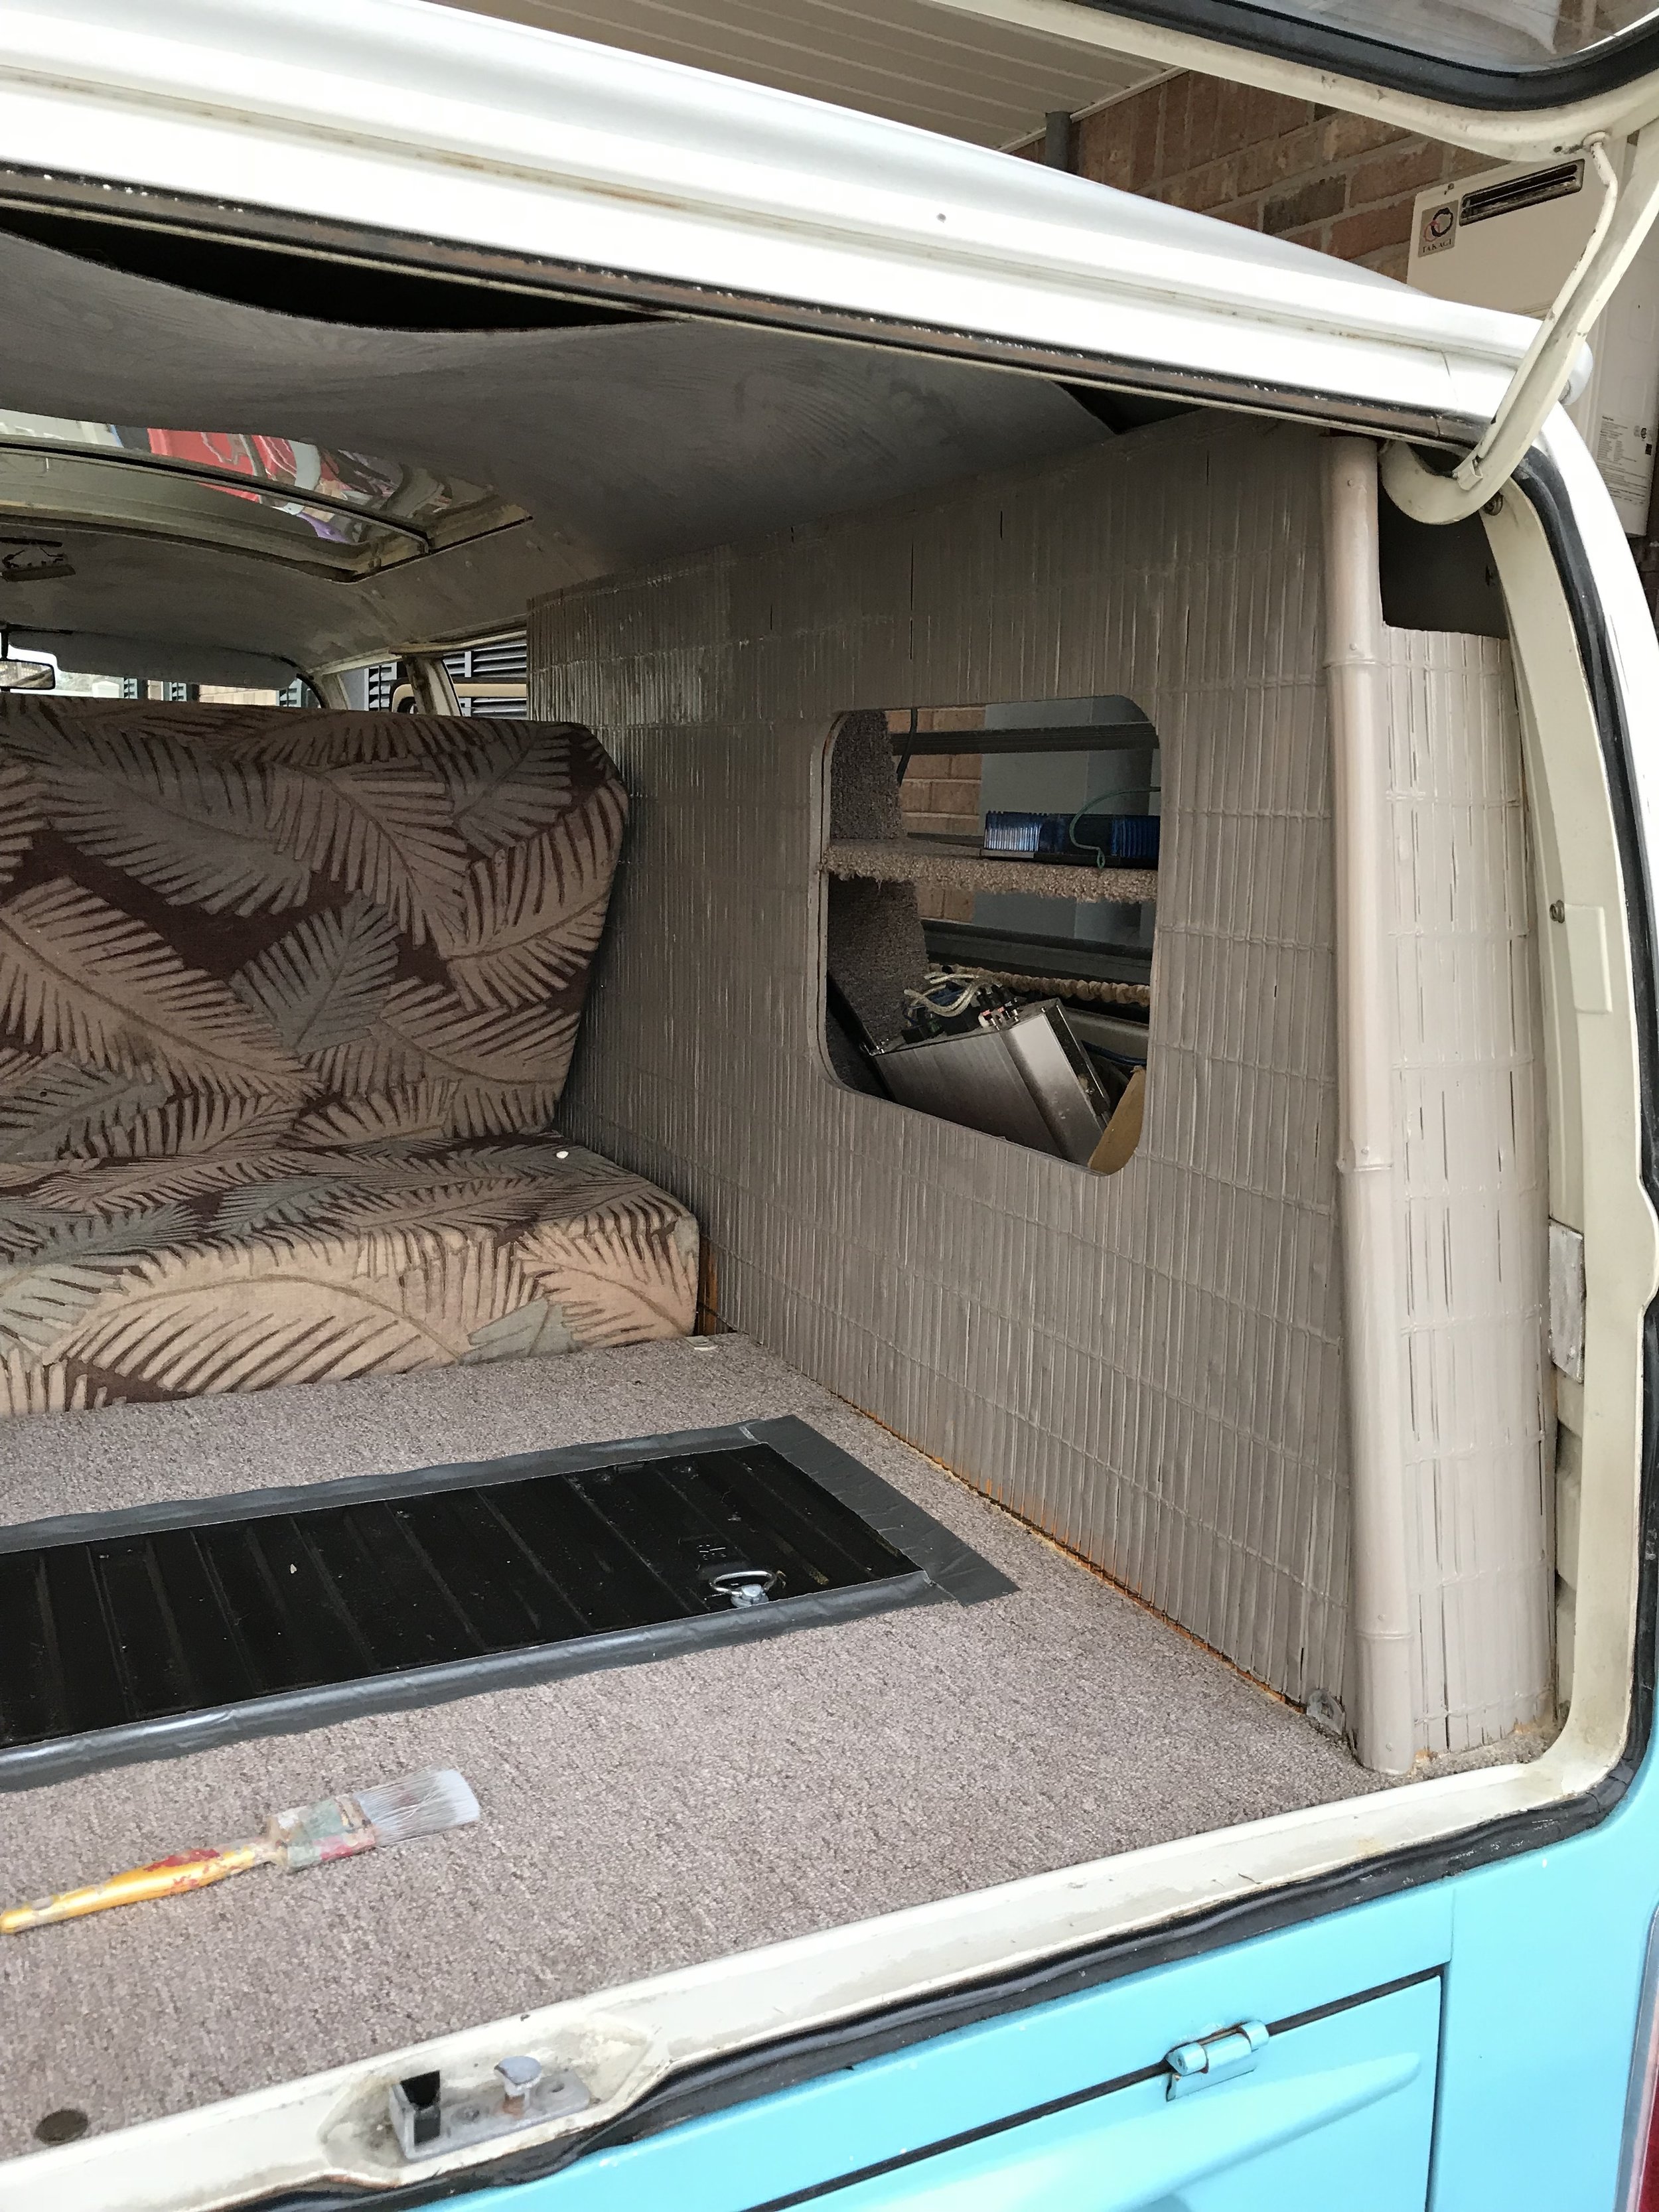
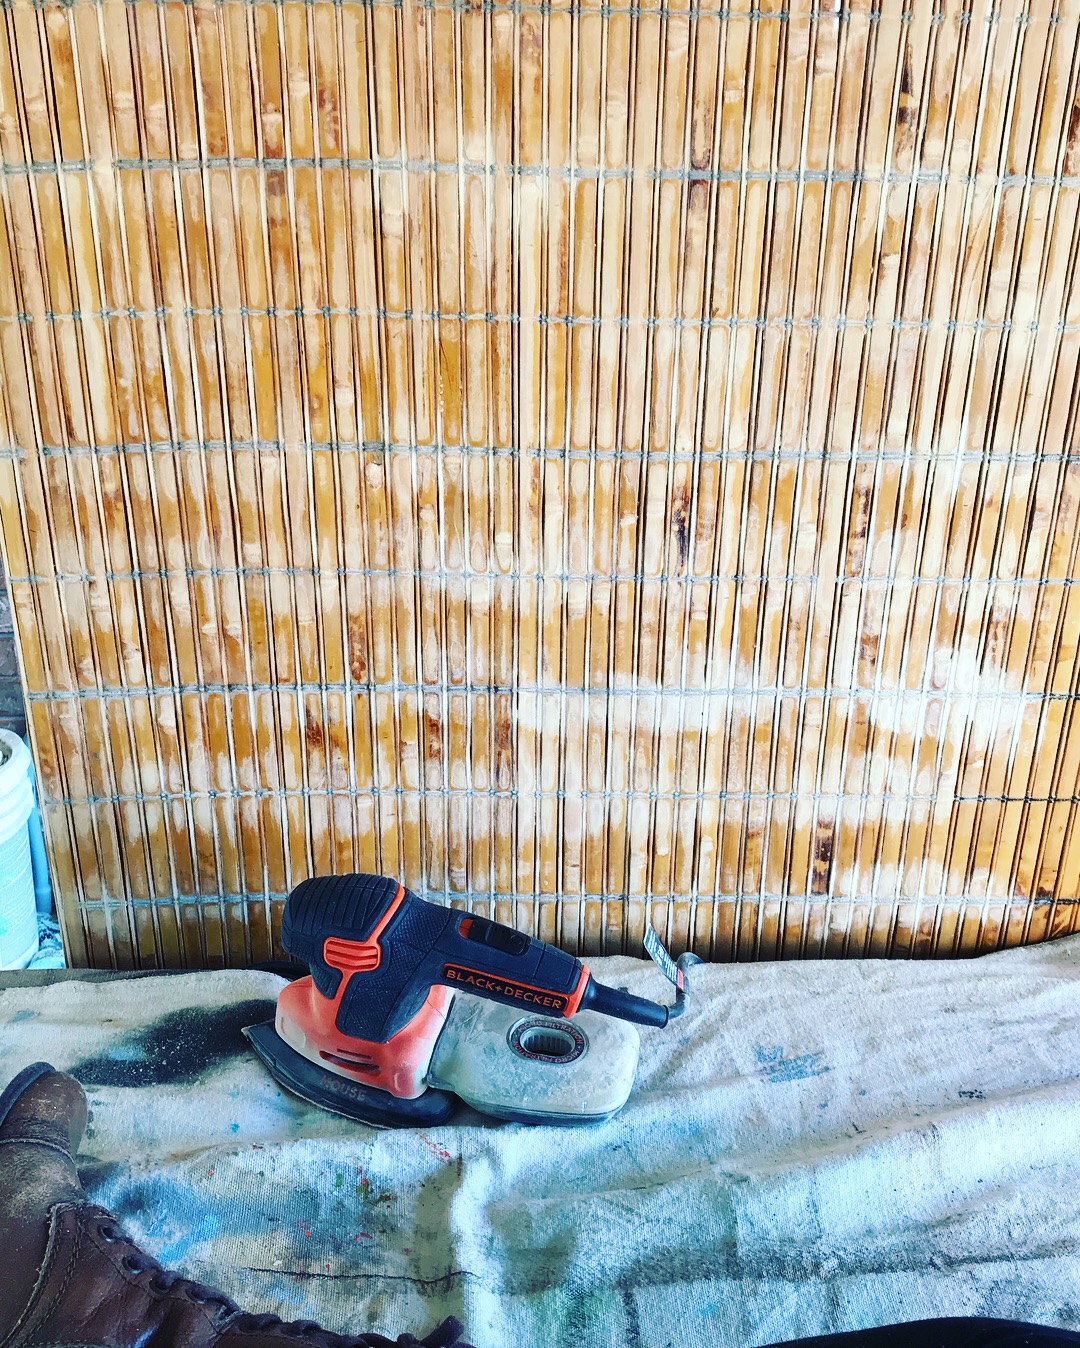
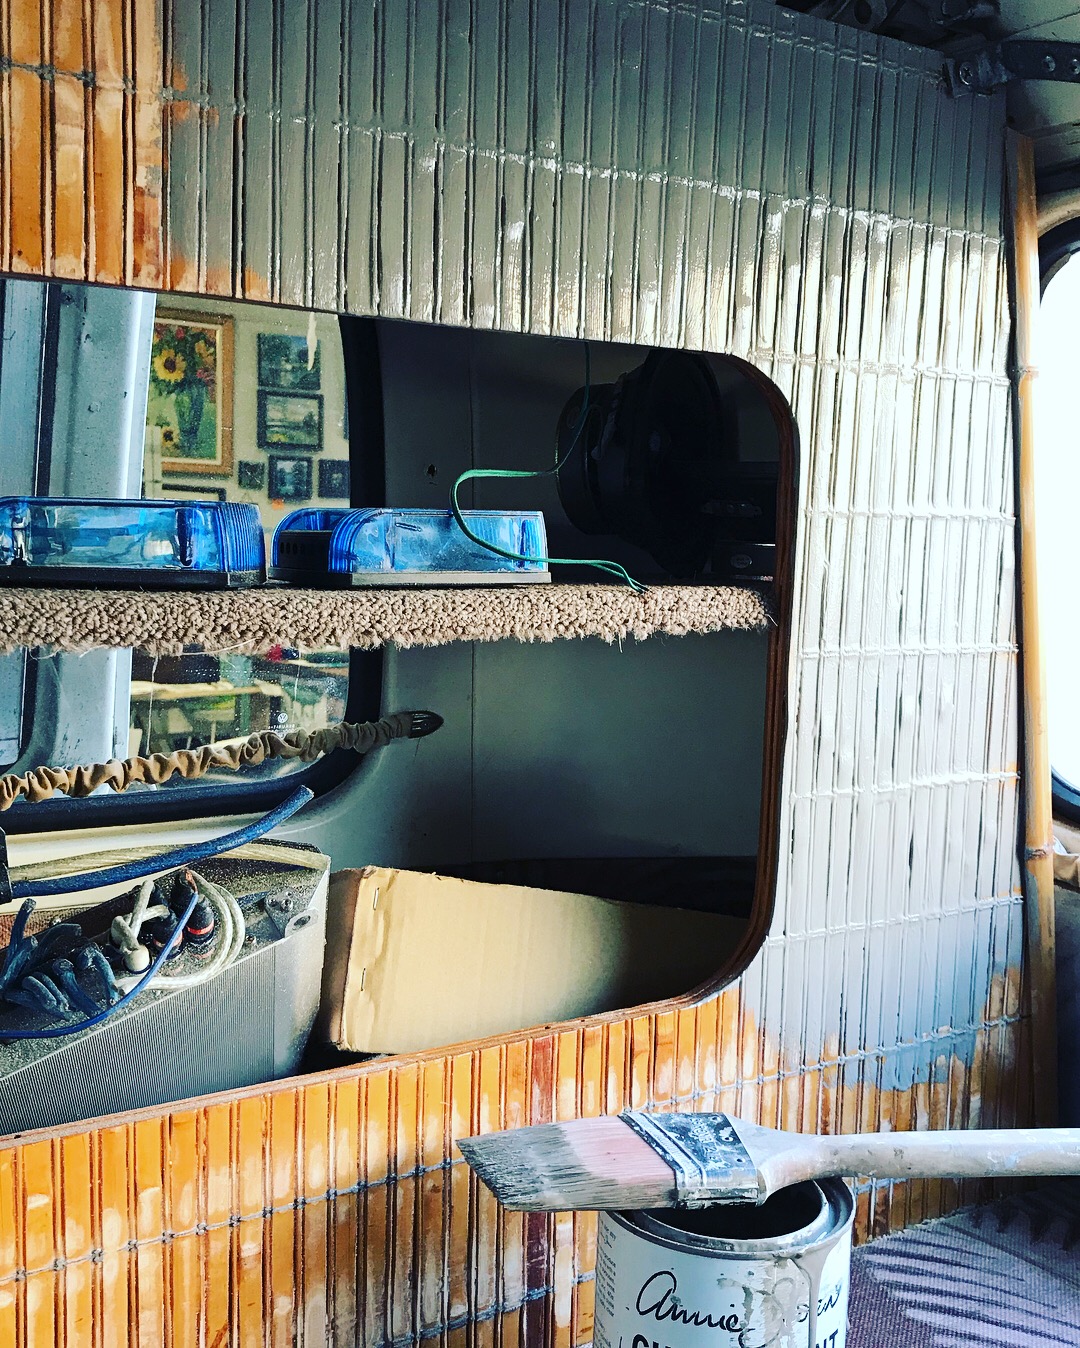
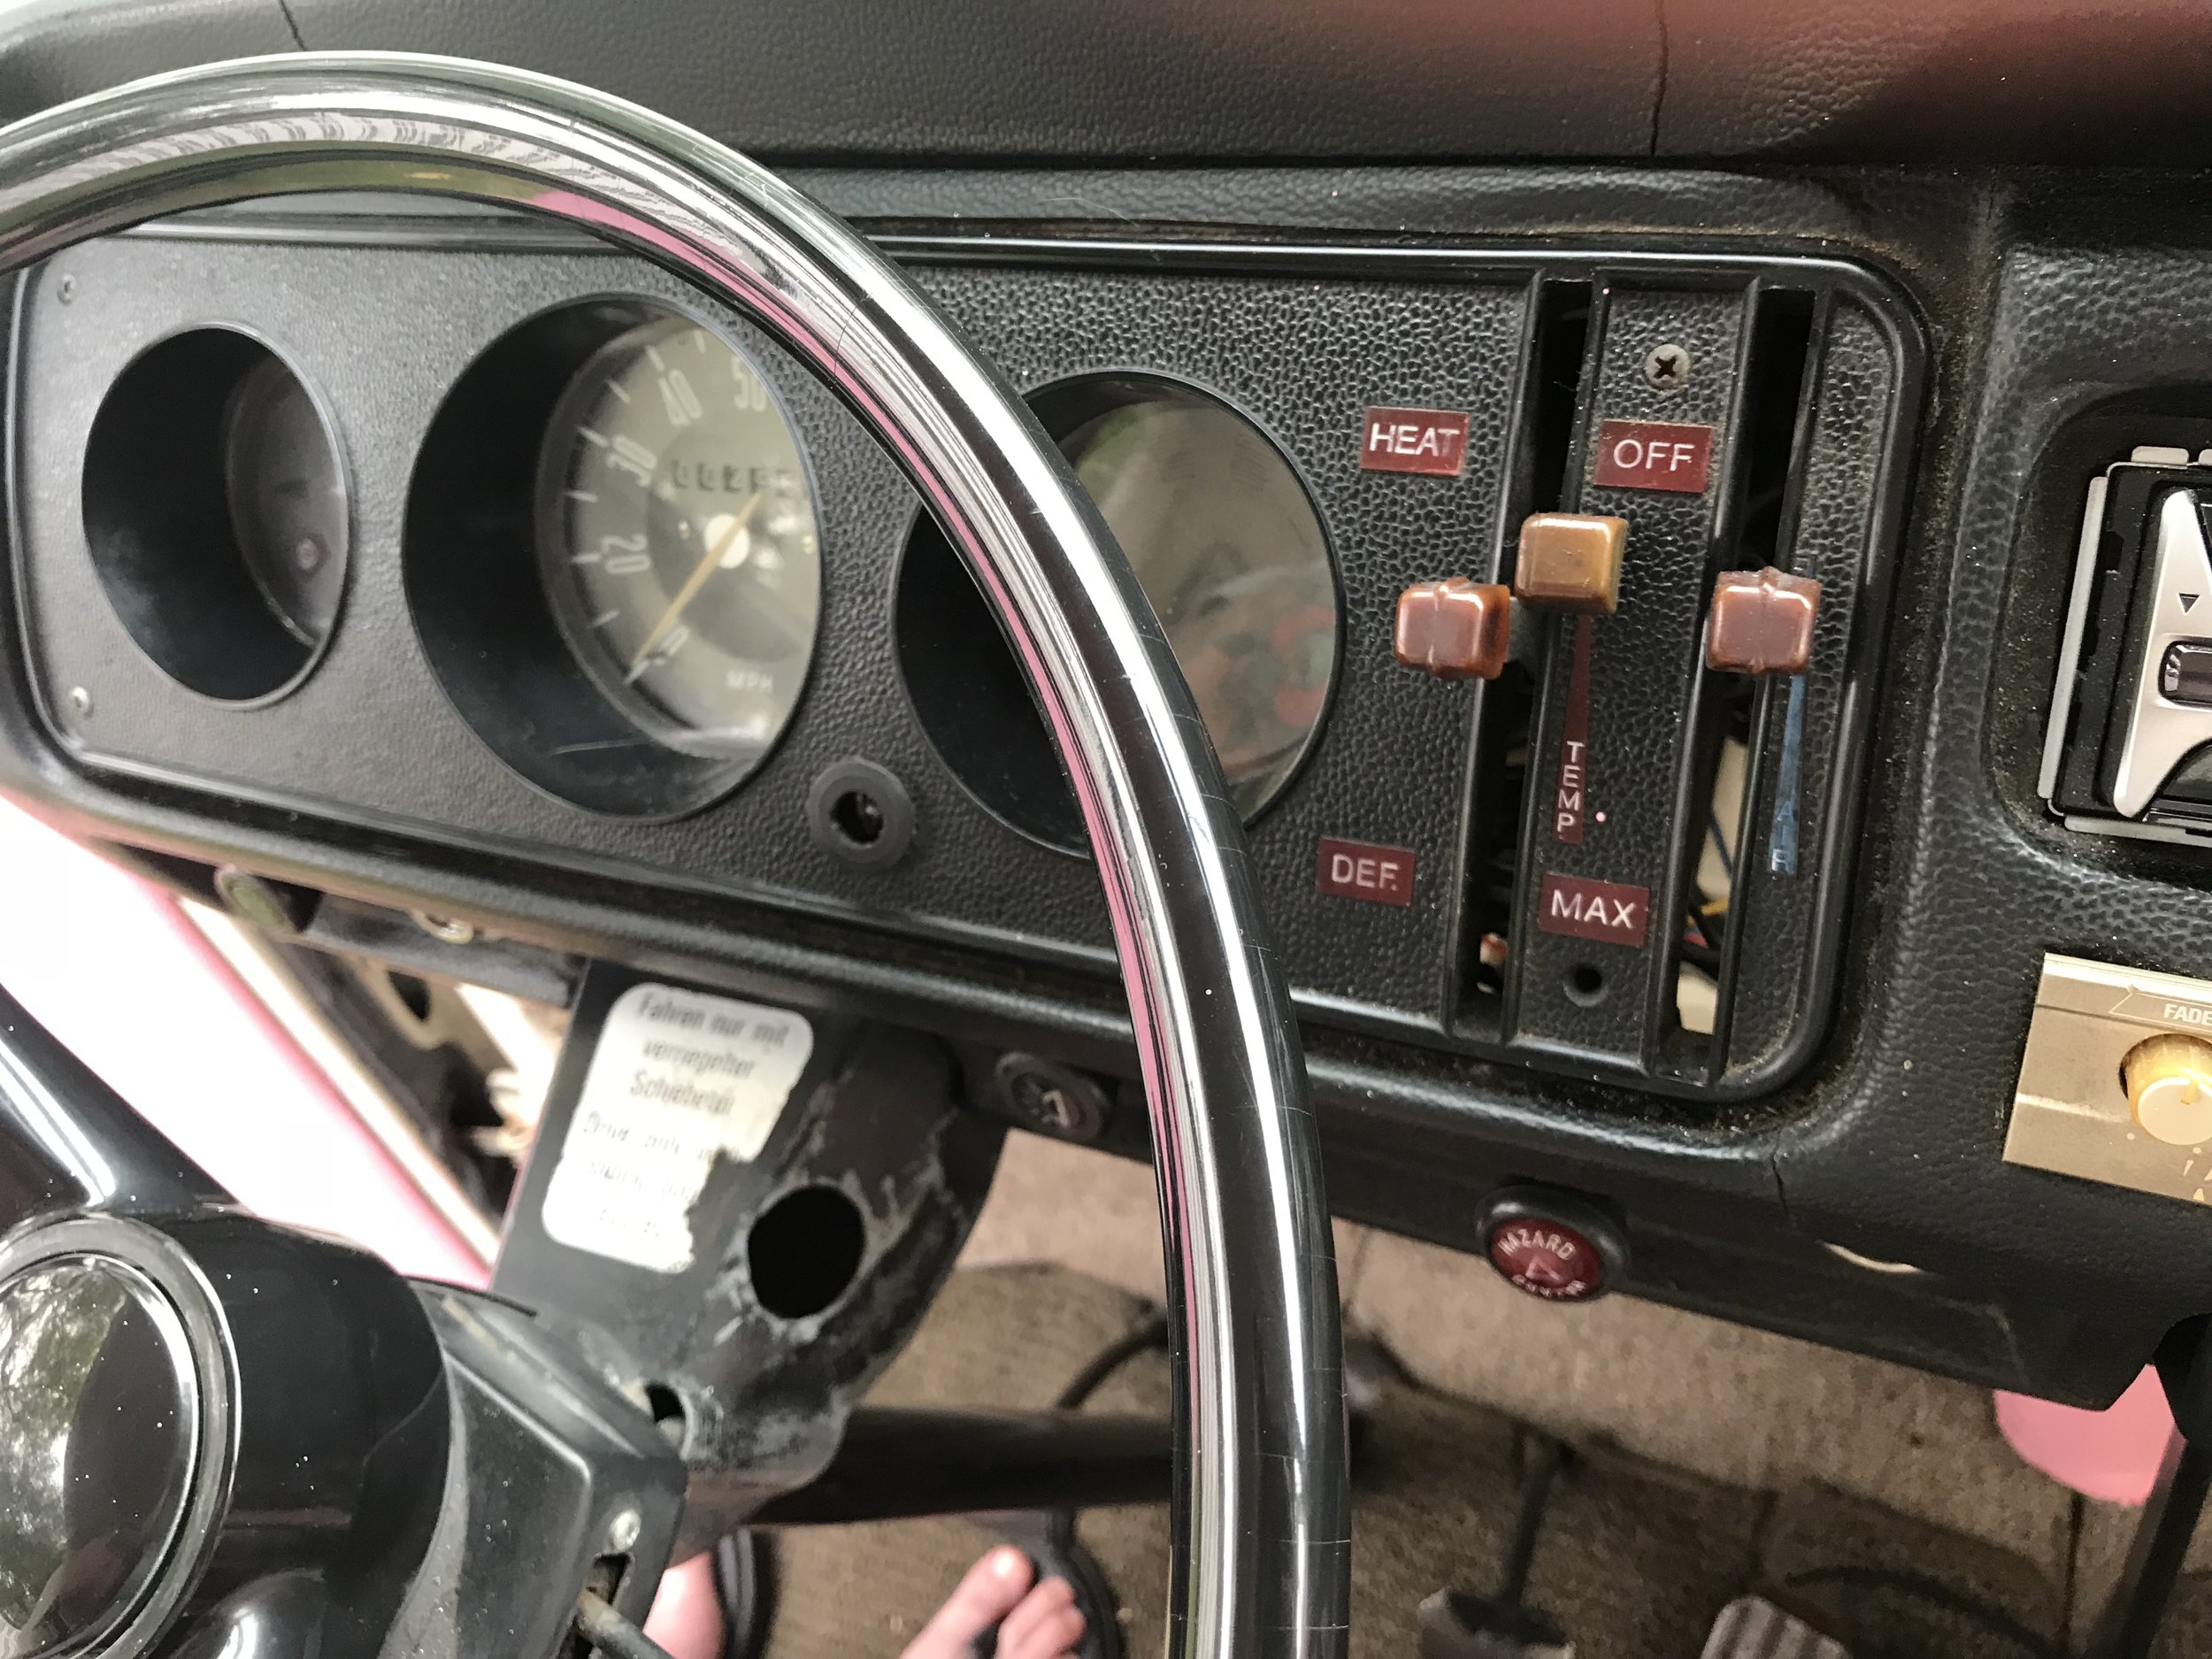
Another first things first---- I had to get rid of that print. So I used a really strong primer and primed the fabric twice. The ceilings, walls, doors. I also found out that the "bamboo" was actually wooden blinds like what go in a house but turned sideways. The strings on it were super sharp so I sanded that all down to basically smooth and then filled all of the cracks with caulking. And started painting over it with Annie Sloan chalk paint. The paint color I chose is very similar to the color of the original seats that are in the front. There was also a ceiling shelf/rack thing that I just decided to take out completely so there would be more space to sit up in the back.

Can't mess up that fresh mani.

Butch Femme realness.
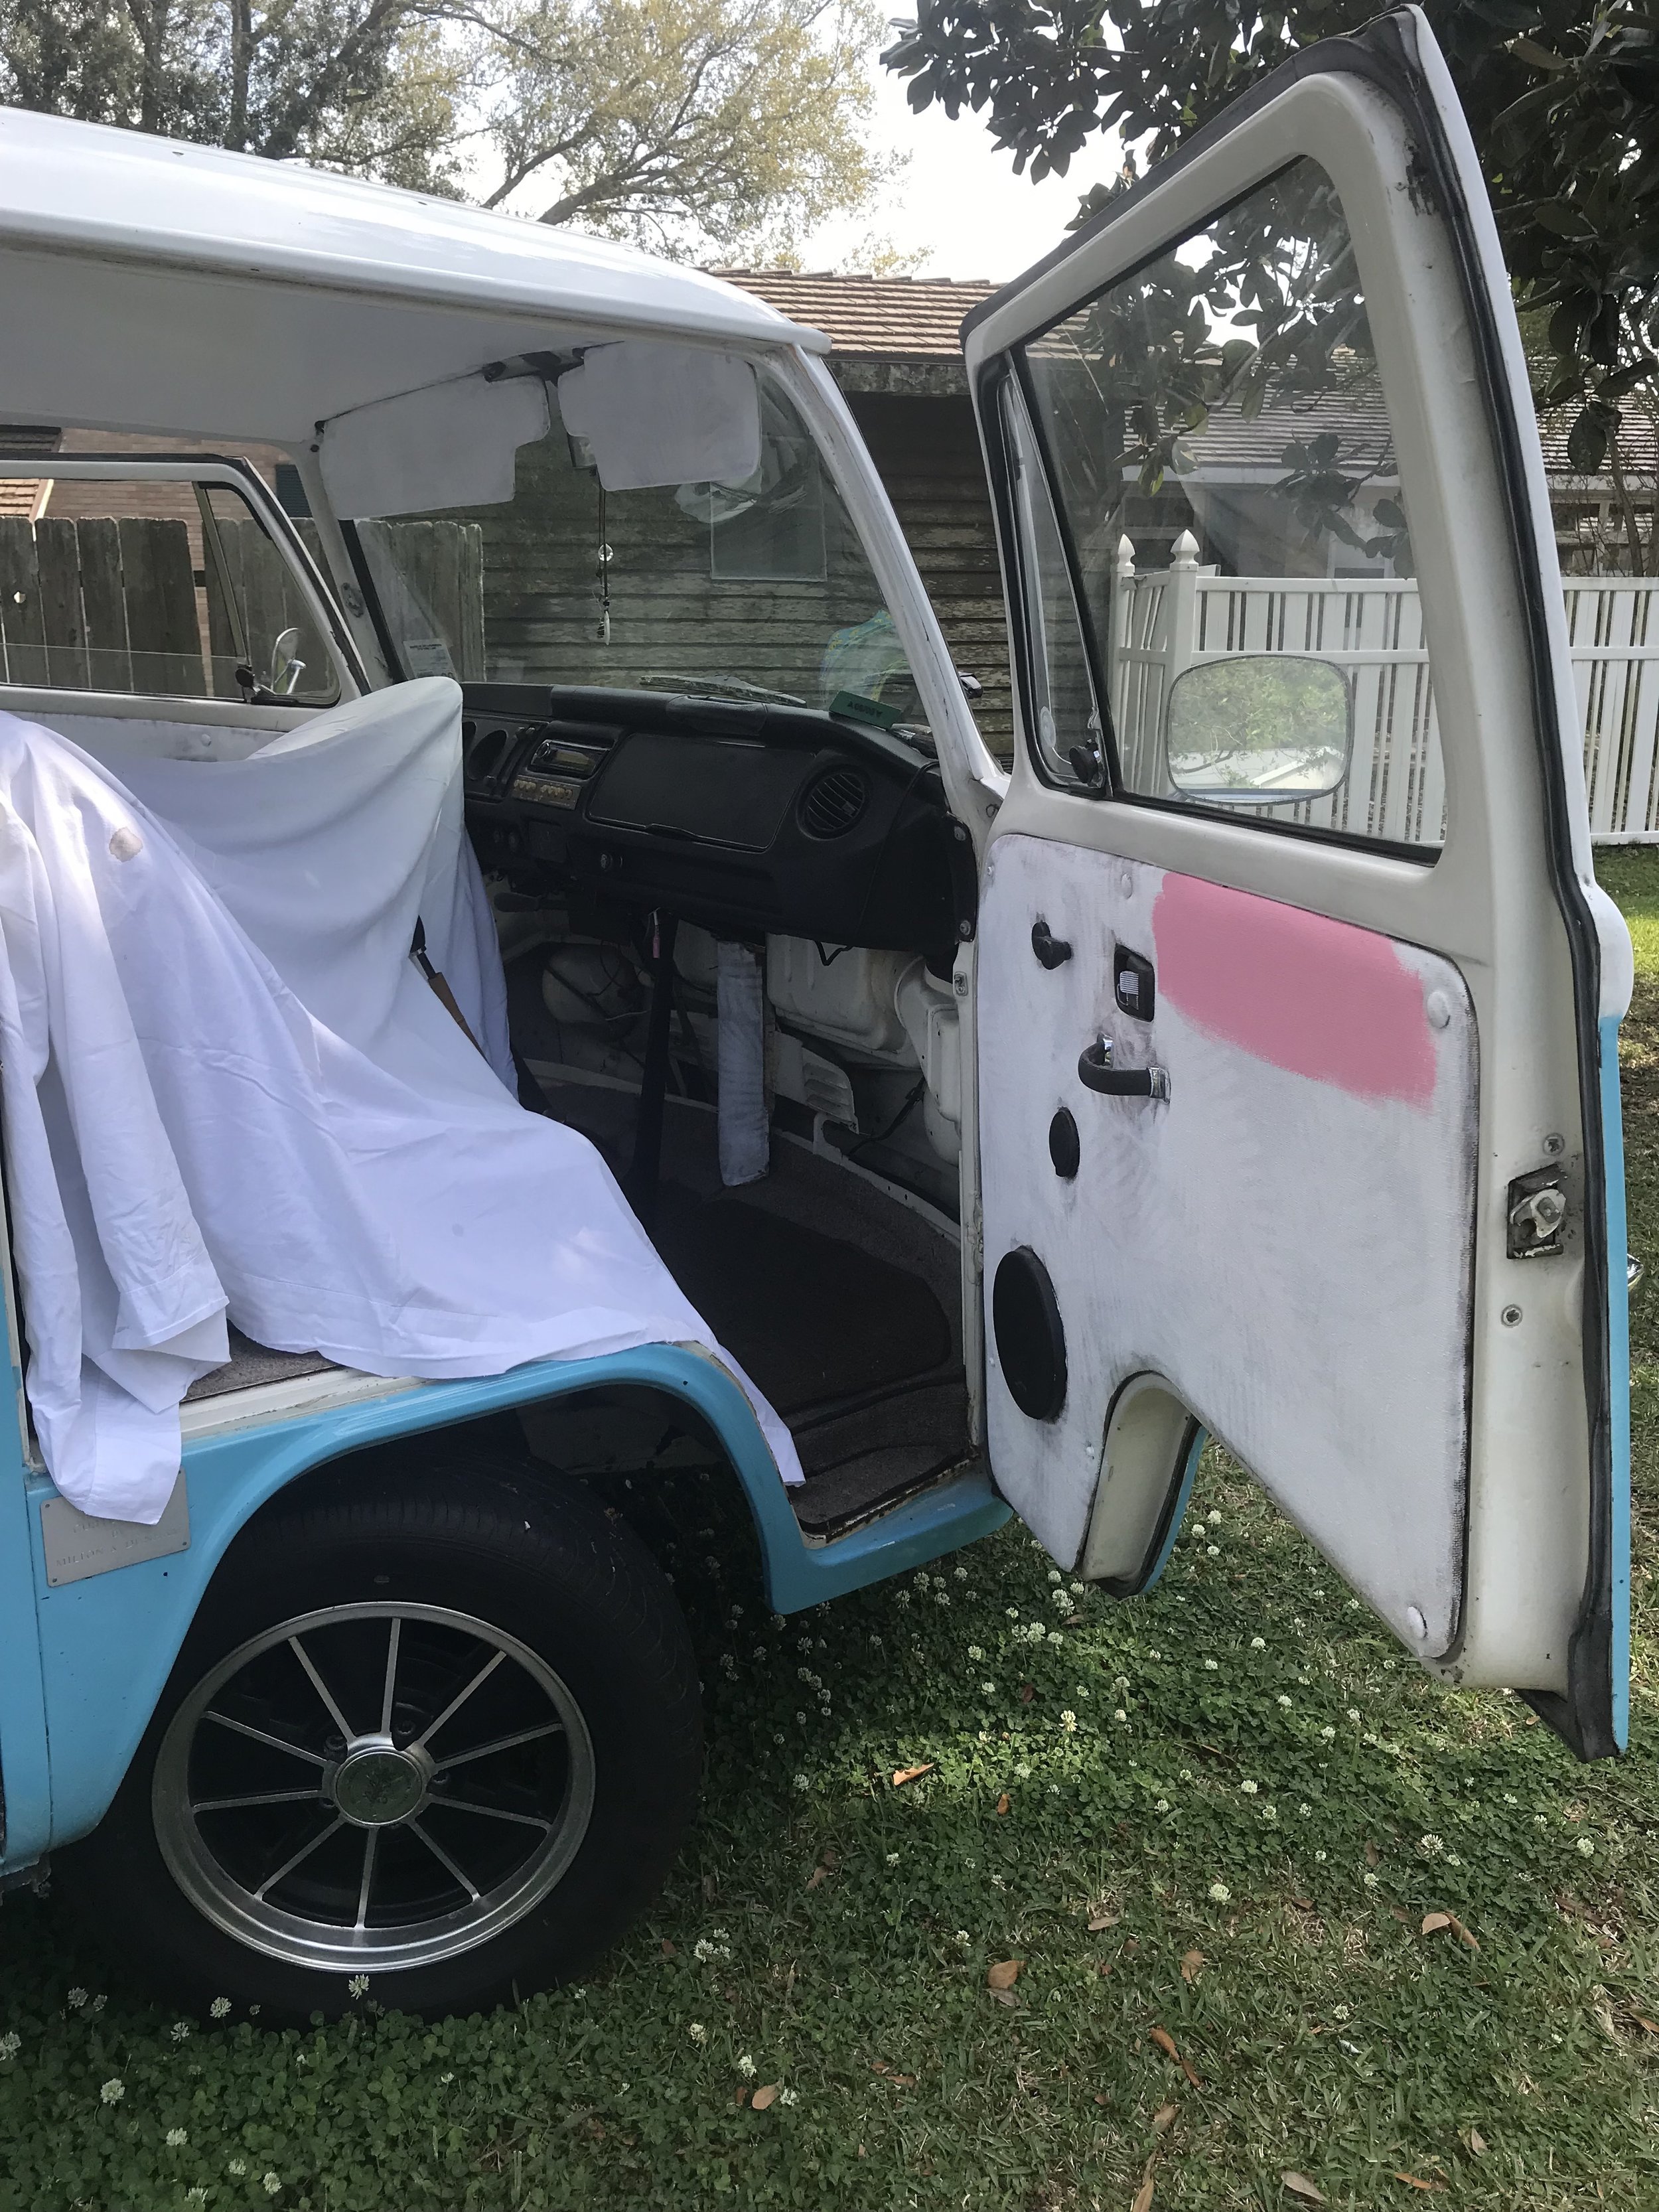
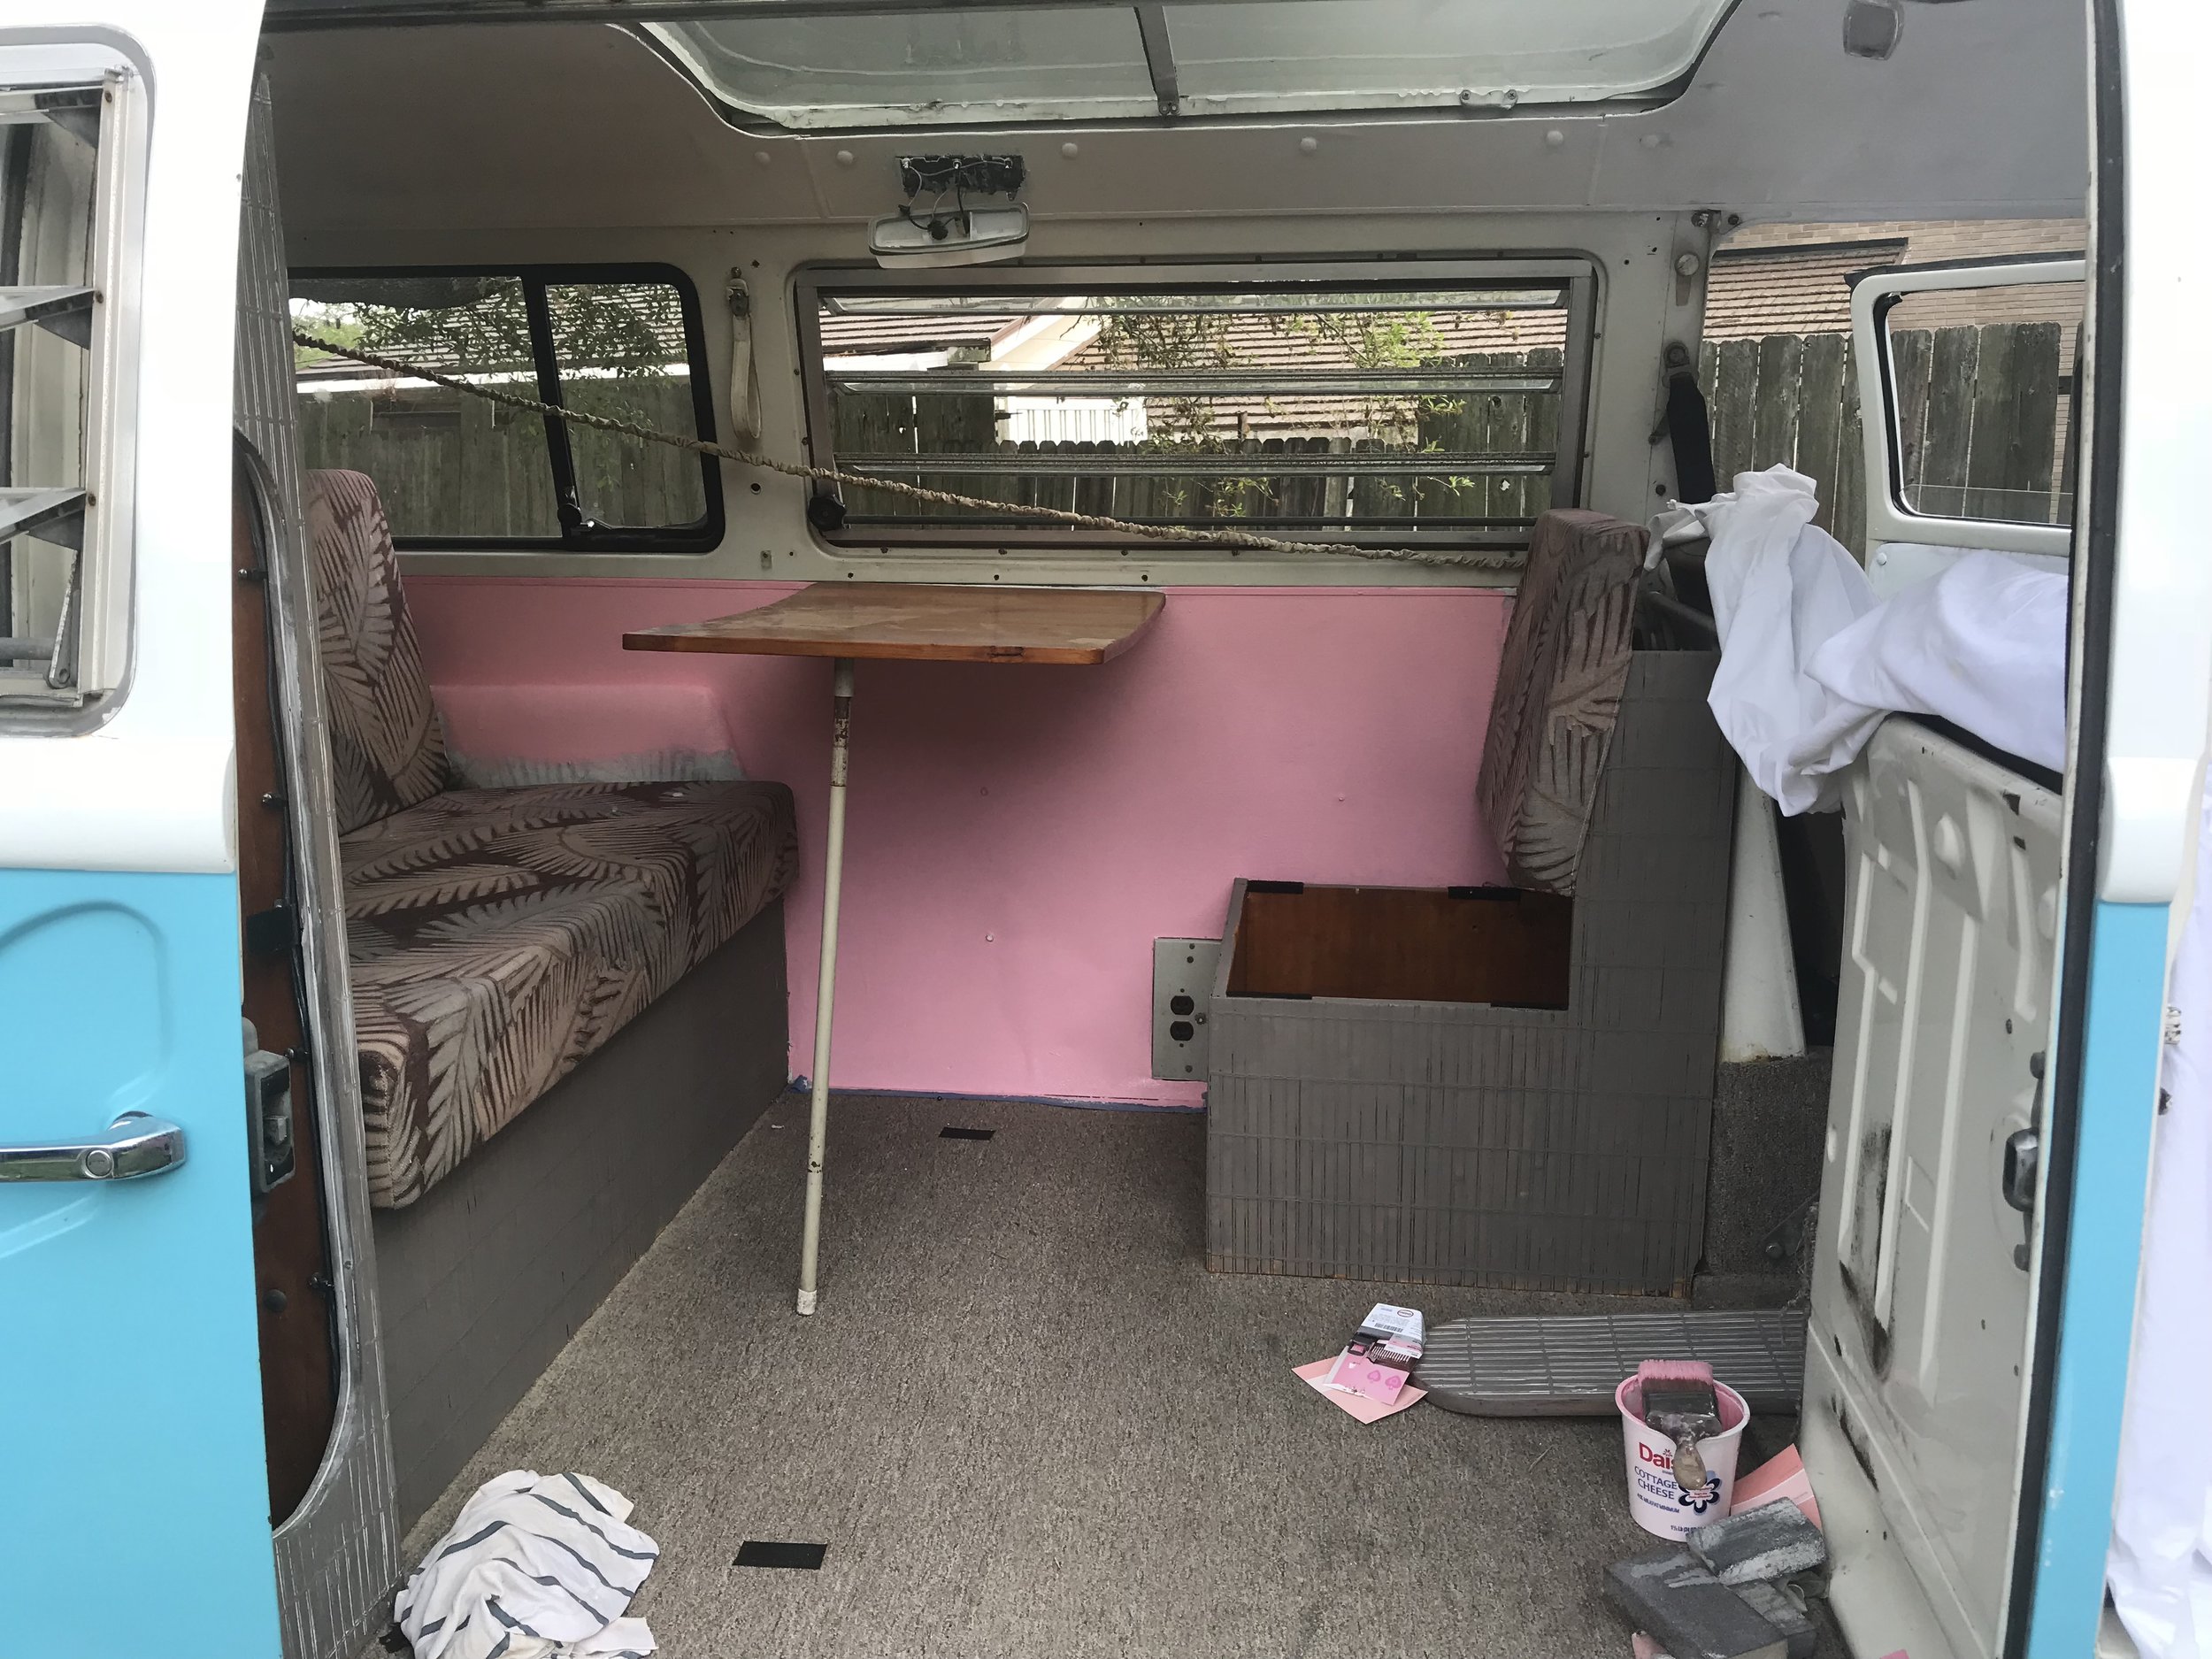
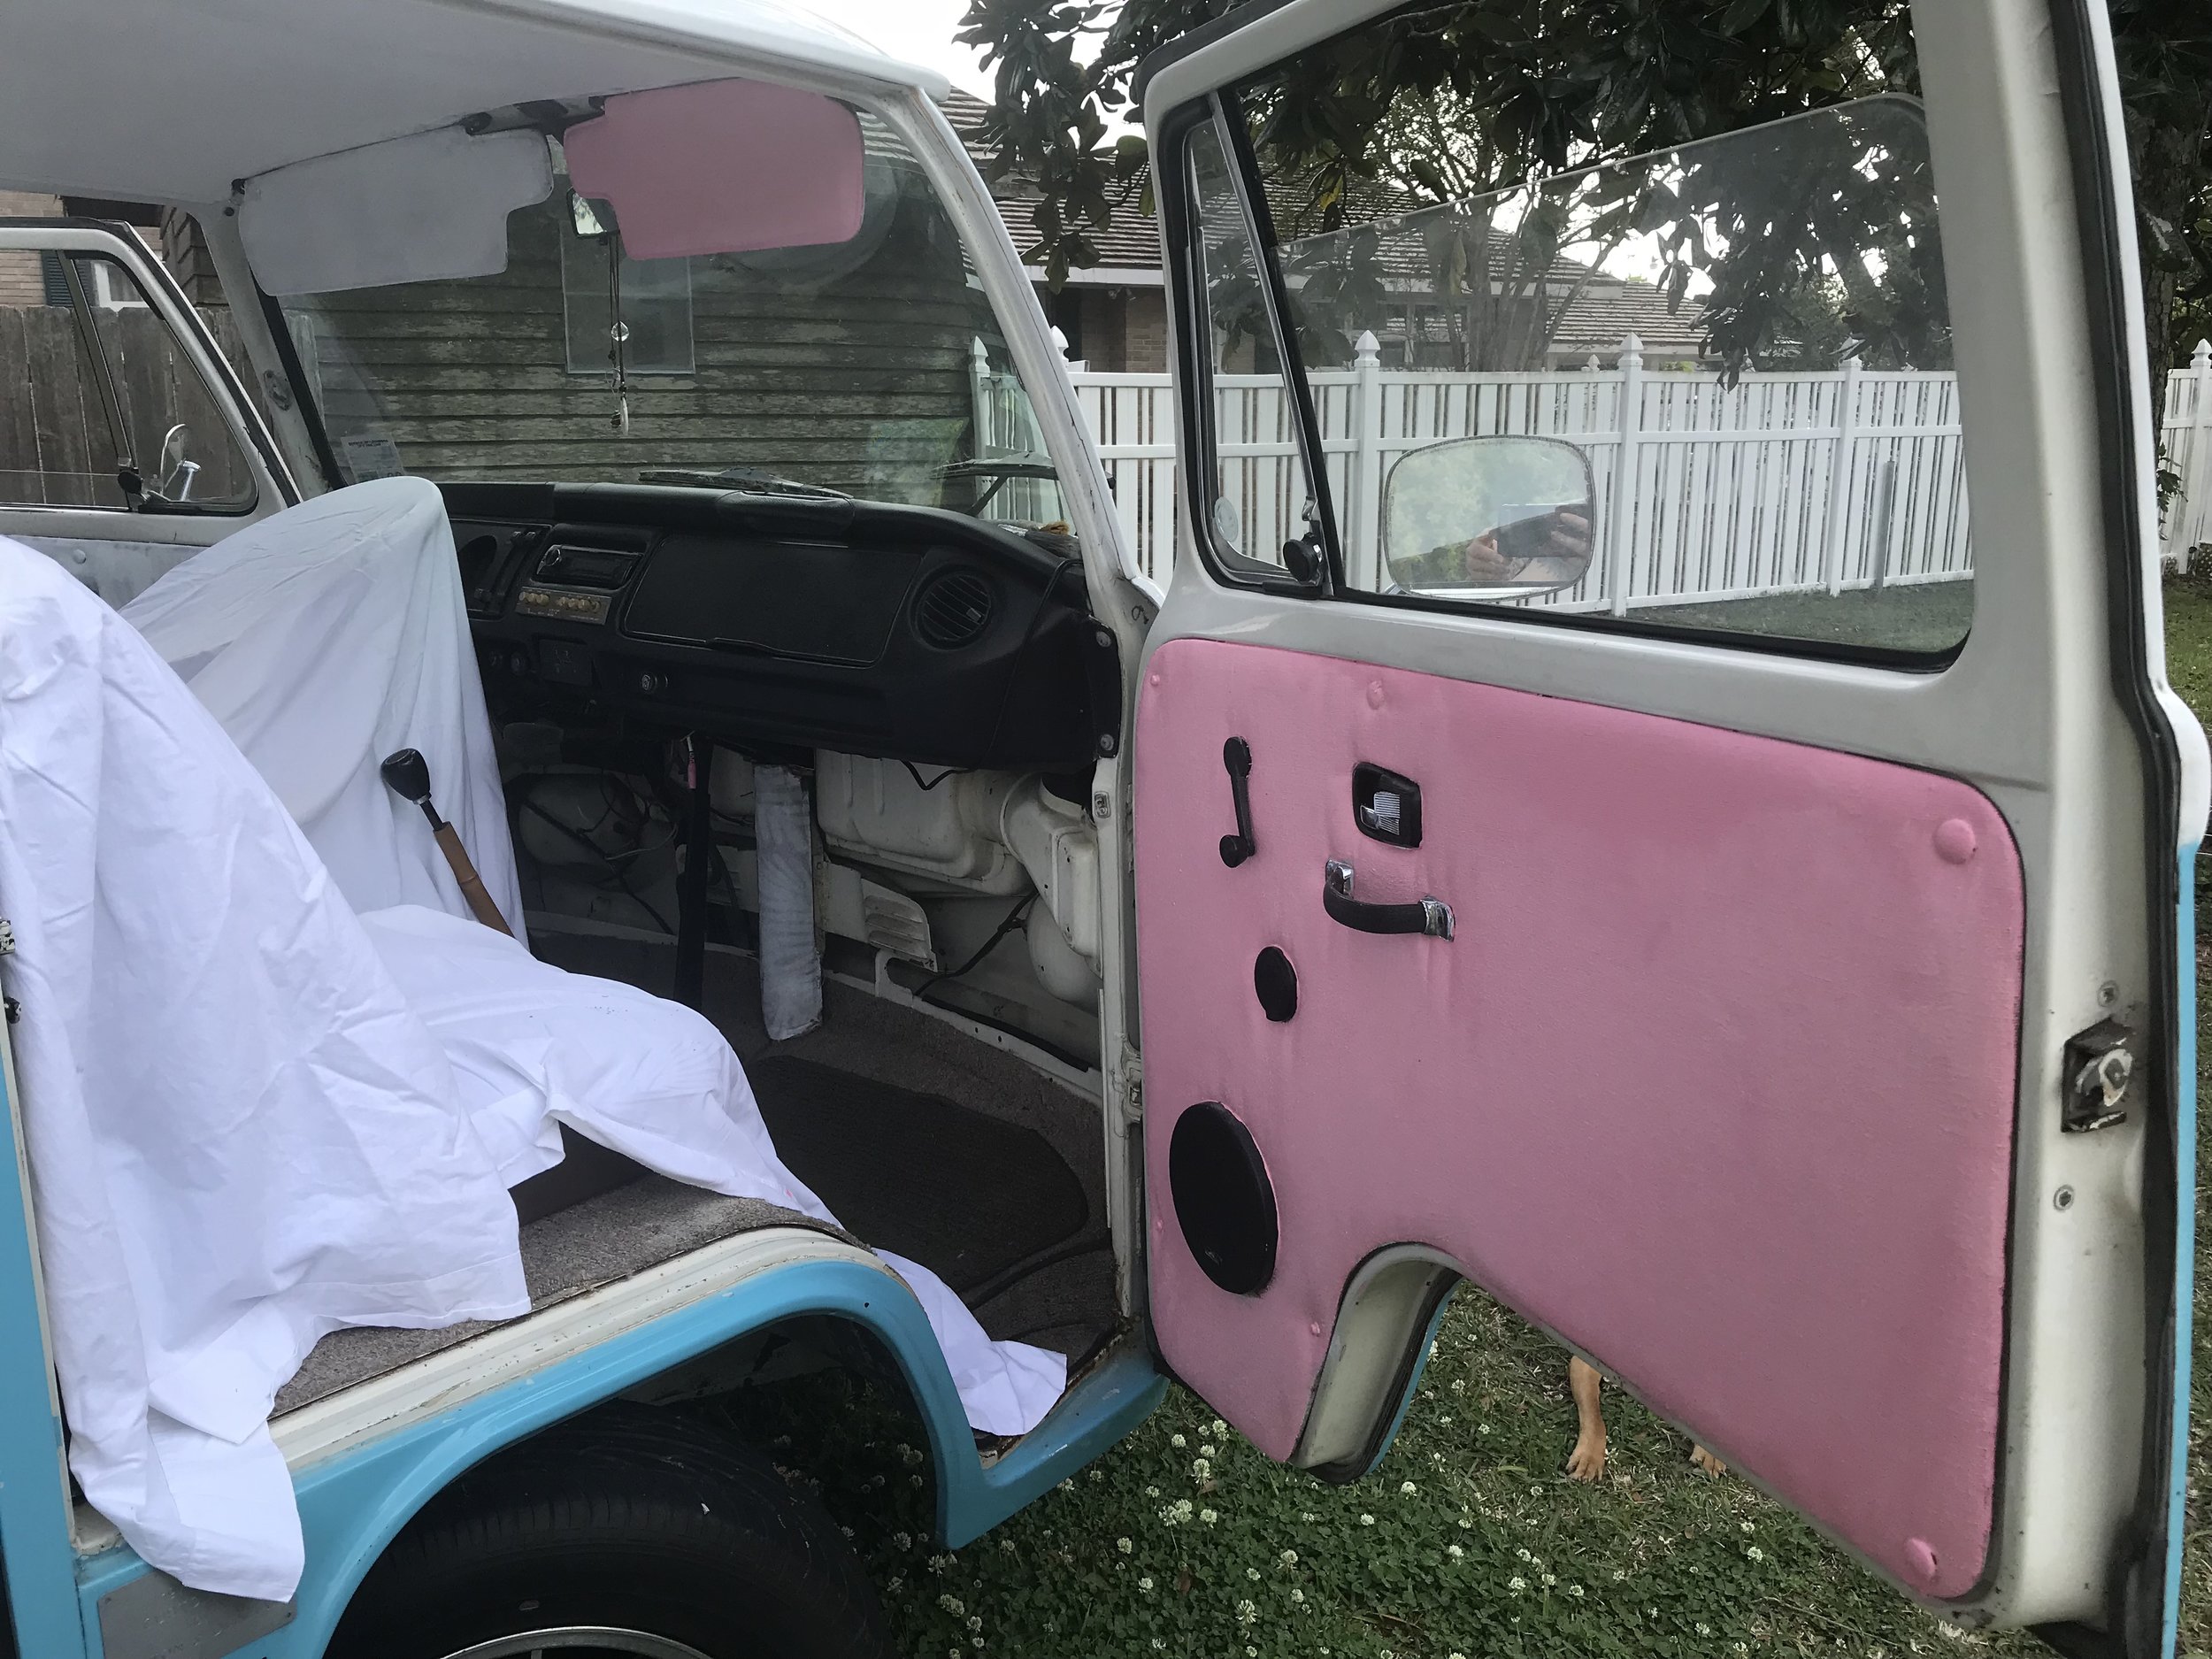
Then after driving it for about a month I decided to get started on painting the inside. This is also how long it took me to pick the colors. I color matched the metal on the doors (offwhite color) to paint the ceiling, which took three coats. That print was hard as hell to cover! Then I was lagging on deciding what exact shade of pink I wanted. I knew I wanted pink because PINK/TEAL duh. But also I had a pink bathroom in Portland that I LOVED, and I have been obsessed with that ever since. I was actually perusing some clearance paint at Target one day and found a gallon of the PERFECT pink paint for like $12. The pink goes on the walls, the visors, the fabric on the doors, and eventually on the dashboard. And then as far as the actually seating goes- I have something planned for a feminist artsy print on them with offwhite/pink but I haven't completely settled on anything yet.
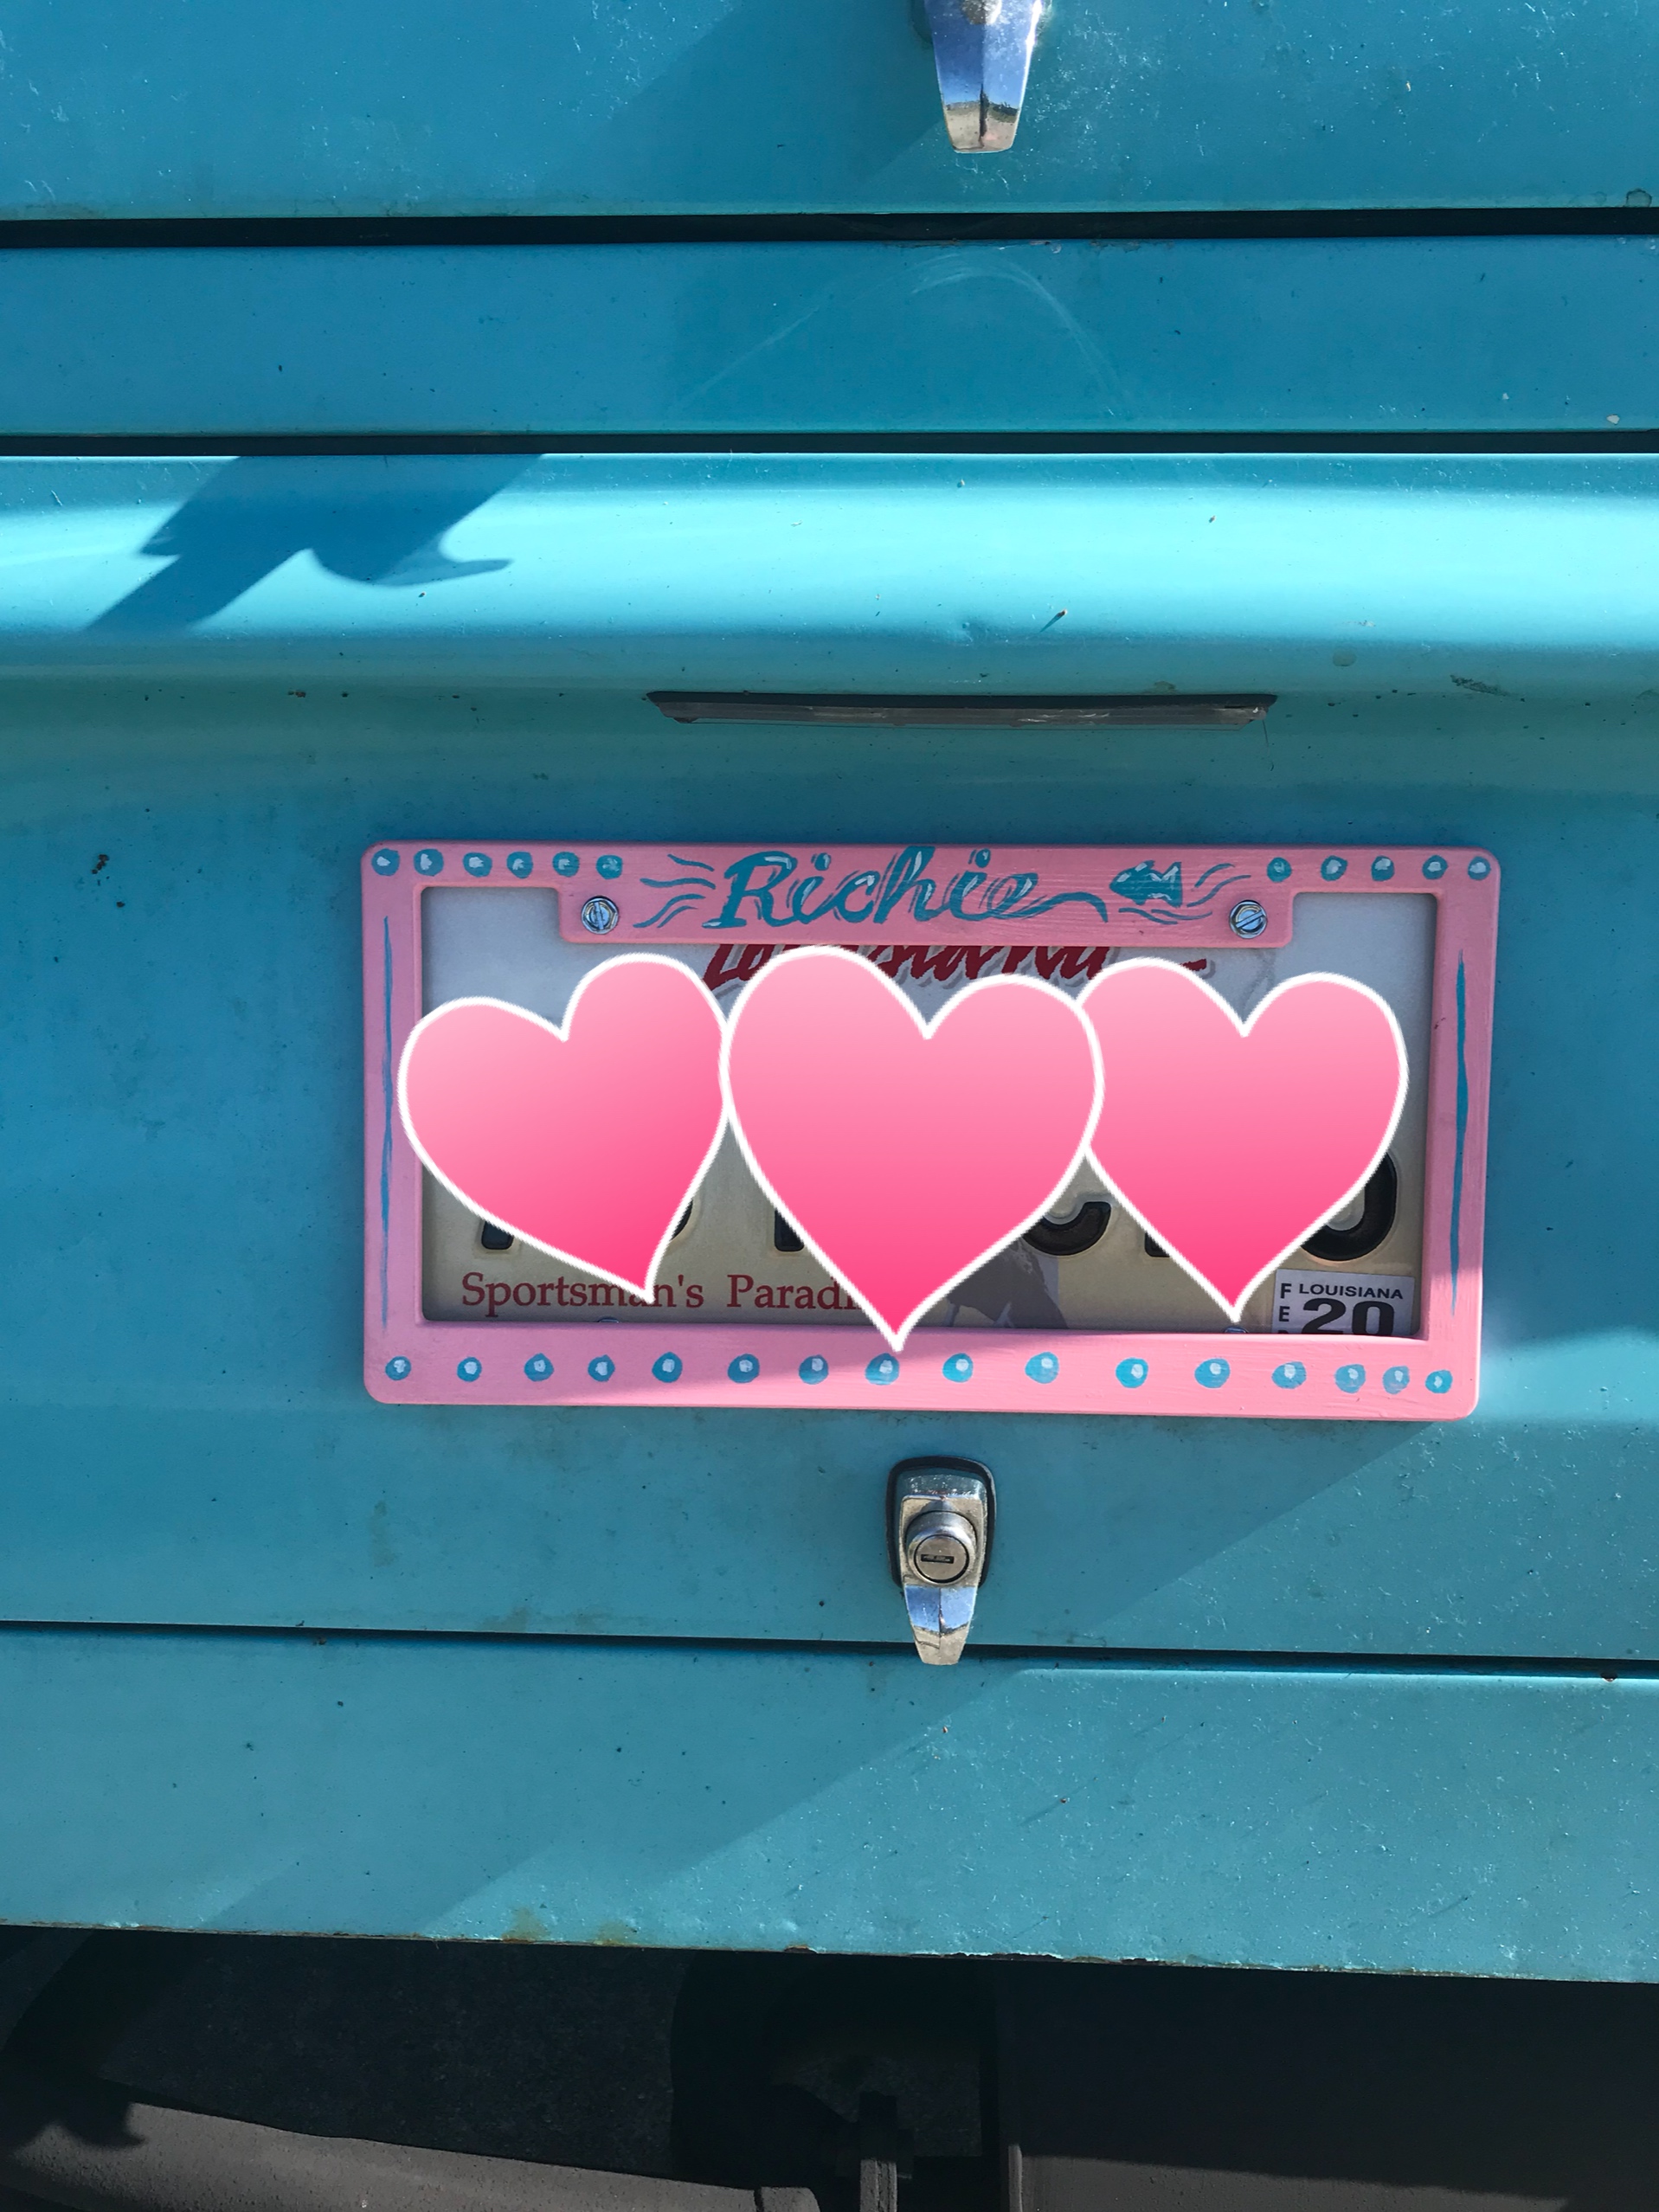
I also decided to name my bus, Richie, after my Dad! I know that my Dad would have LOVED this bus and he would have been so excited to teach me how to drive it. I somehow even feel like I believe he made it to where I could find it so that my sister and I could work on our relationship again and bond.

They had to "help".


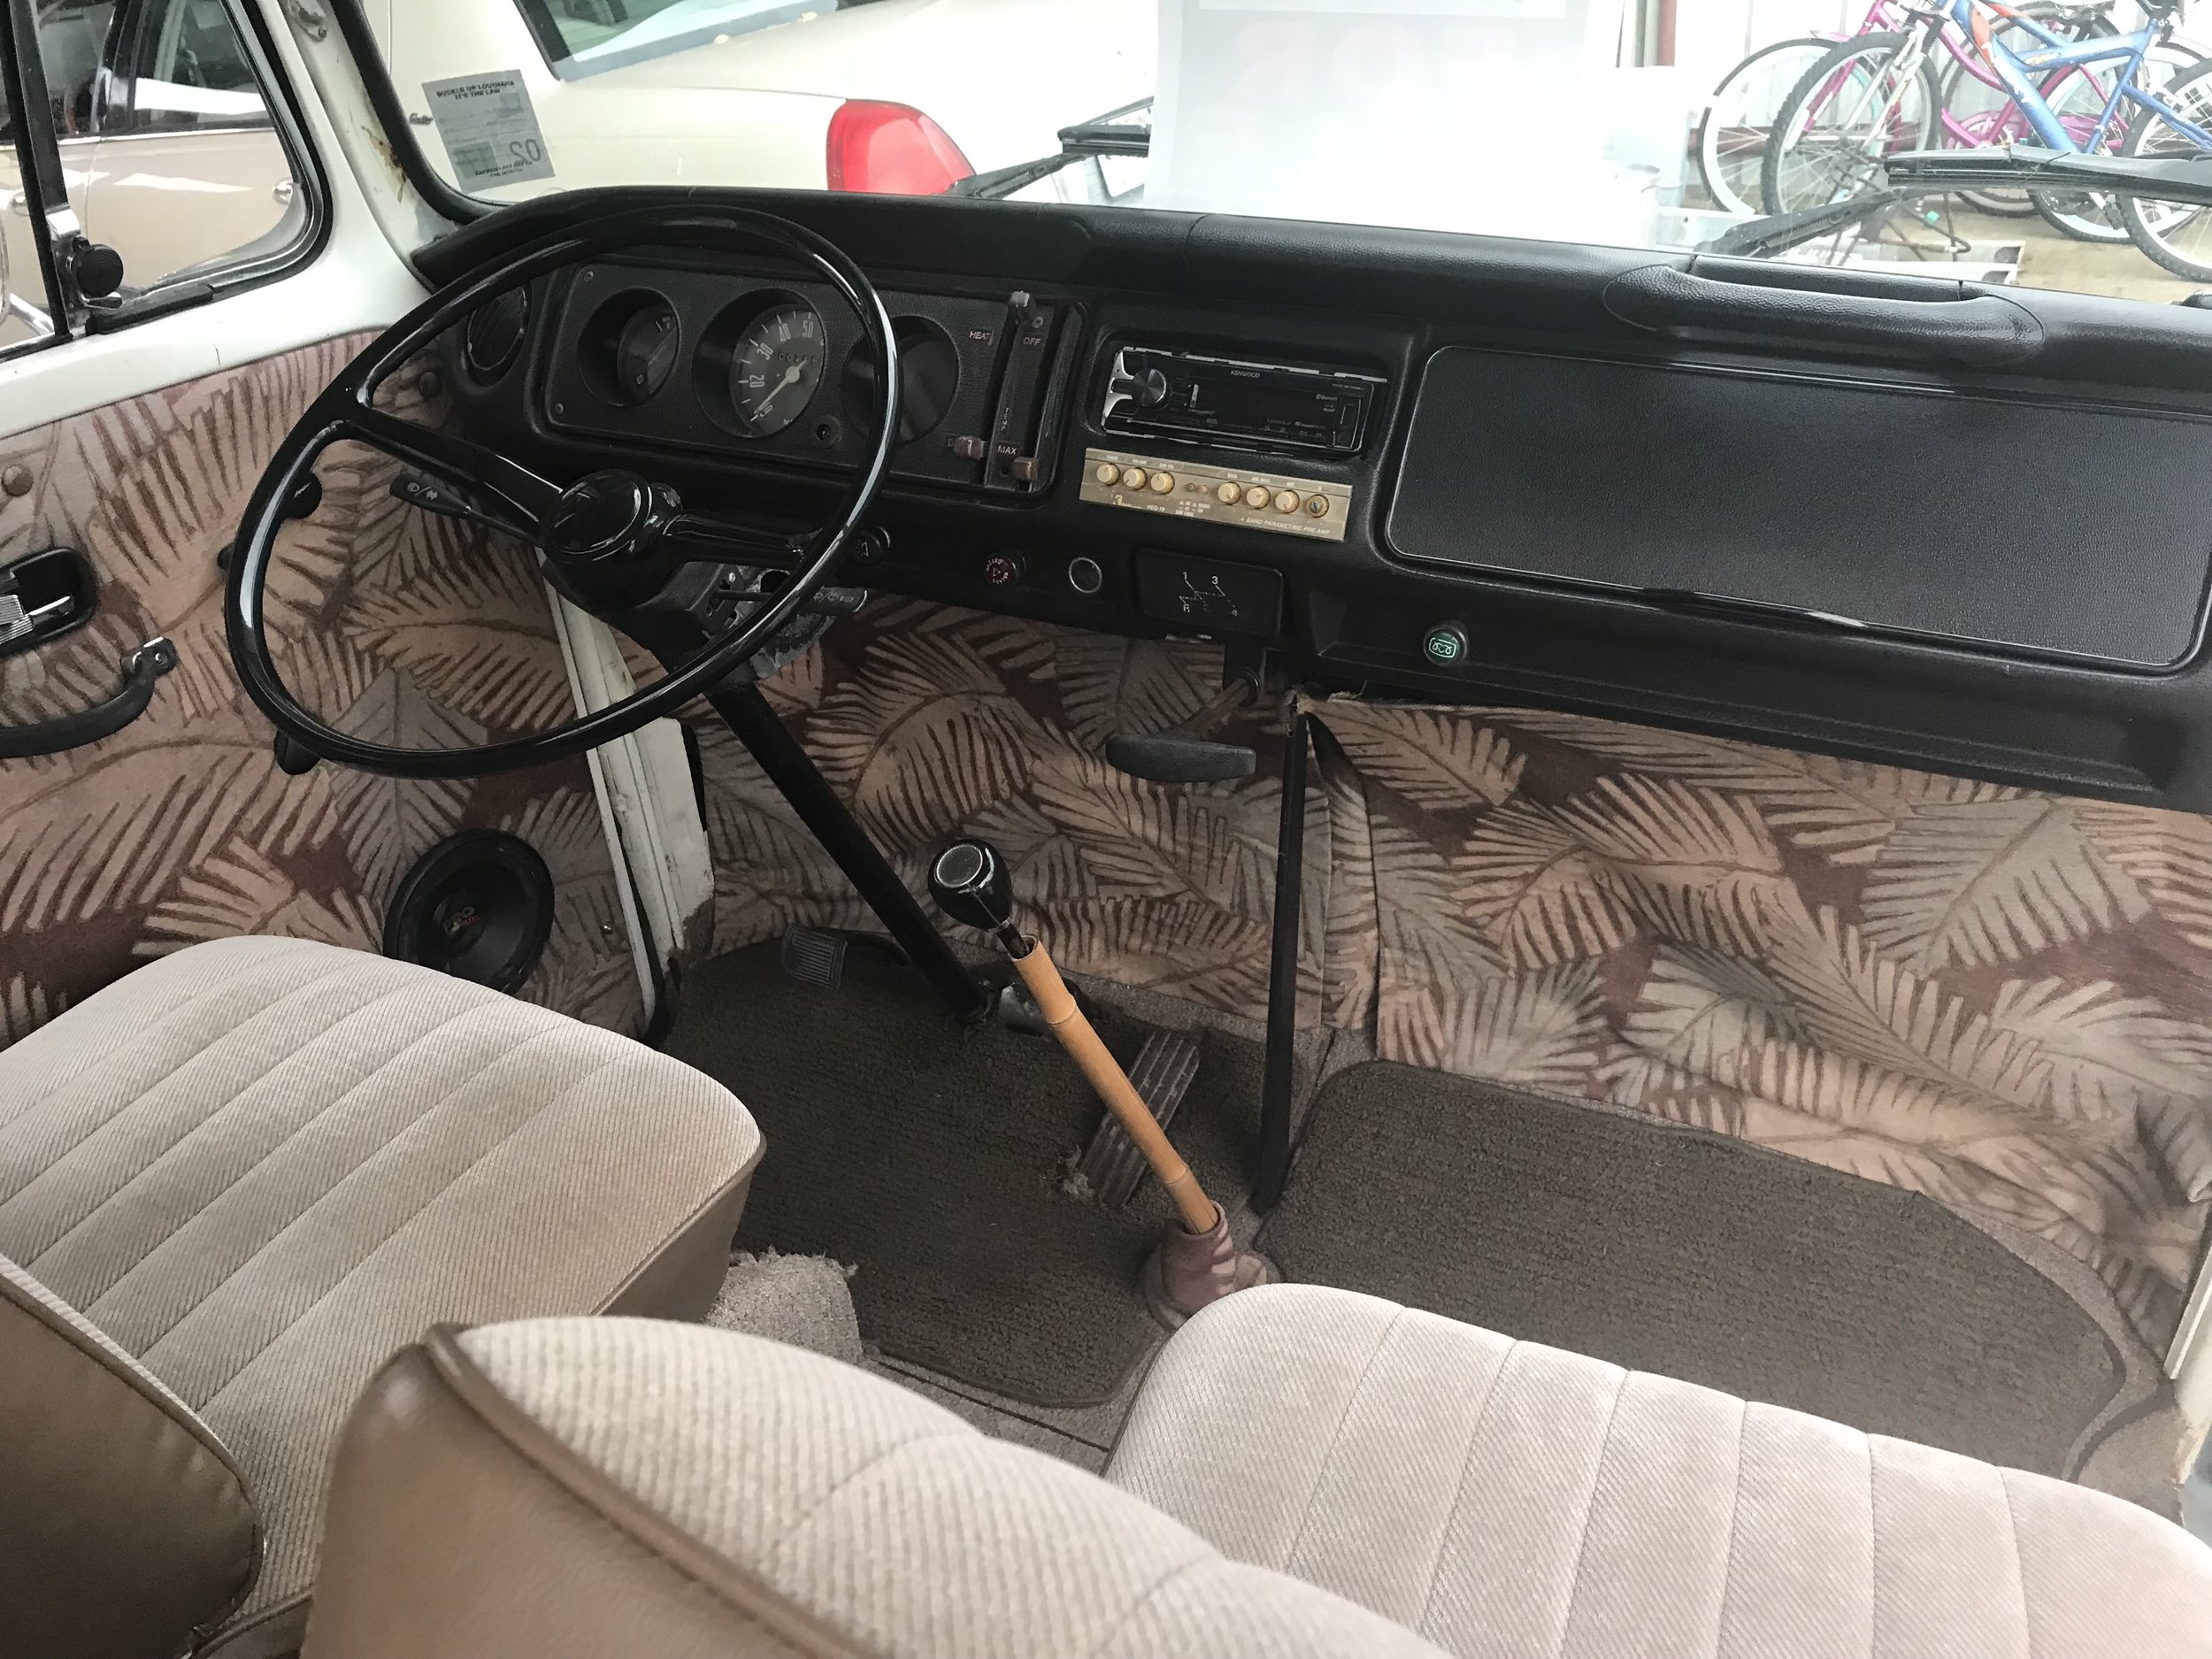
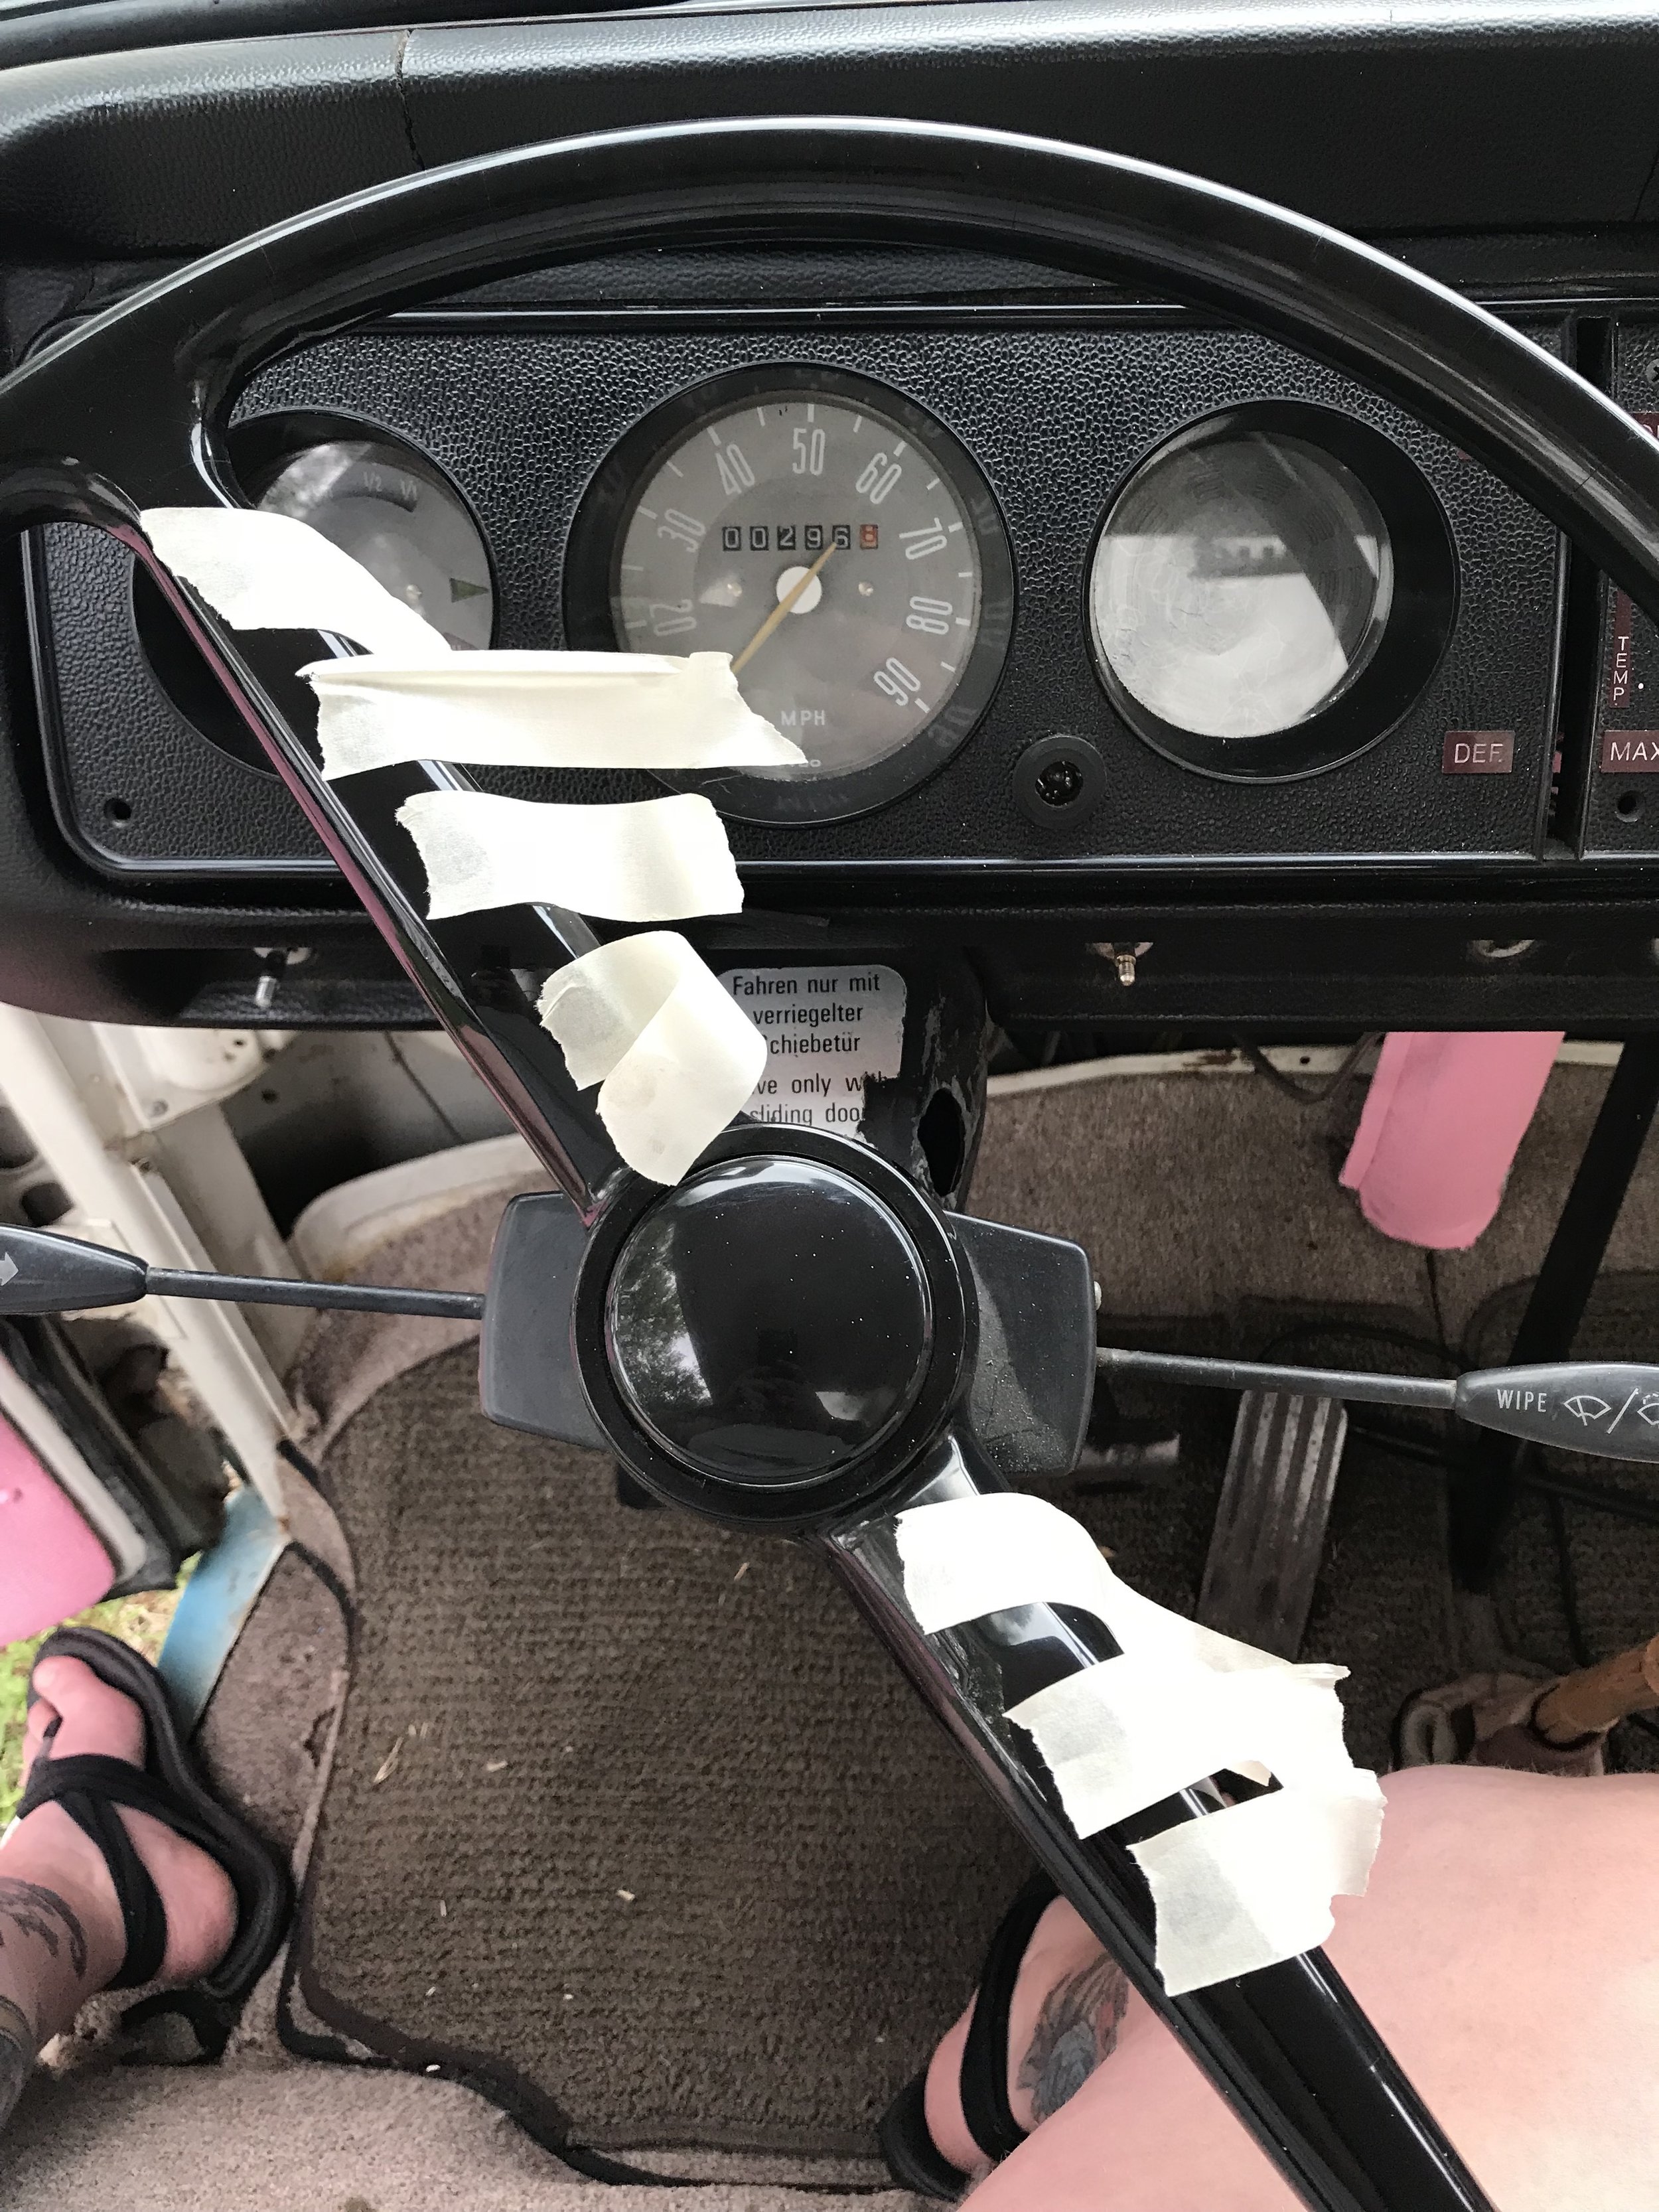
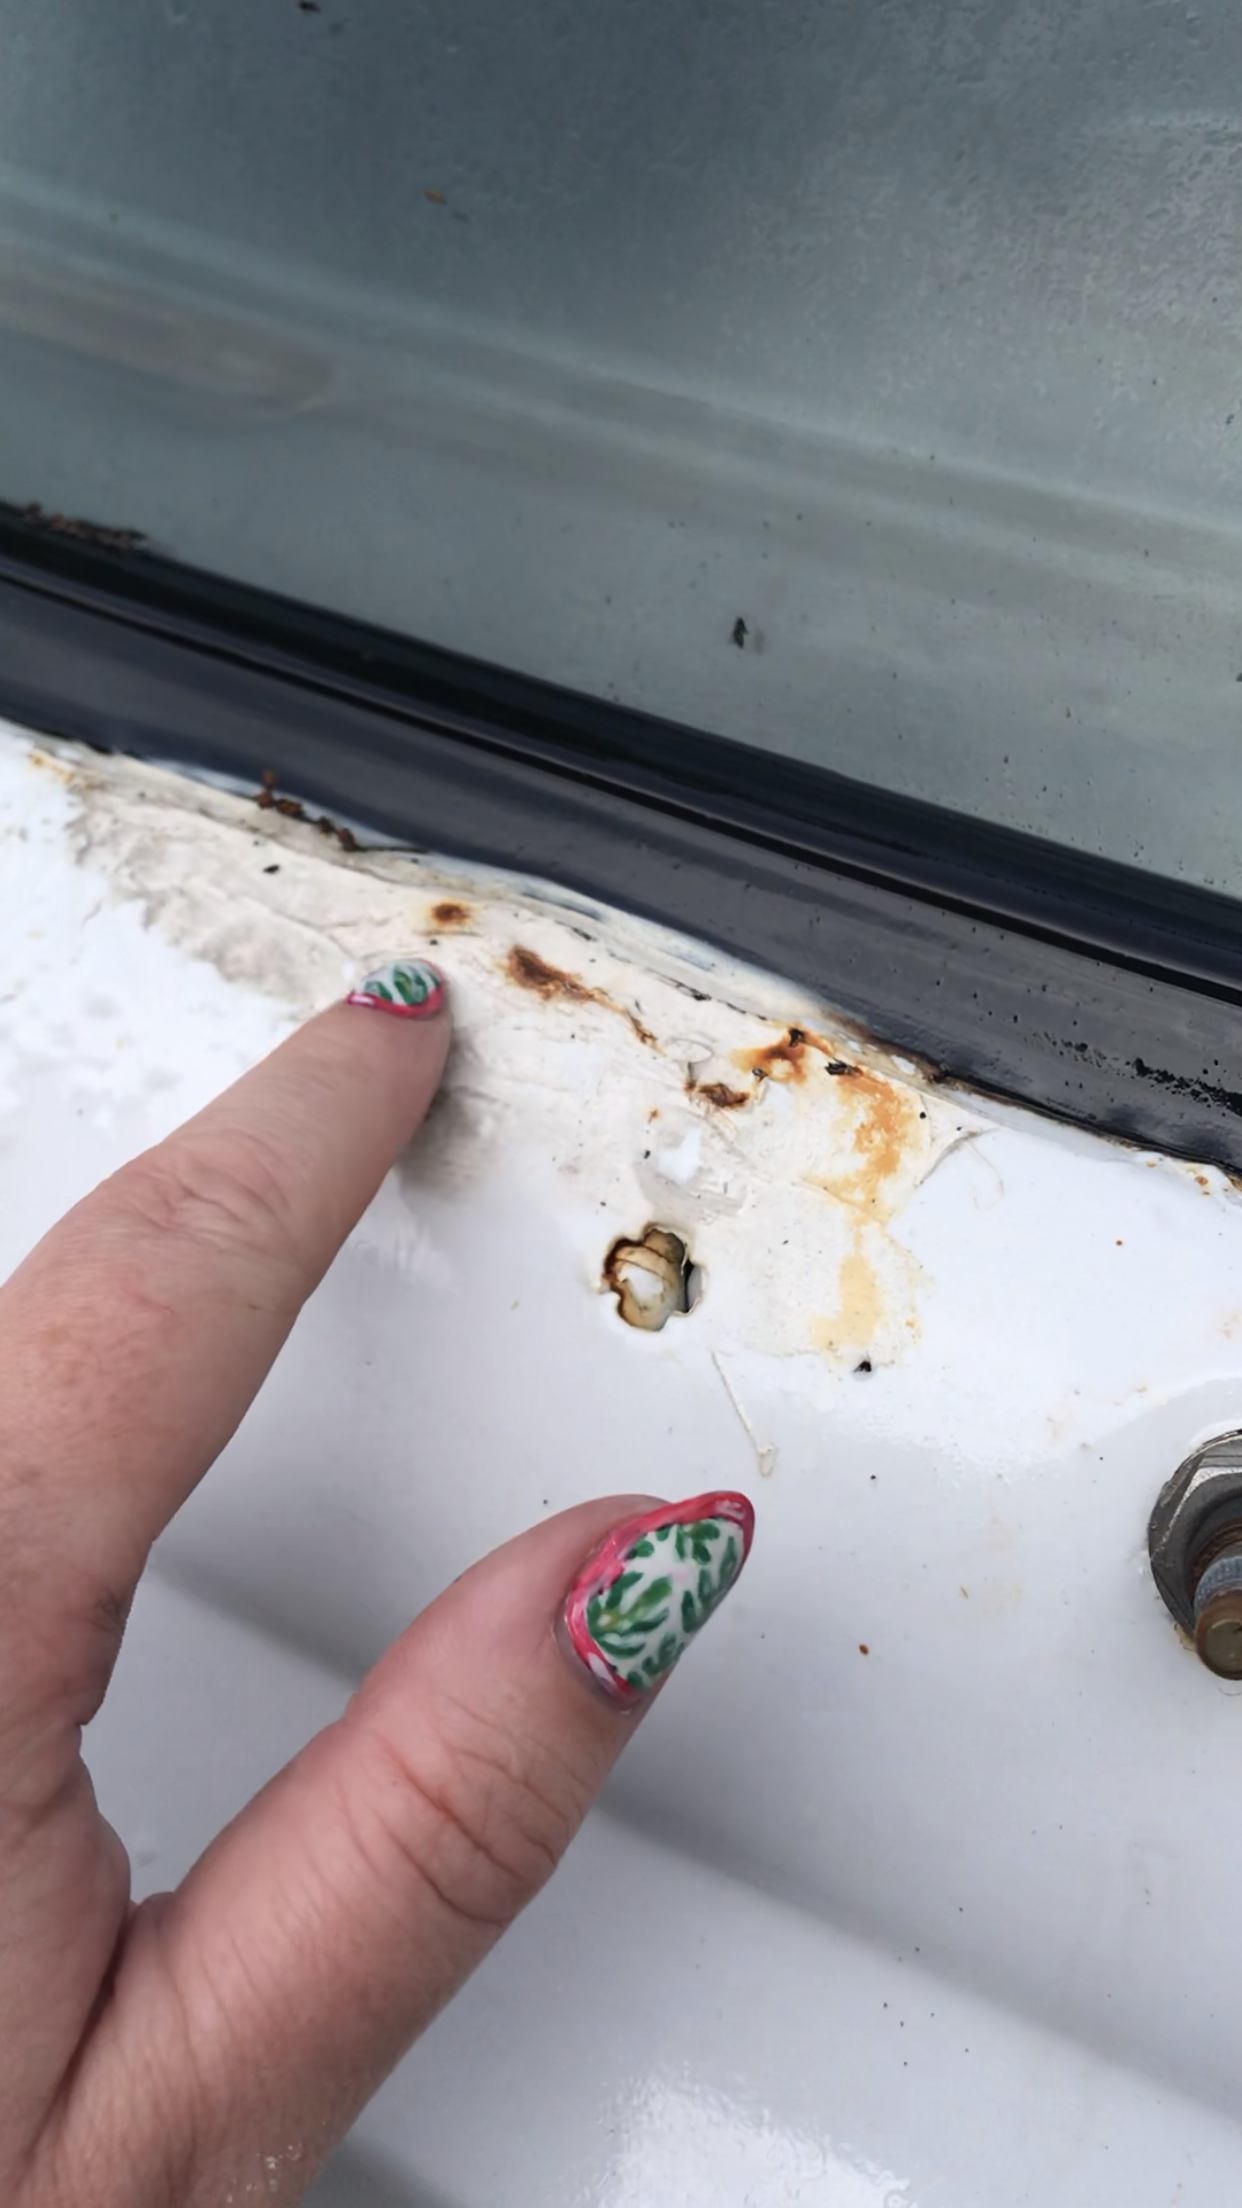
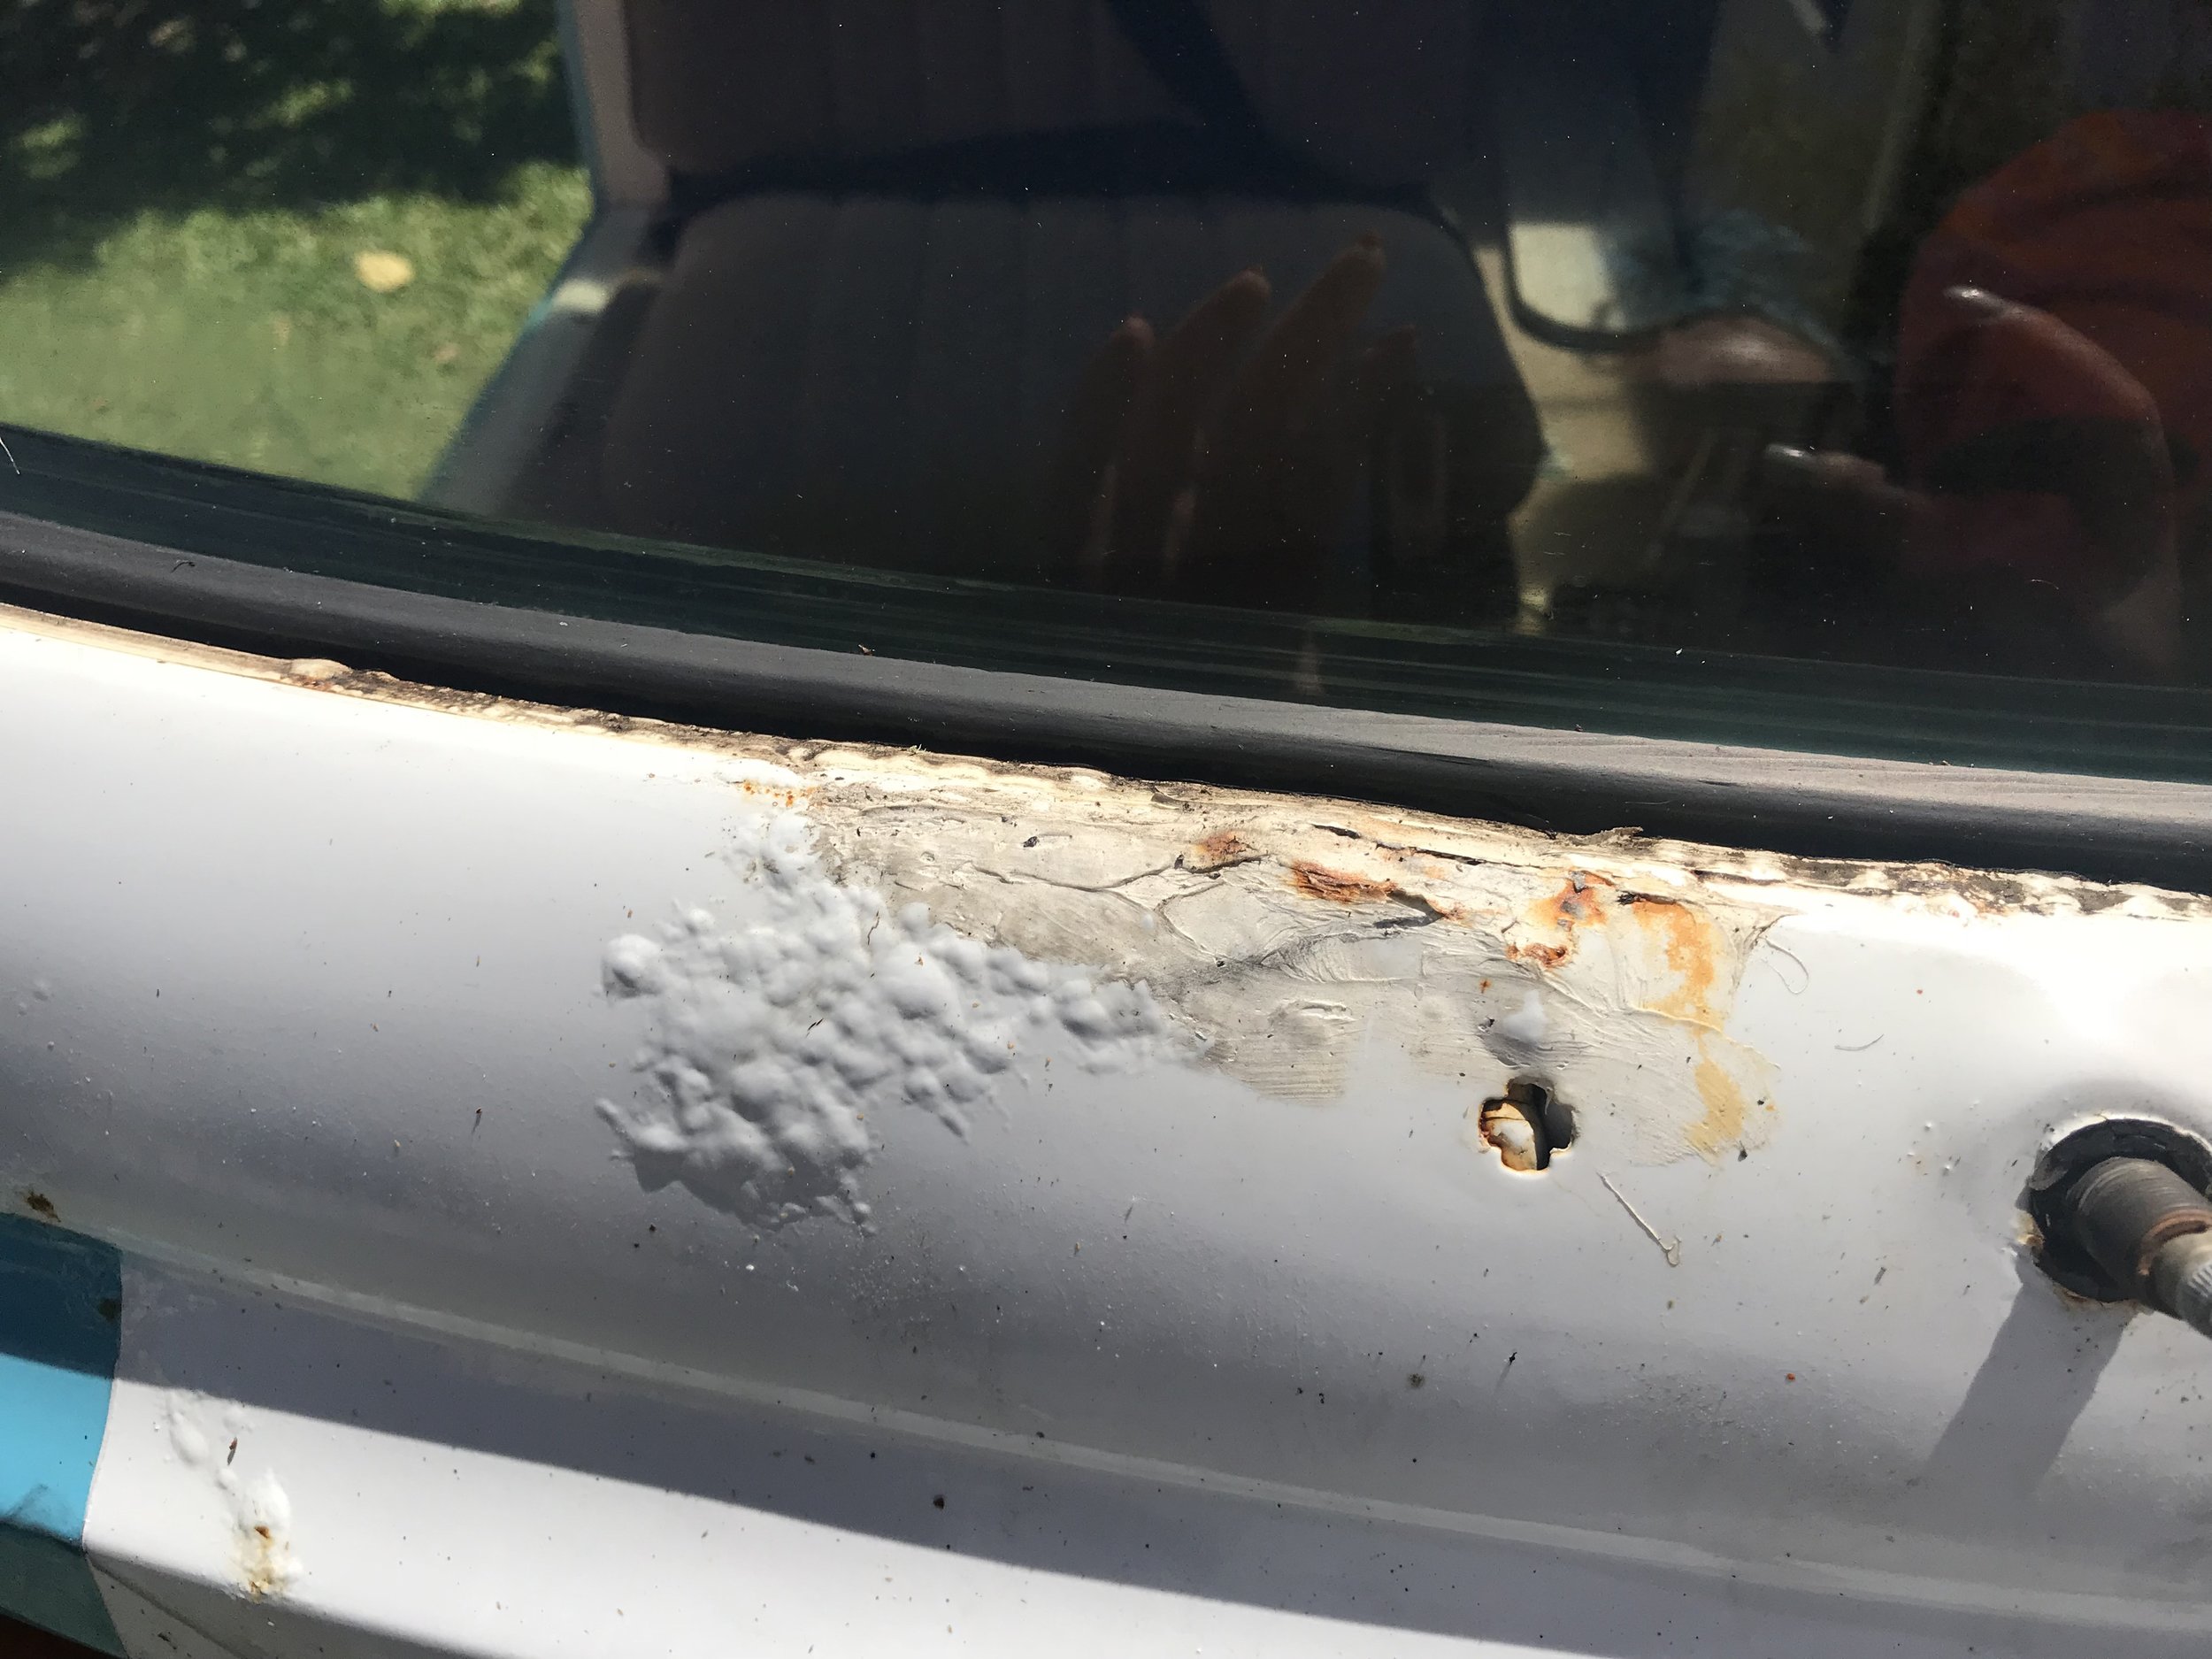
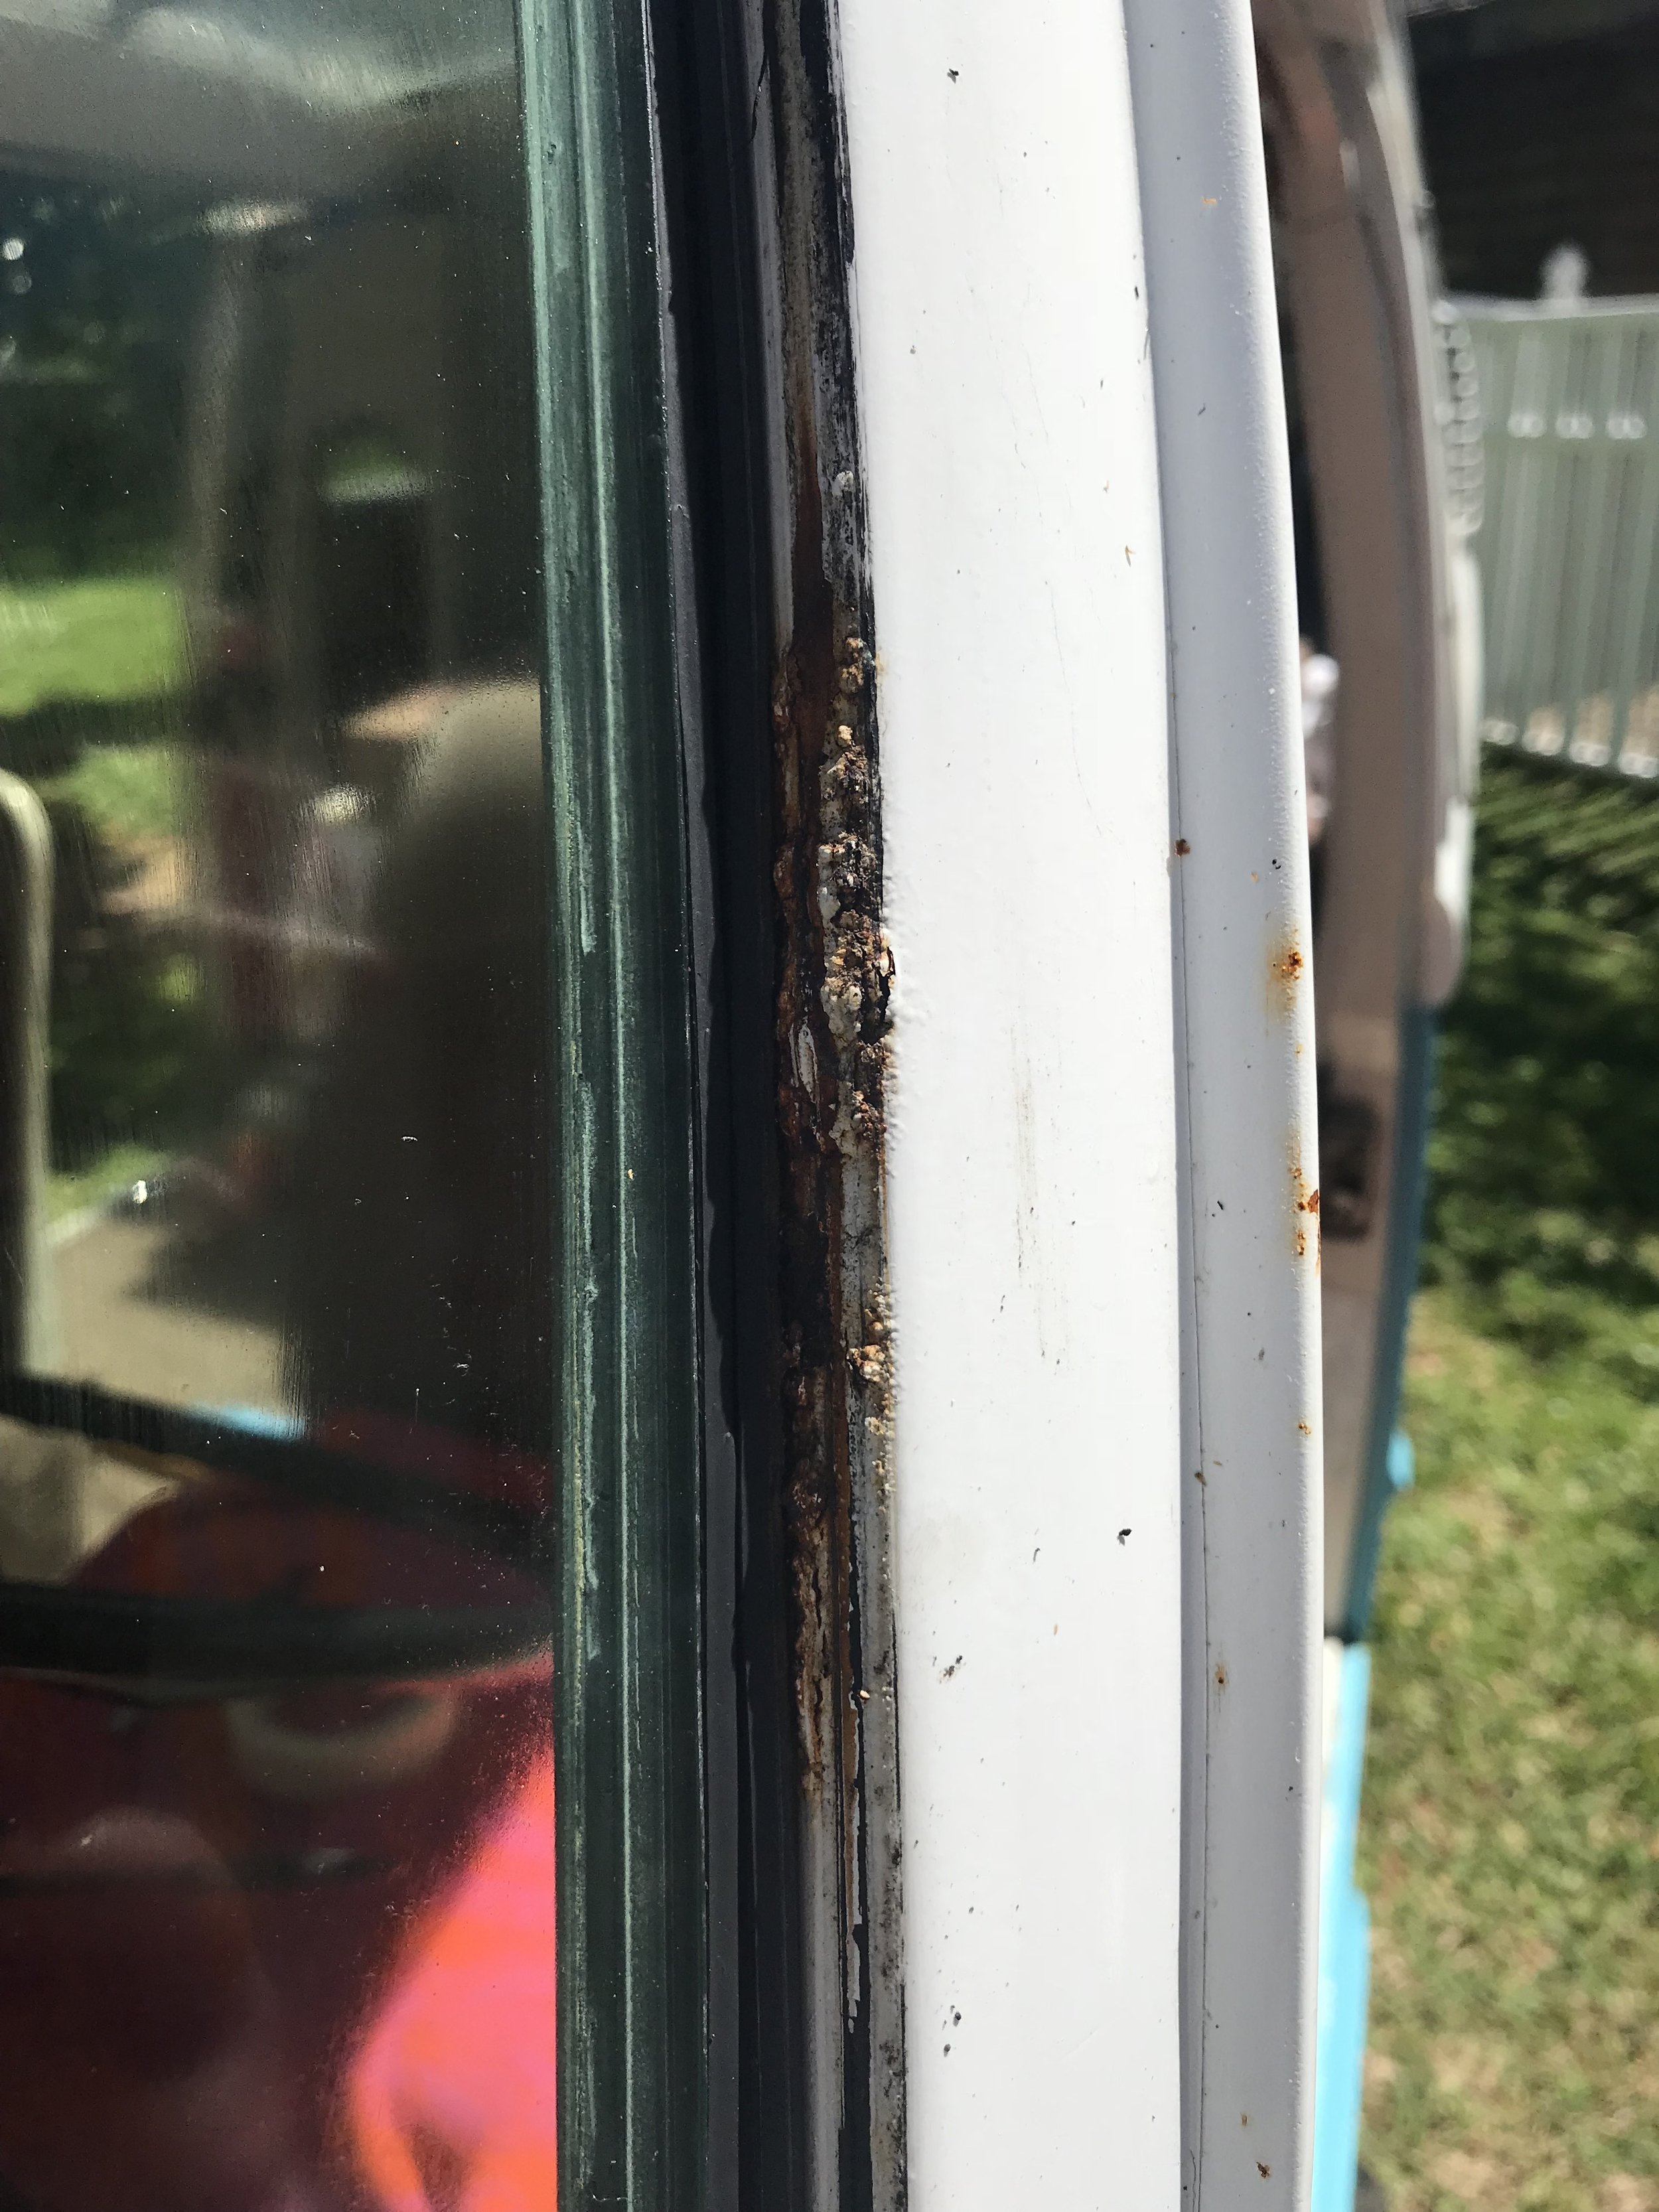
Then I had to address the rust problem. As you can see a few pictures into this slideshow I point to where the rust was bubbling through the paint. I watched tons of youtube tutorials, got all of the supplies I needed, asked for advice and help from family and friends... and then I decided to start. First process of fixing- under the windshield rust--is to take the dash out. WHICH.IS.A.FUCKING.CHORE. I had found a youtube video of a lady taking her dash out for the first time and it helped SO much. (Find that here).
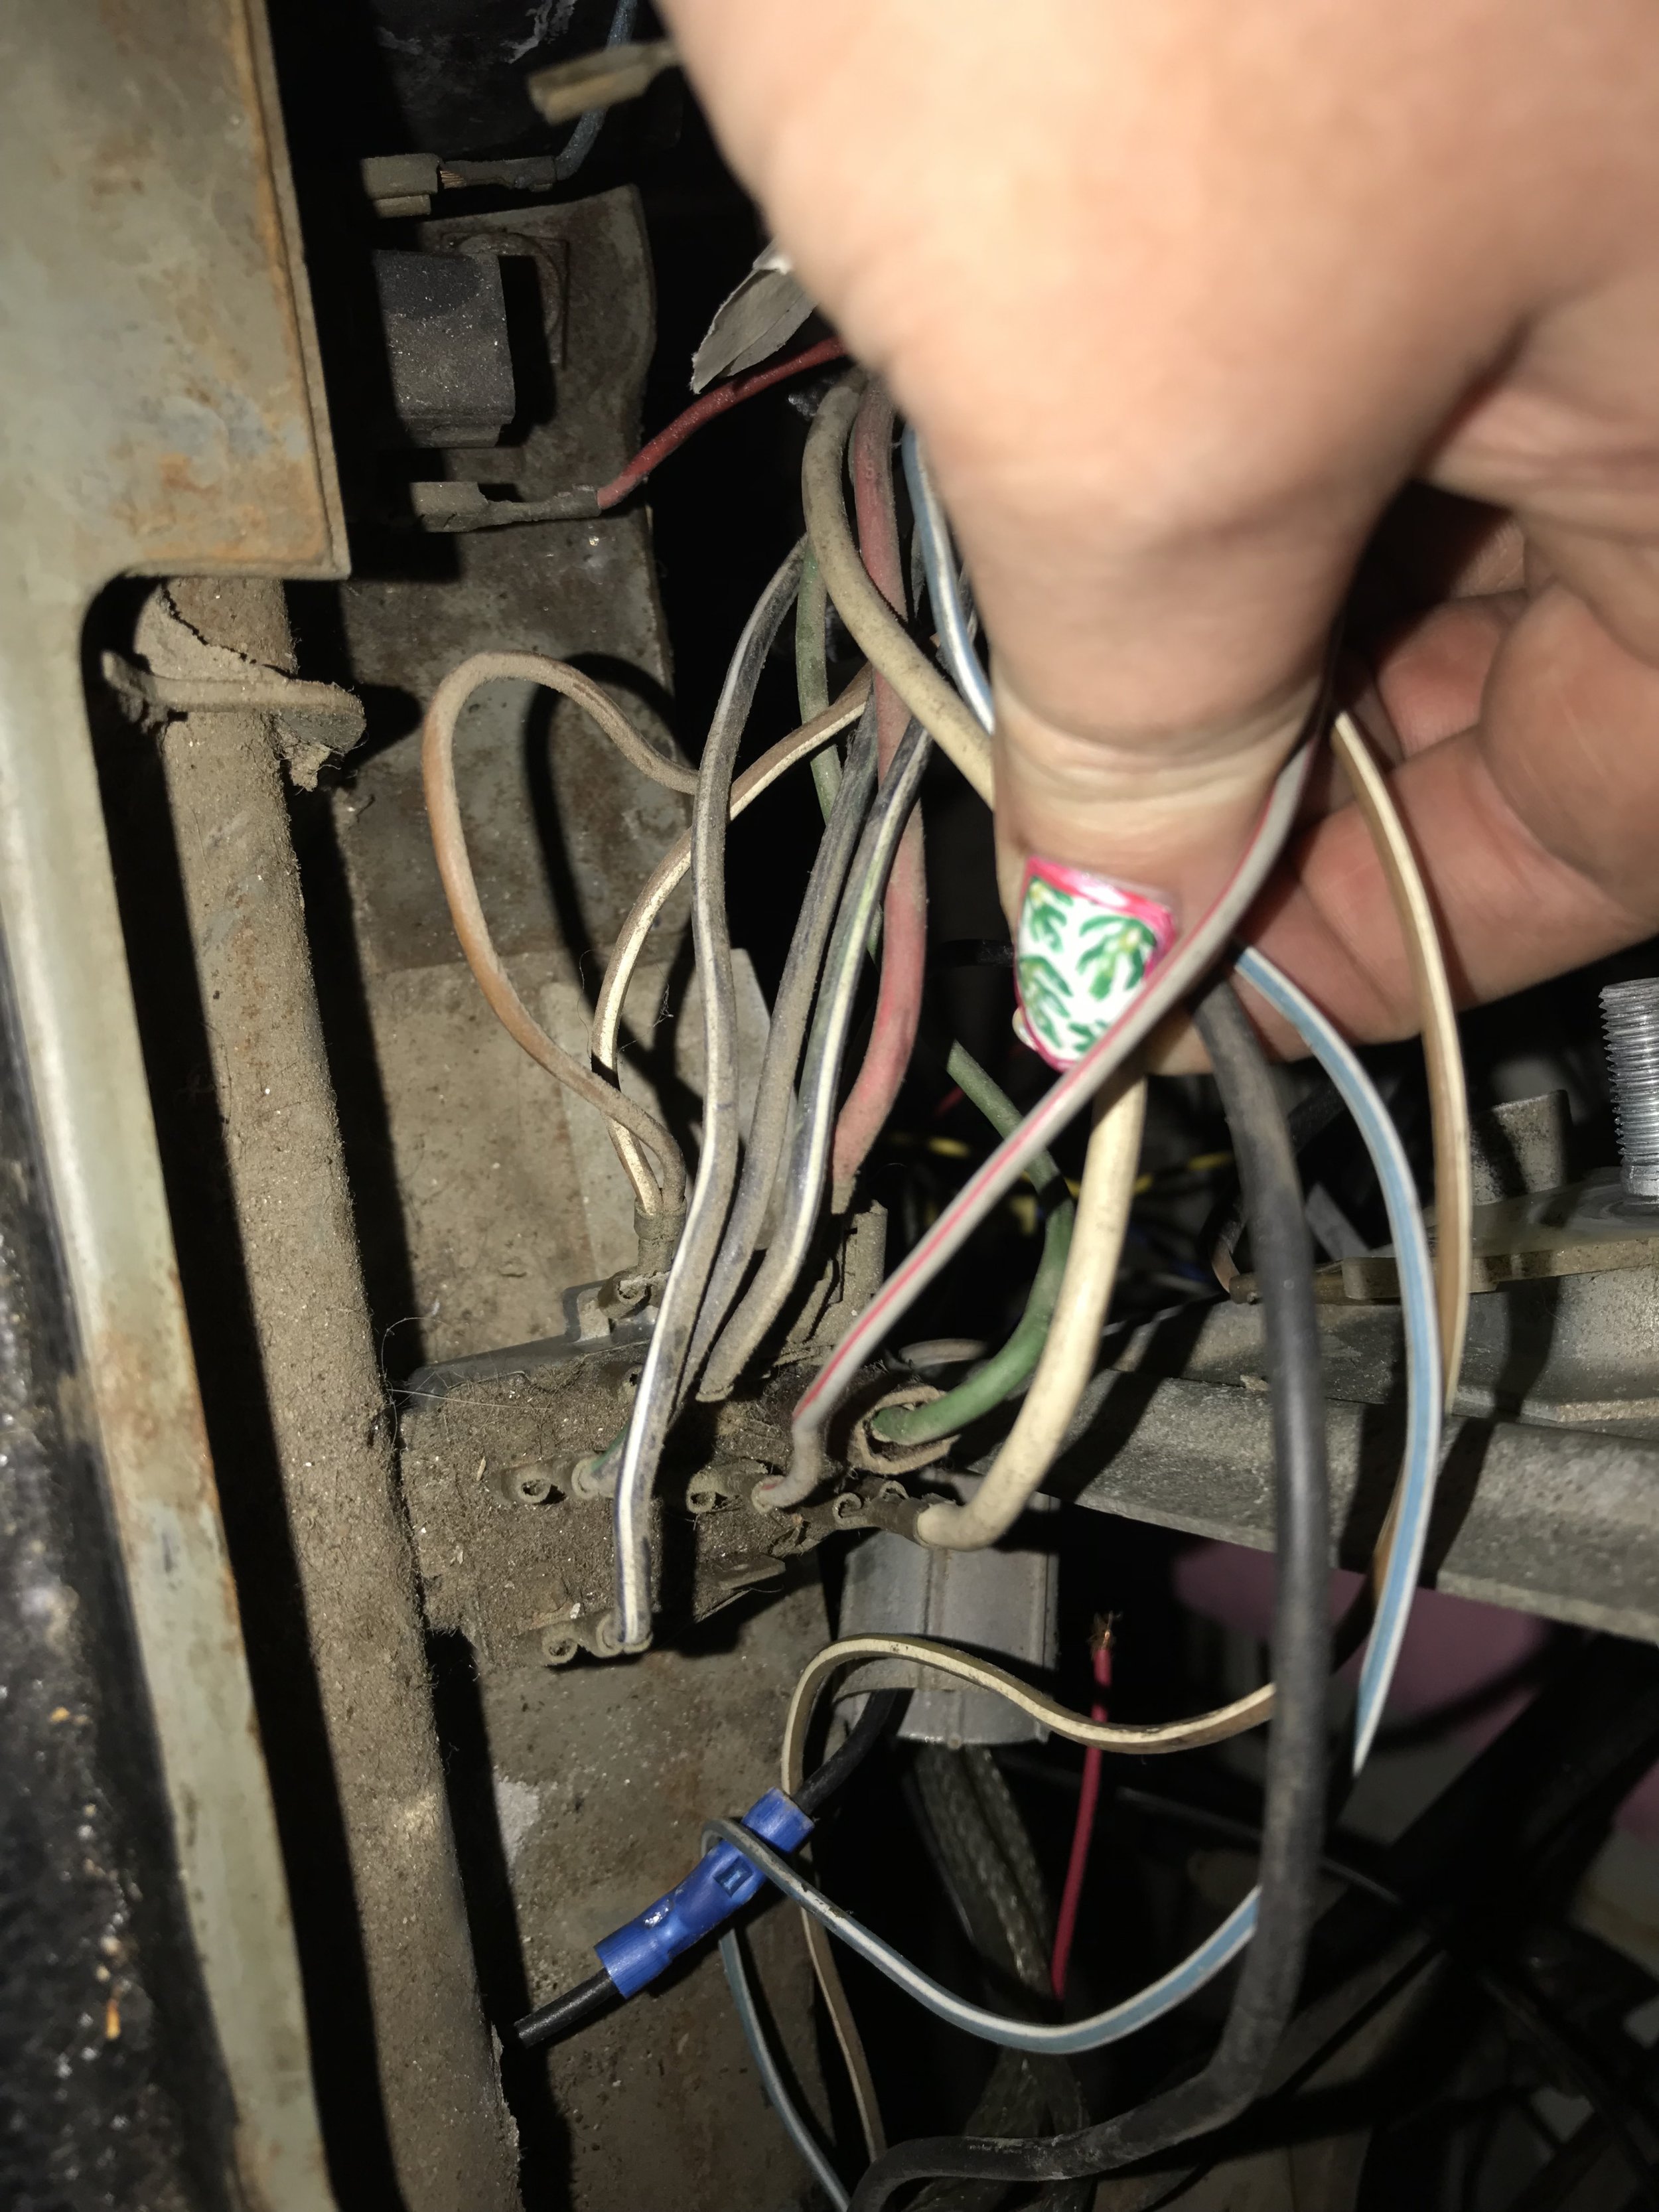
First off- the dash is fucking heavy. It's basically all metal. It starts with a couple screws you have to take out and then it's a shitload of labeling and taking pictures and videos to make sure I can explain to myself where everything goes as it goes back in. I also found a tonnnn of wiring that didn't even go to anything and some parts that were broken-- so that's another good thing to taking it out.

Dash was out. I was feeling good.
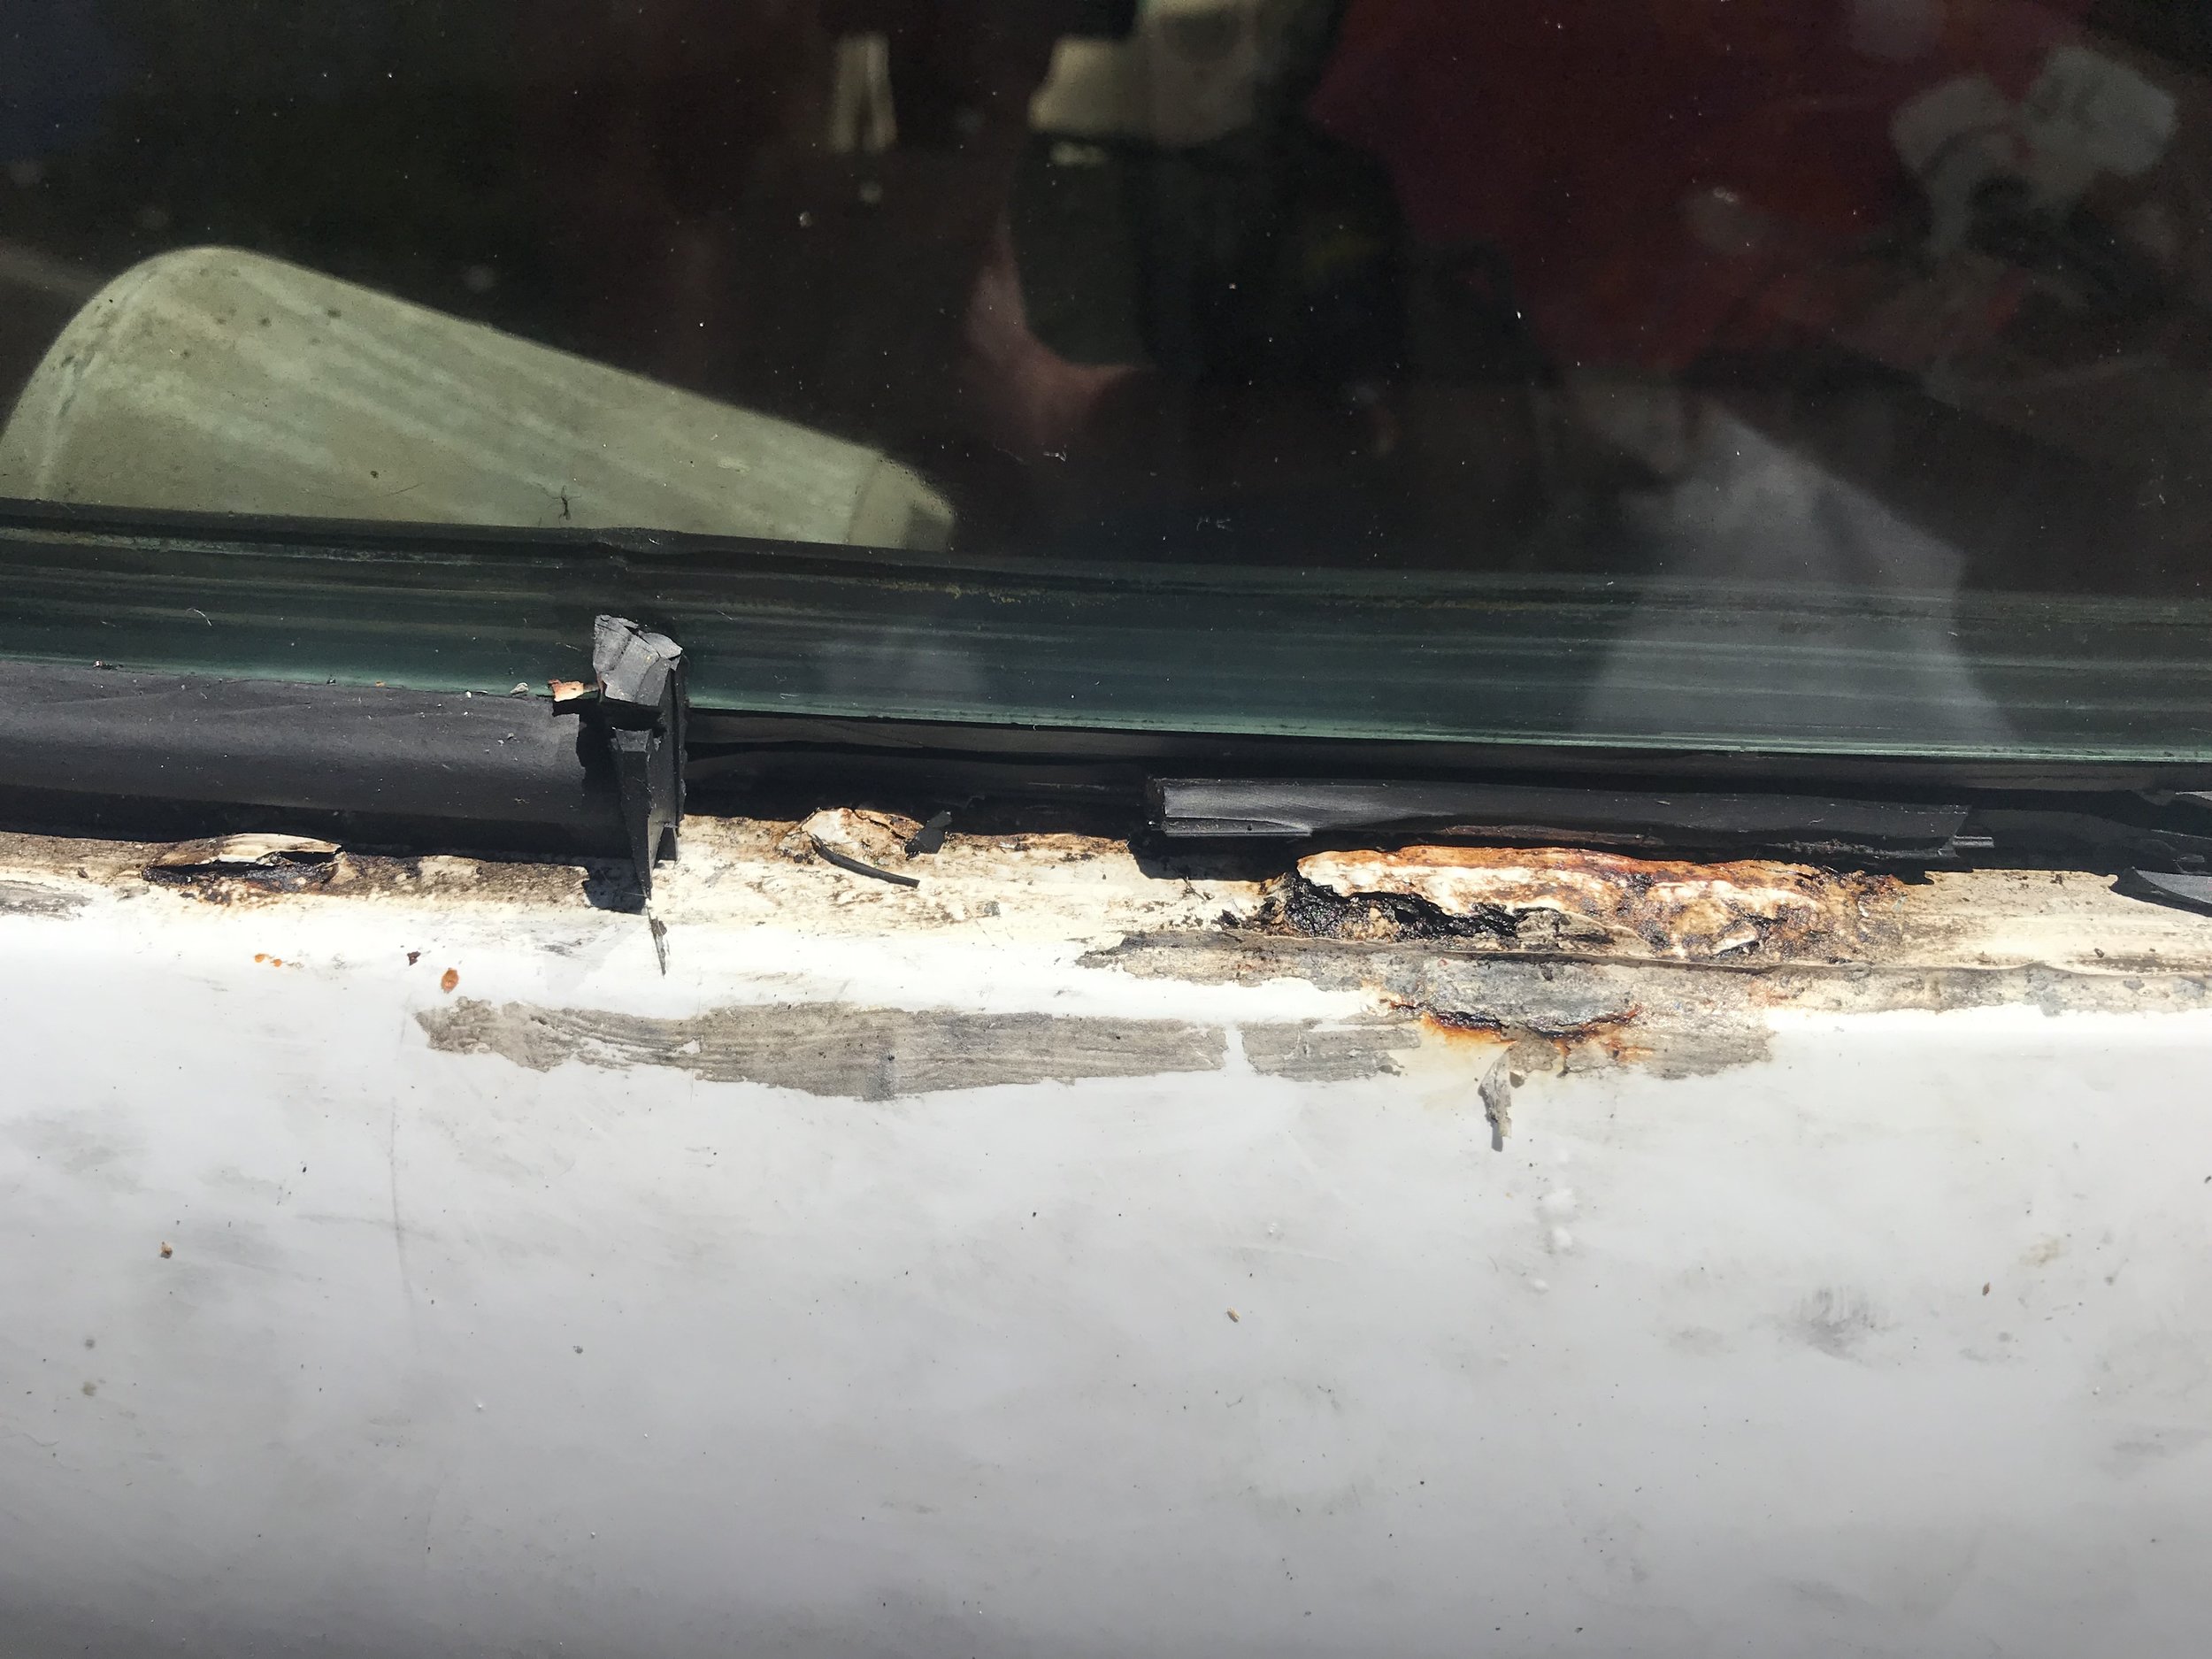
Then the fun stuff. LOL. I sliced off the weatherstripping around the windshield and then had my nephew help me come lift it out. It was surprisingly easy. He pushed from the inside and then I grabbed the windshield and put it in the garage on some foam and blankets. I ripped all of the remaining gaskets/weatherstripping out and I was all "yay now just some scraping rust and bondo!"
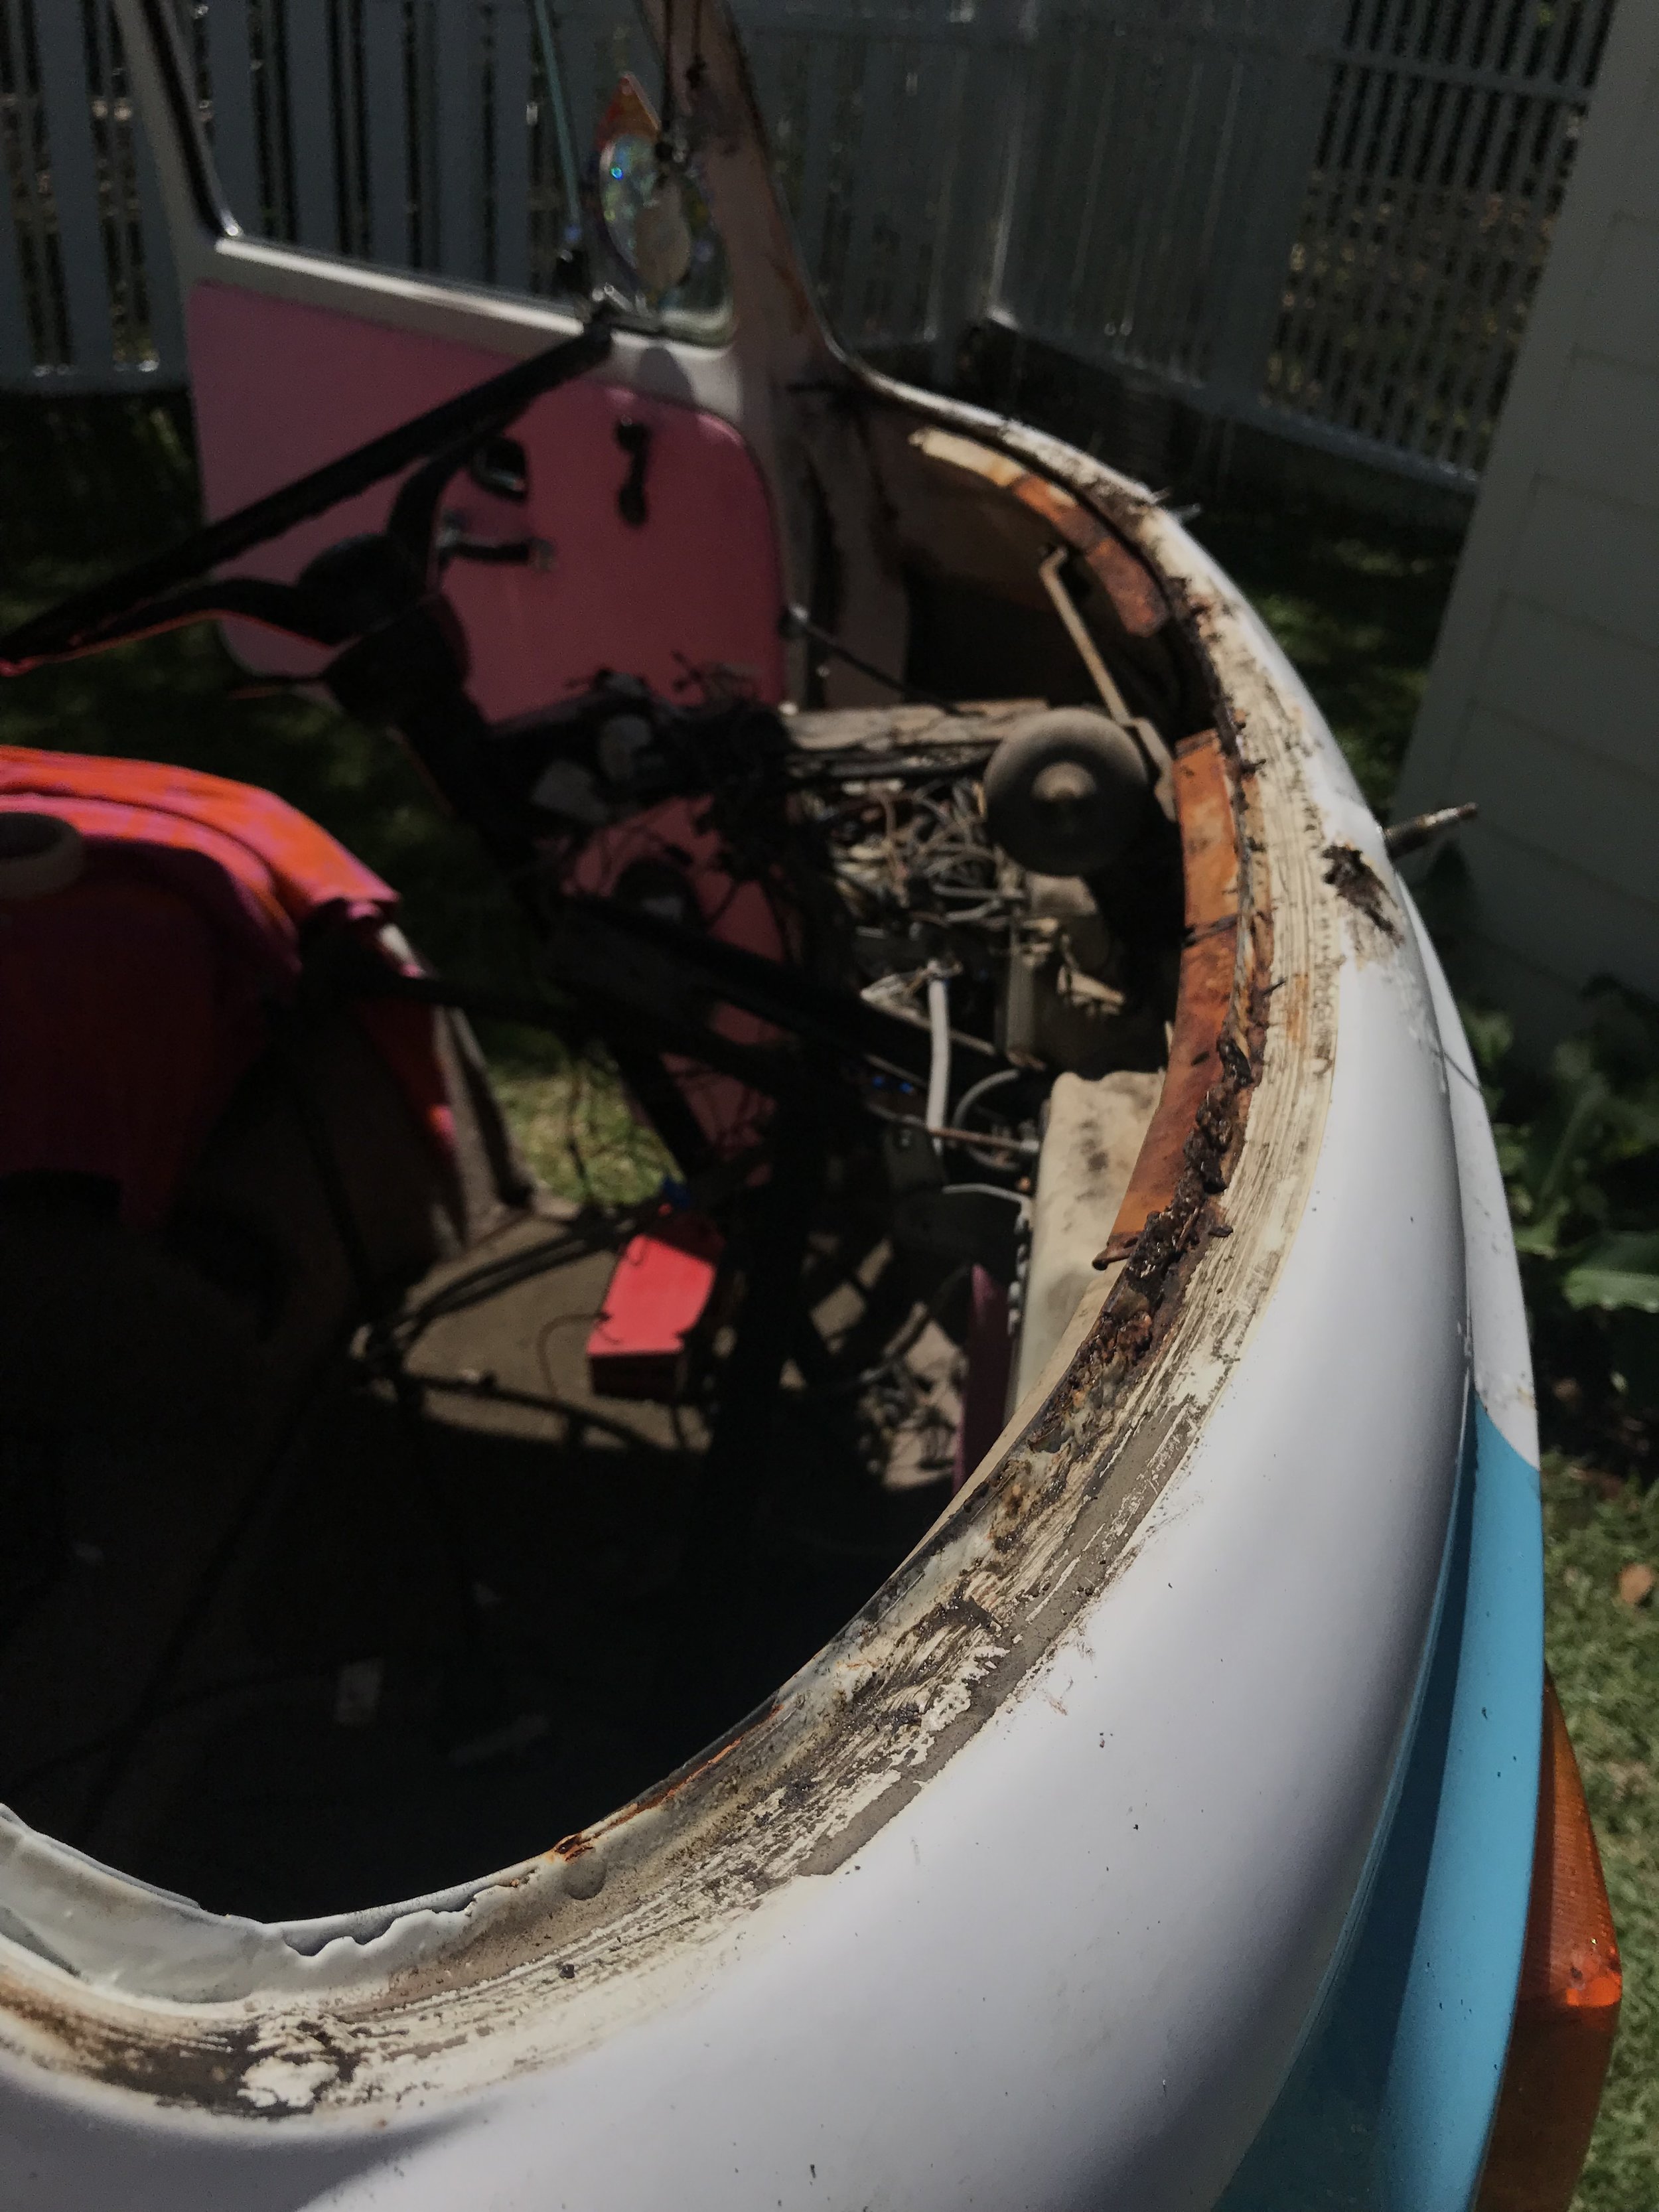
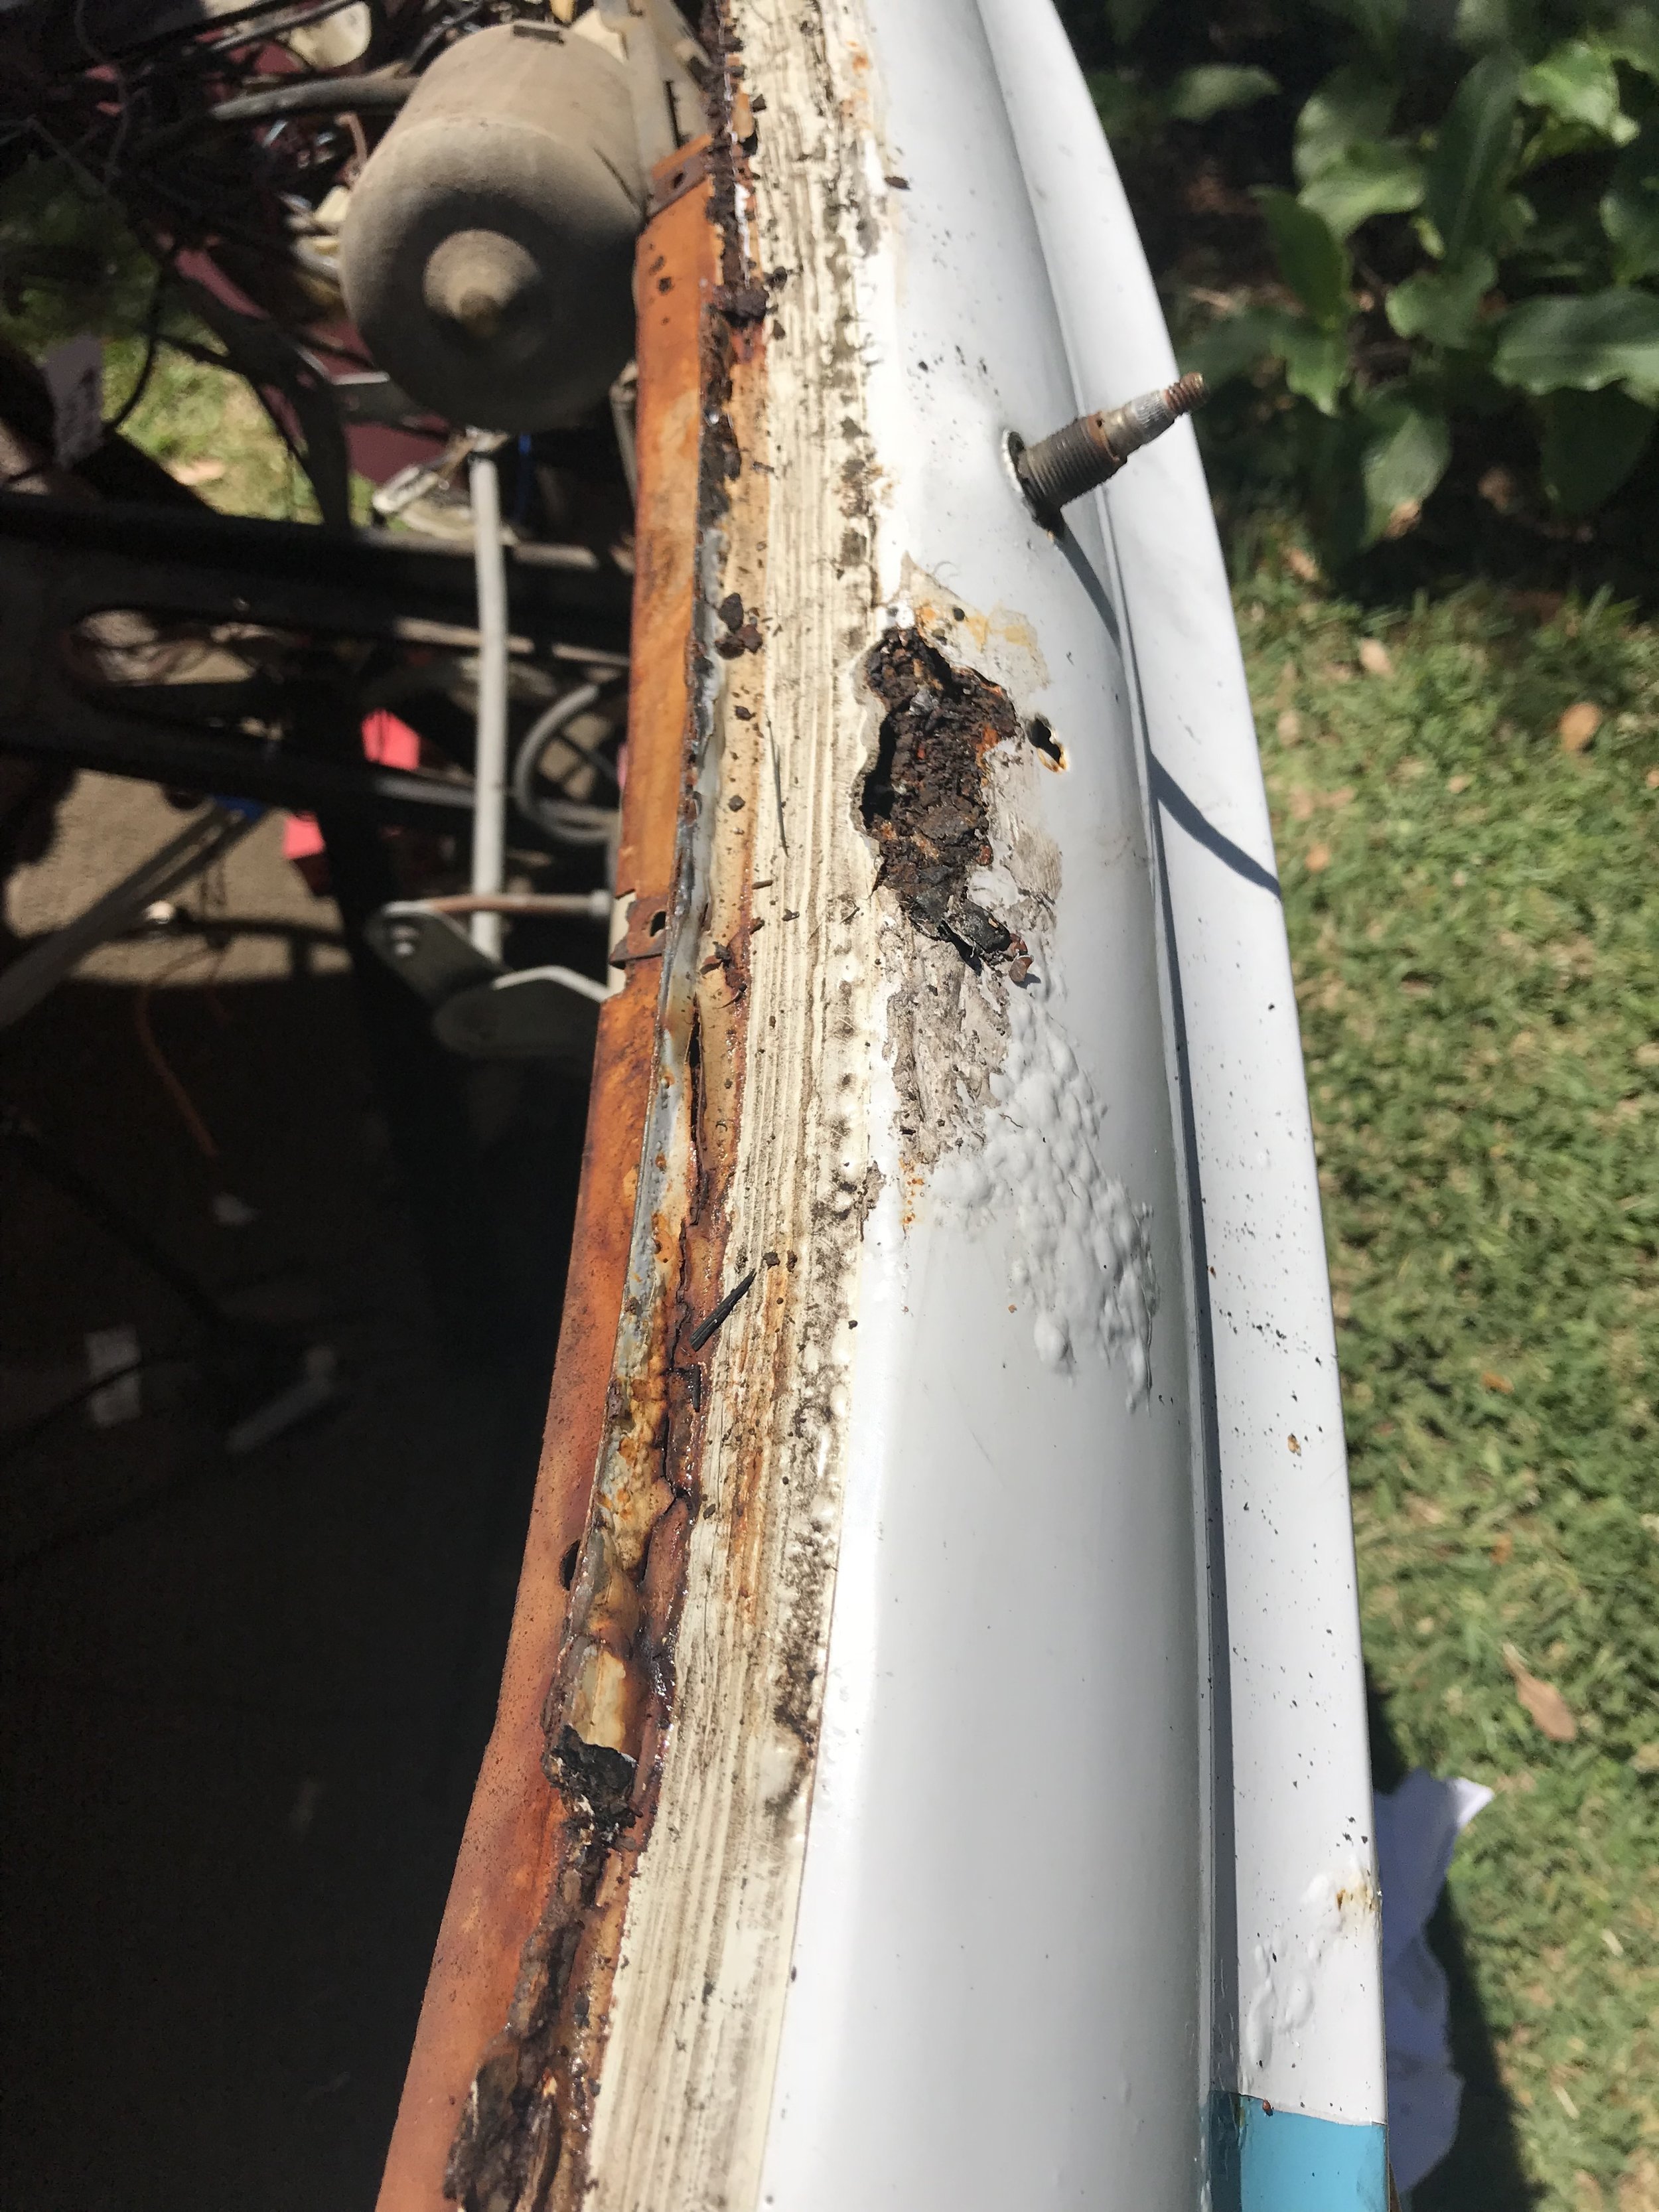
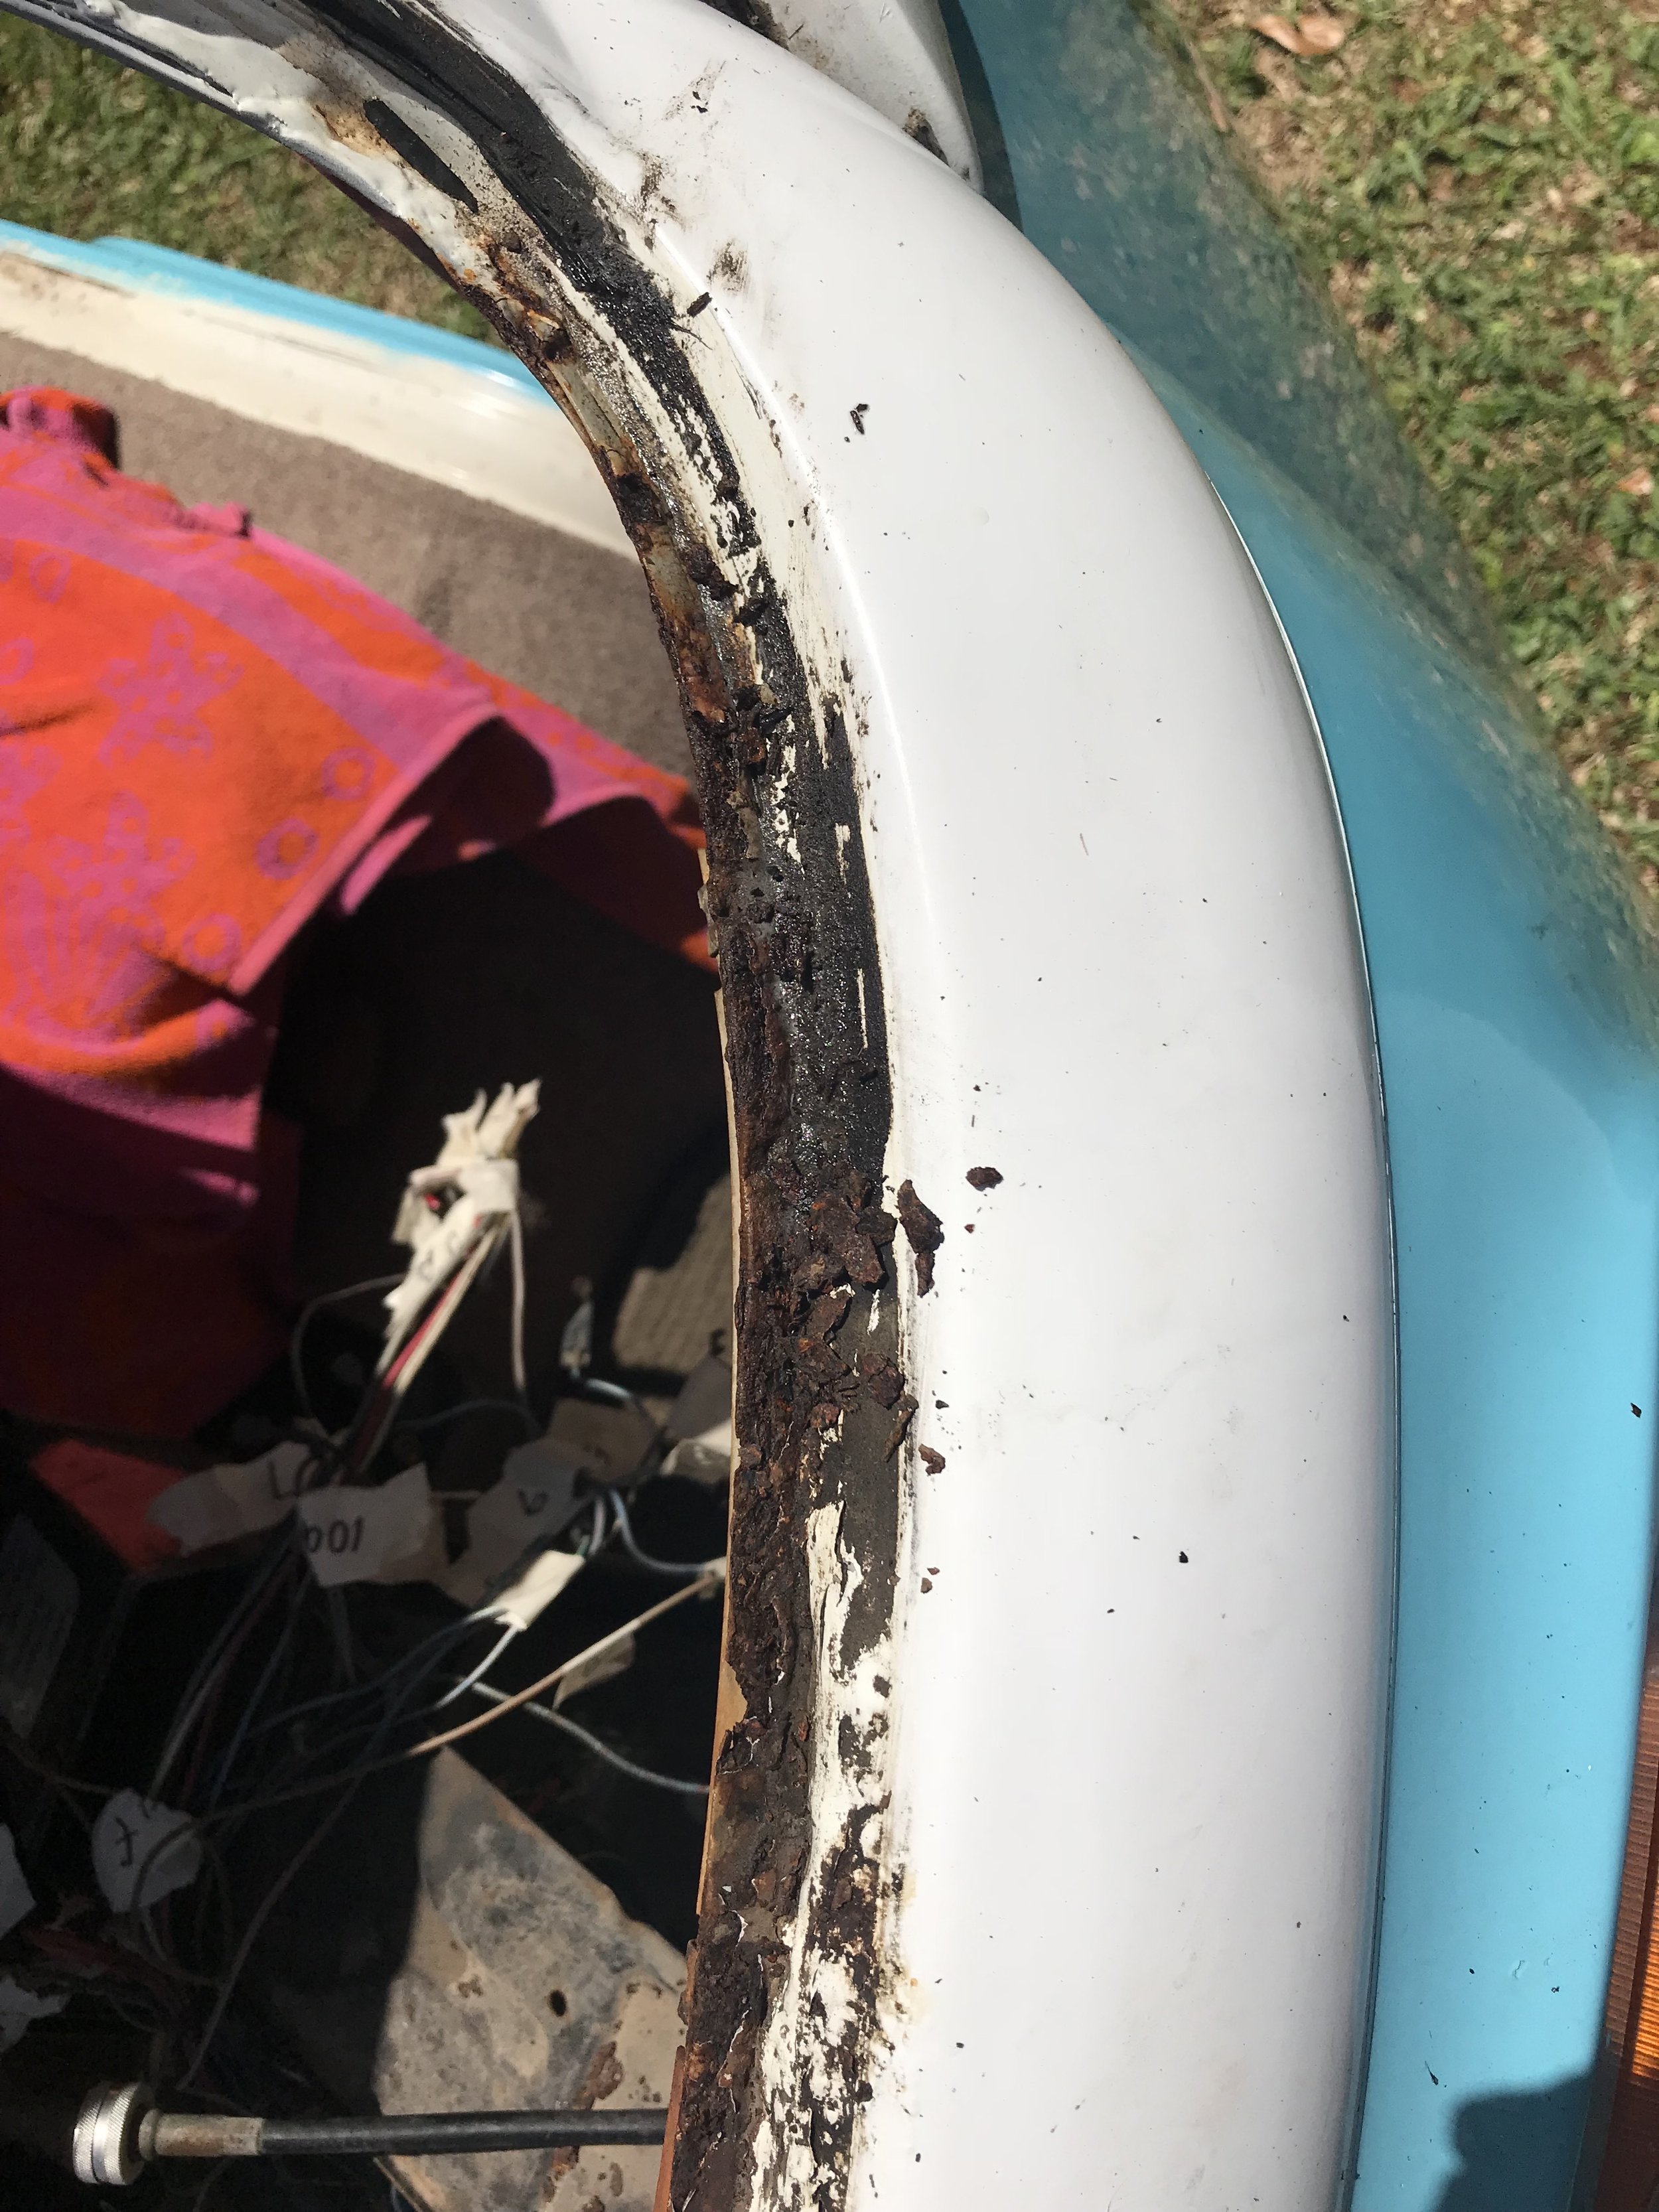
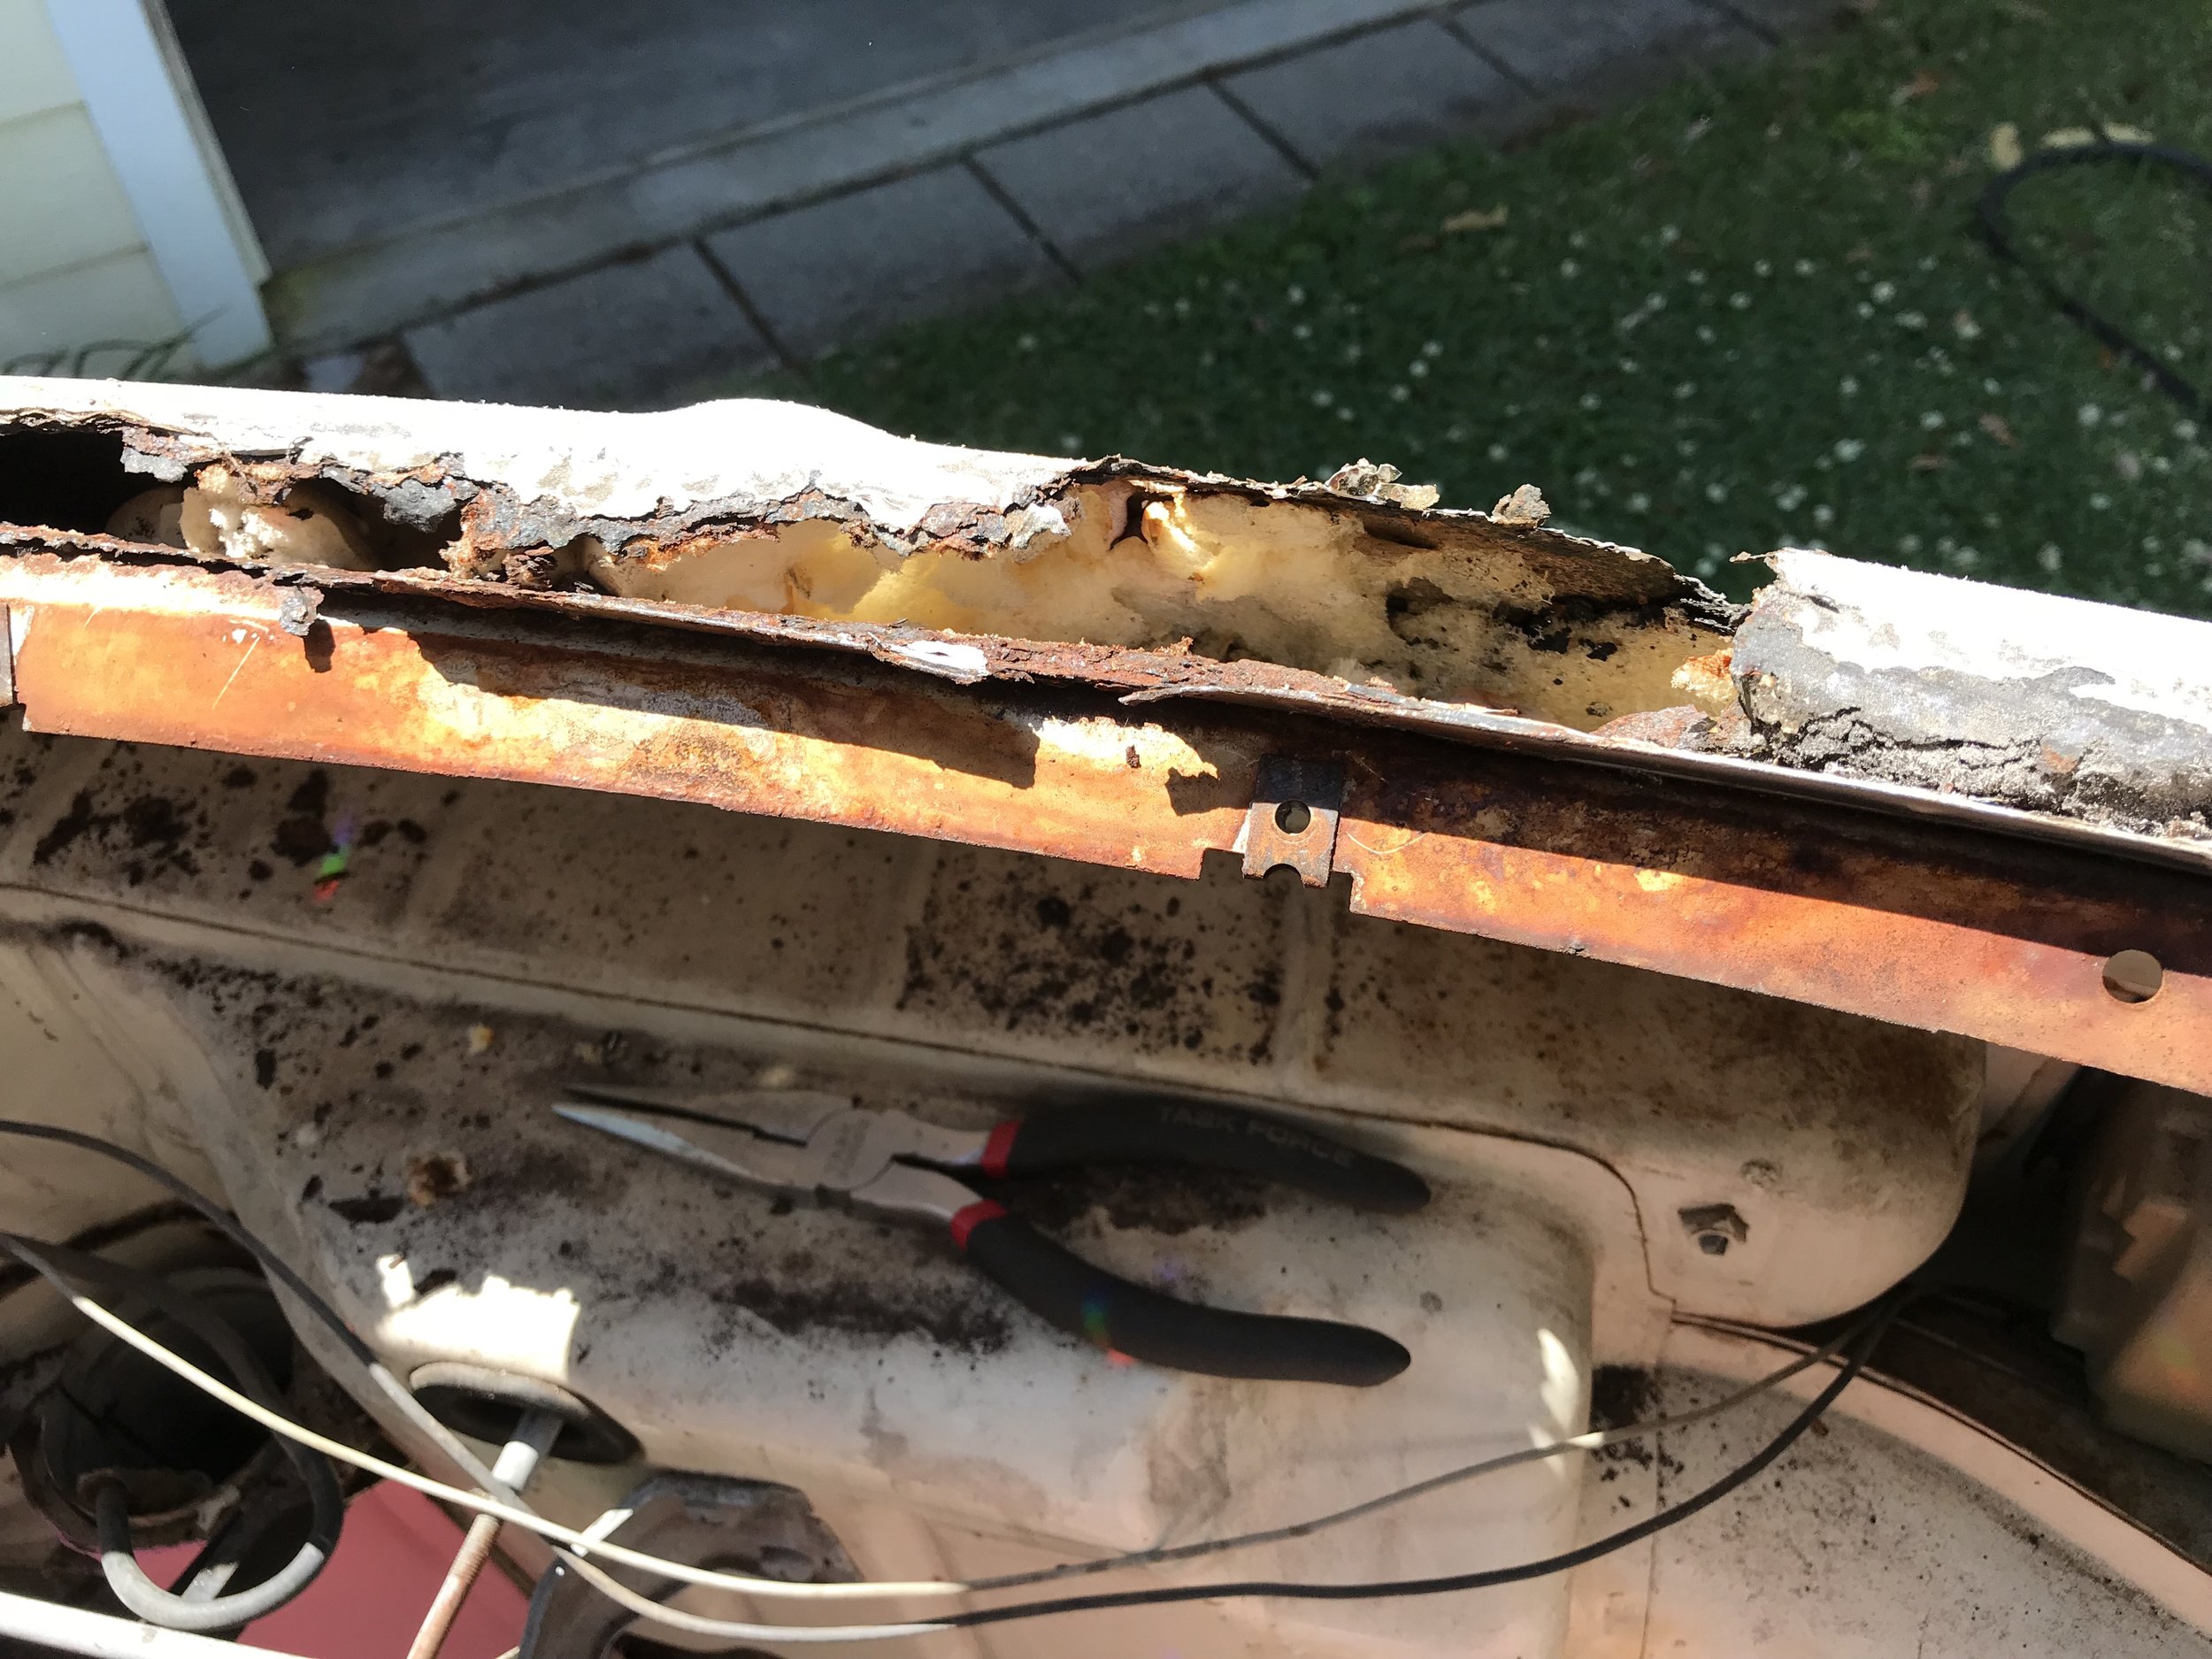
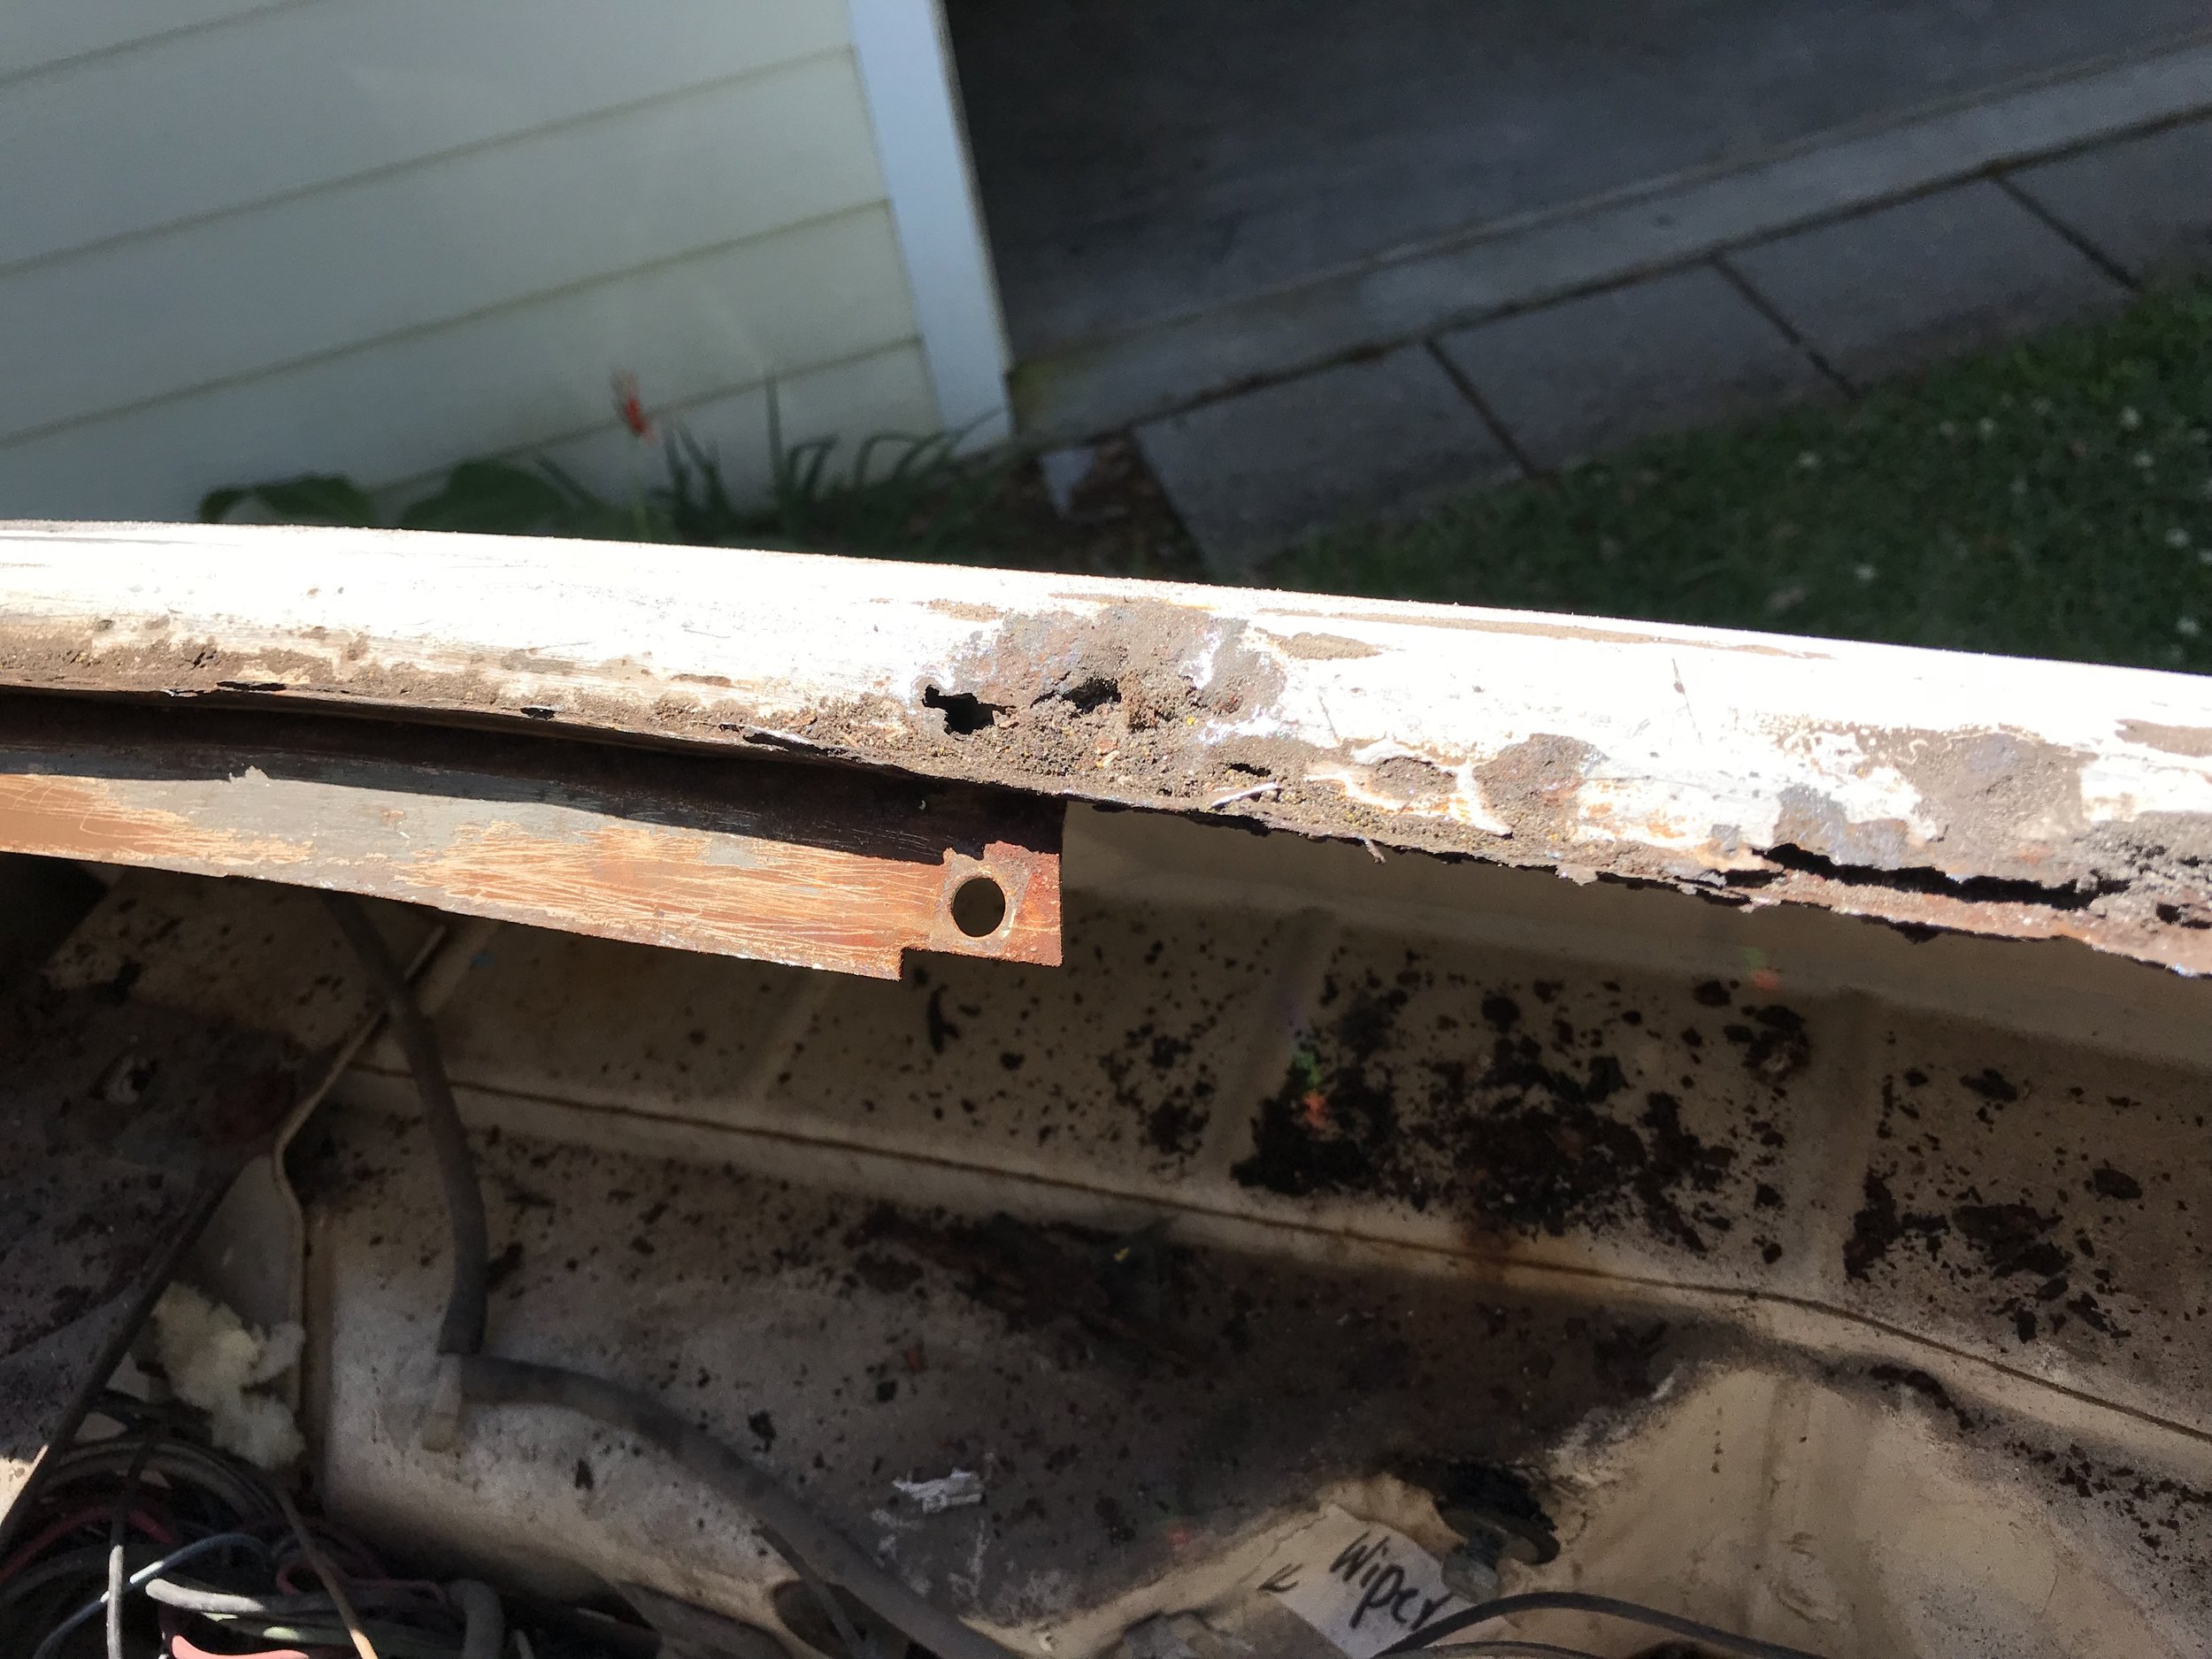
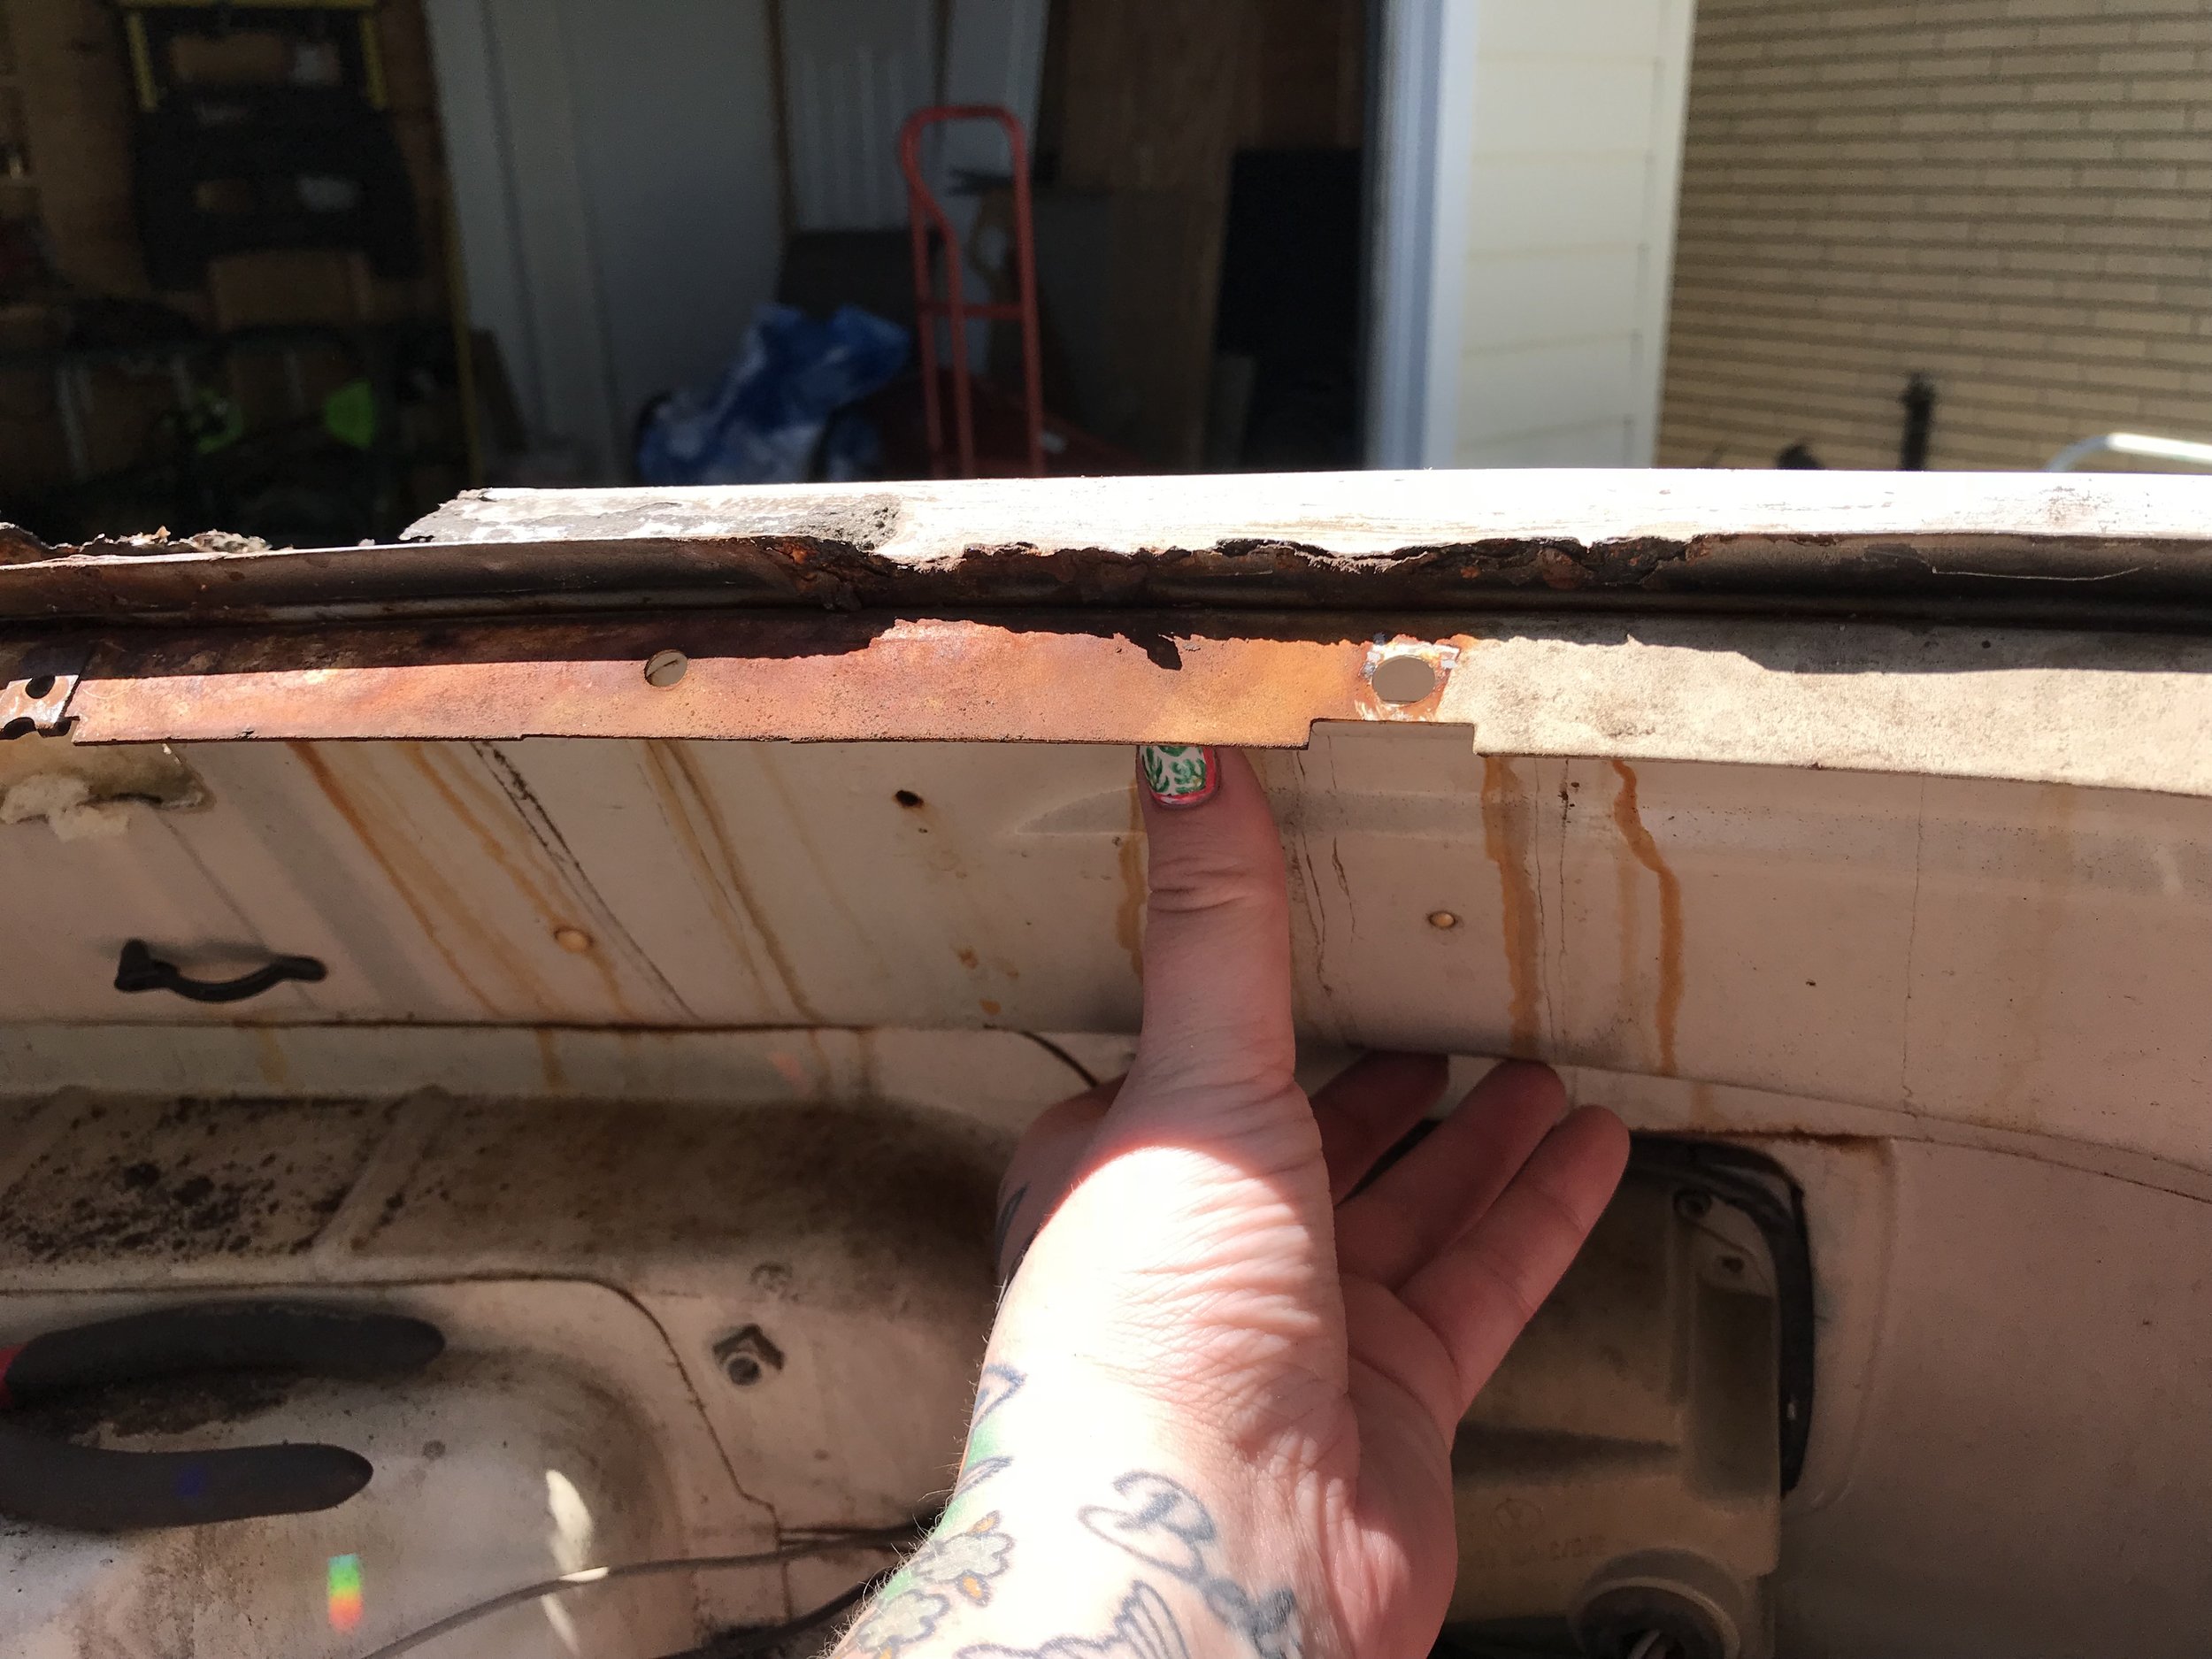
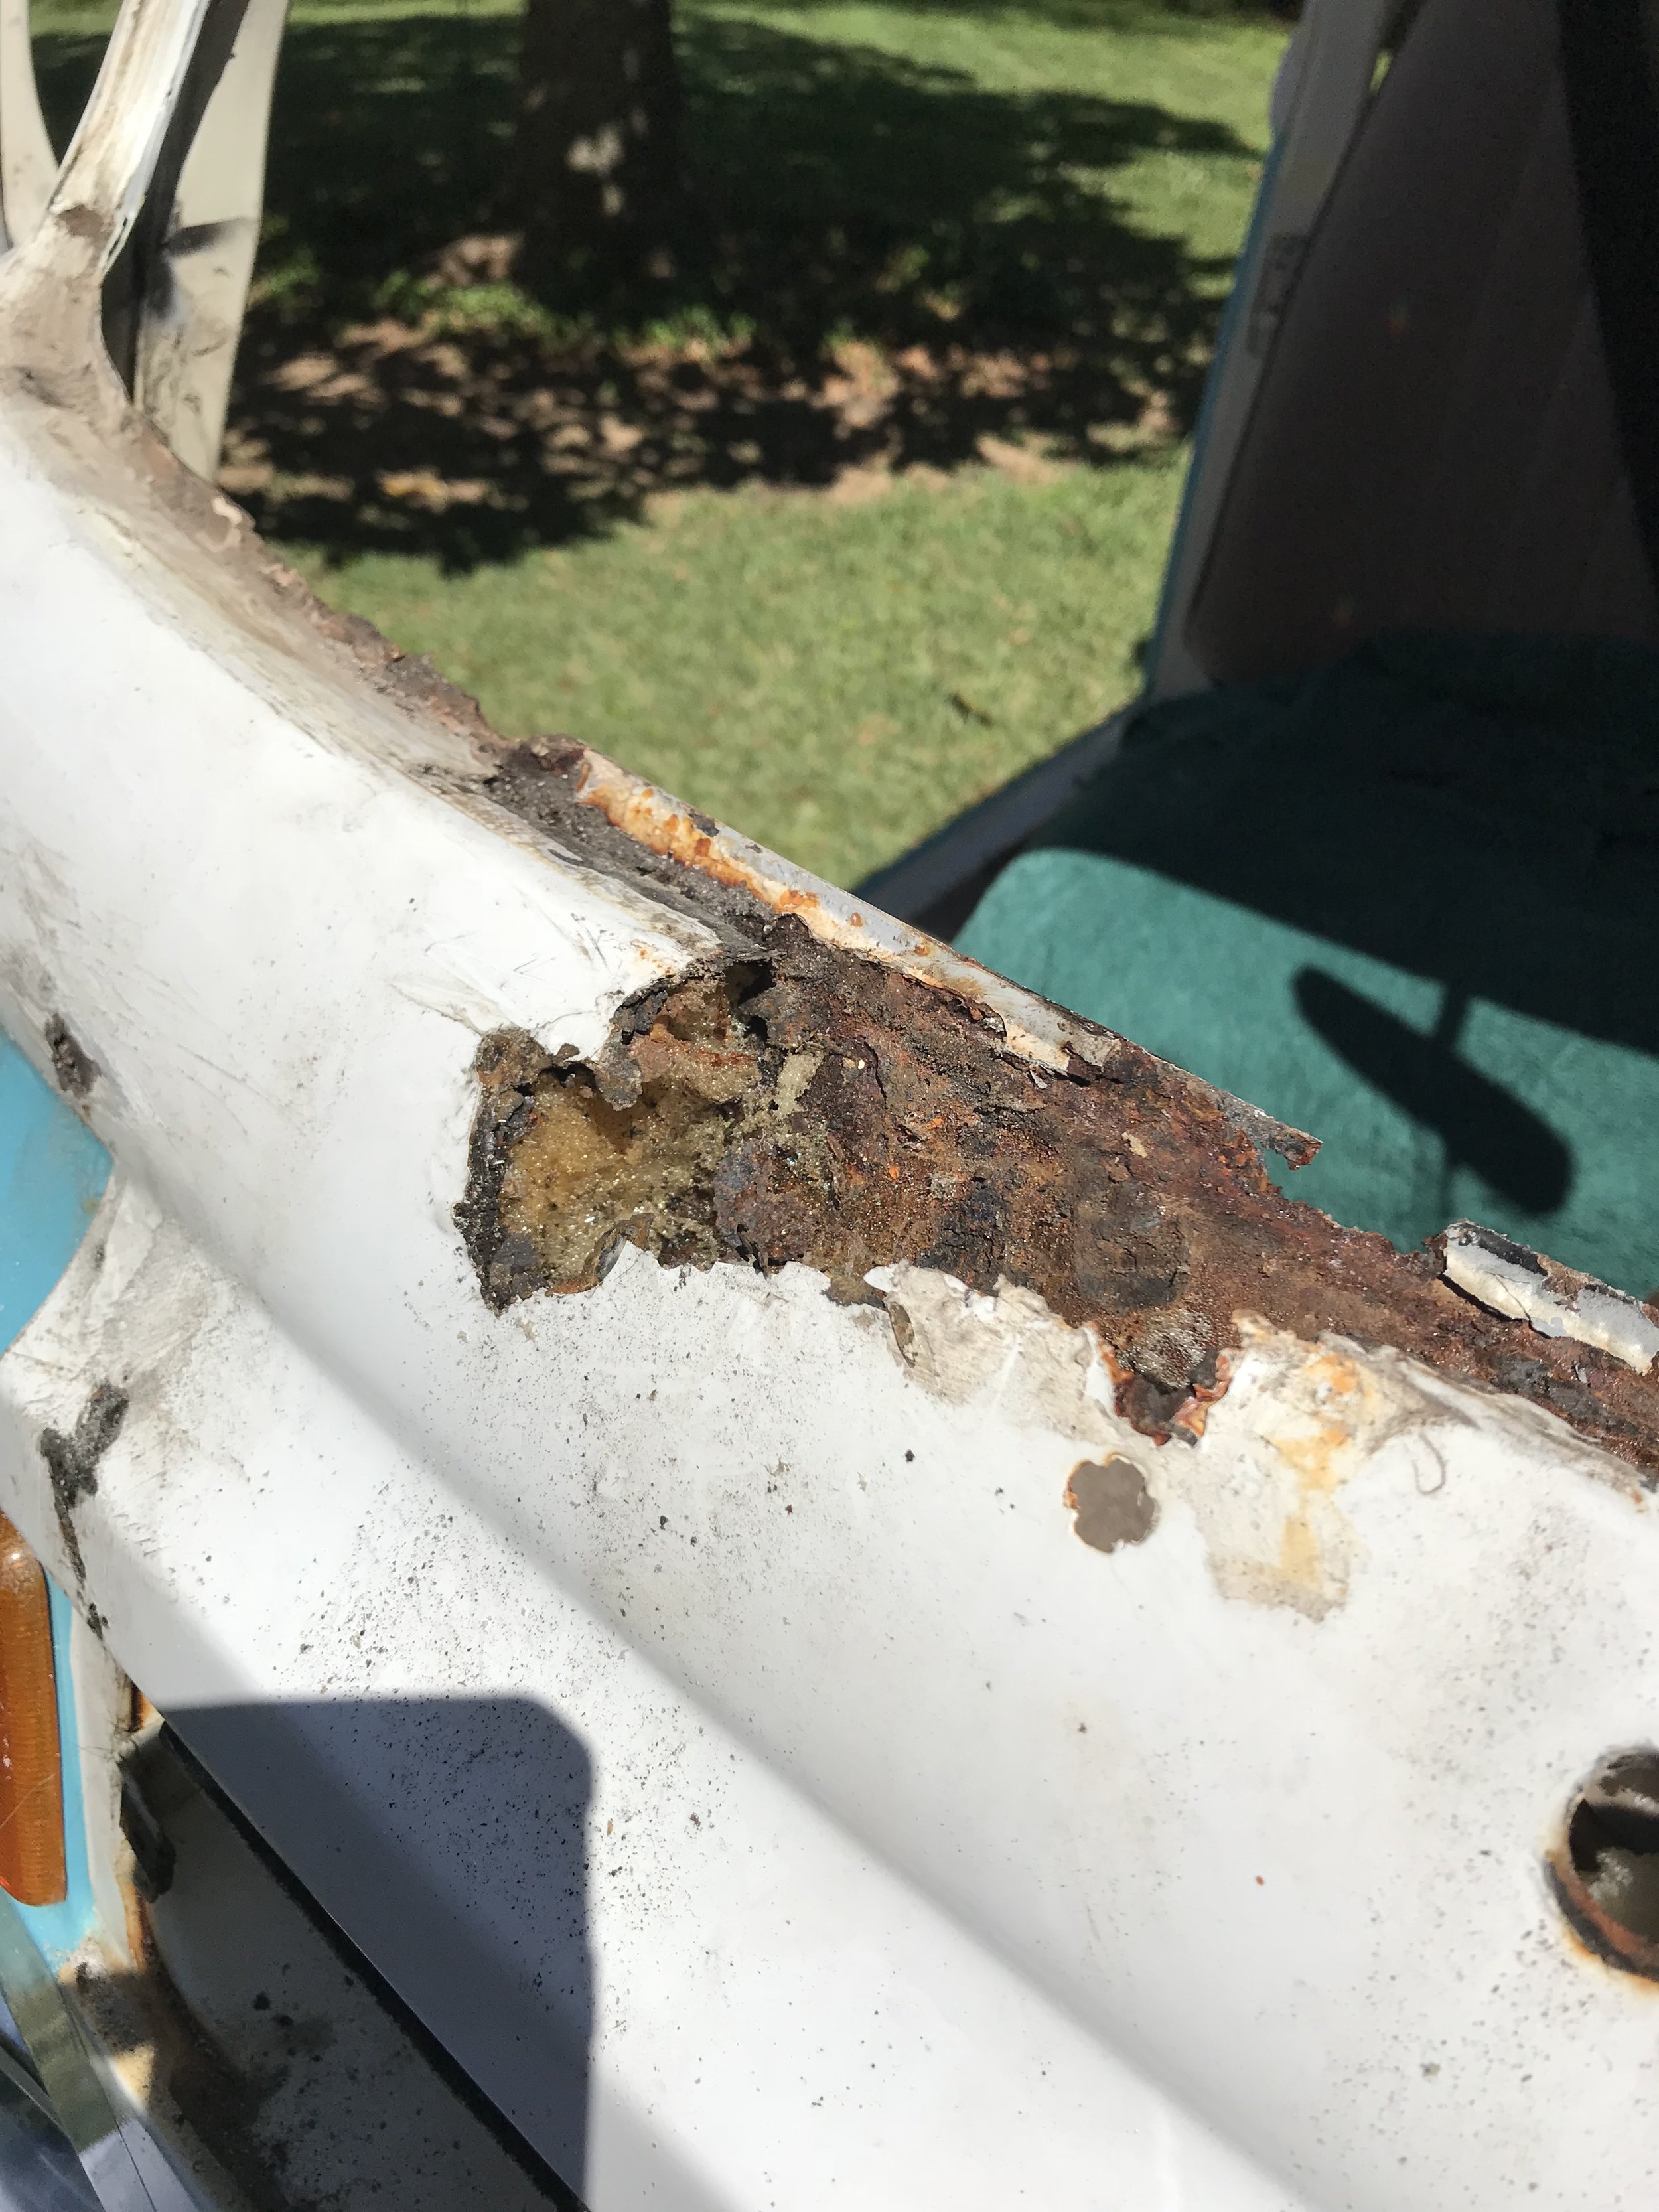
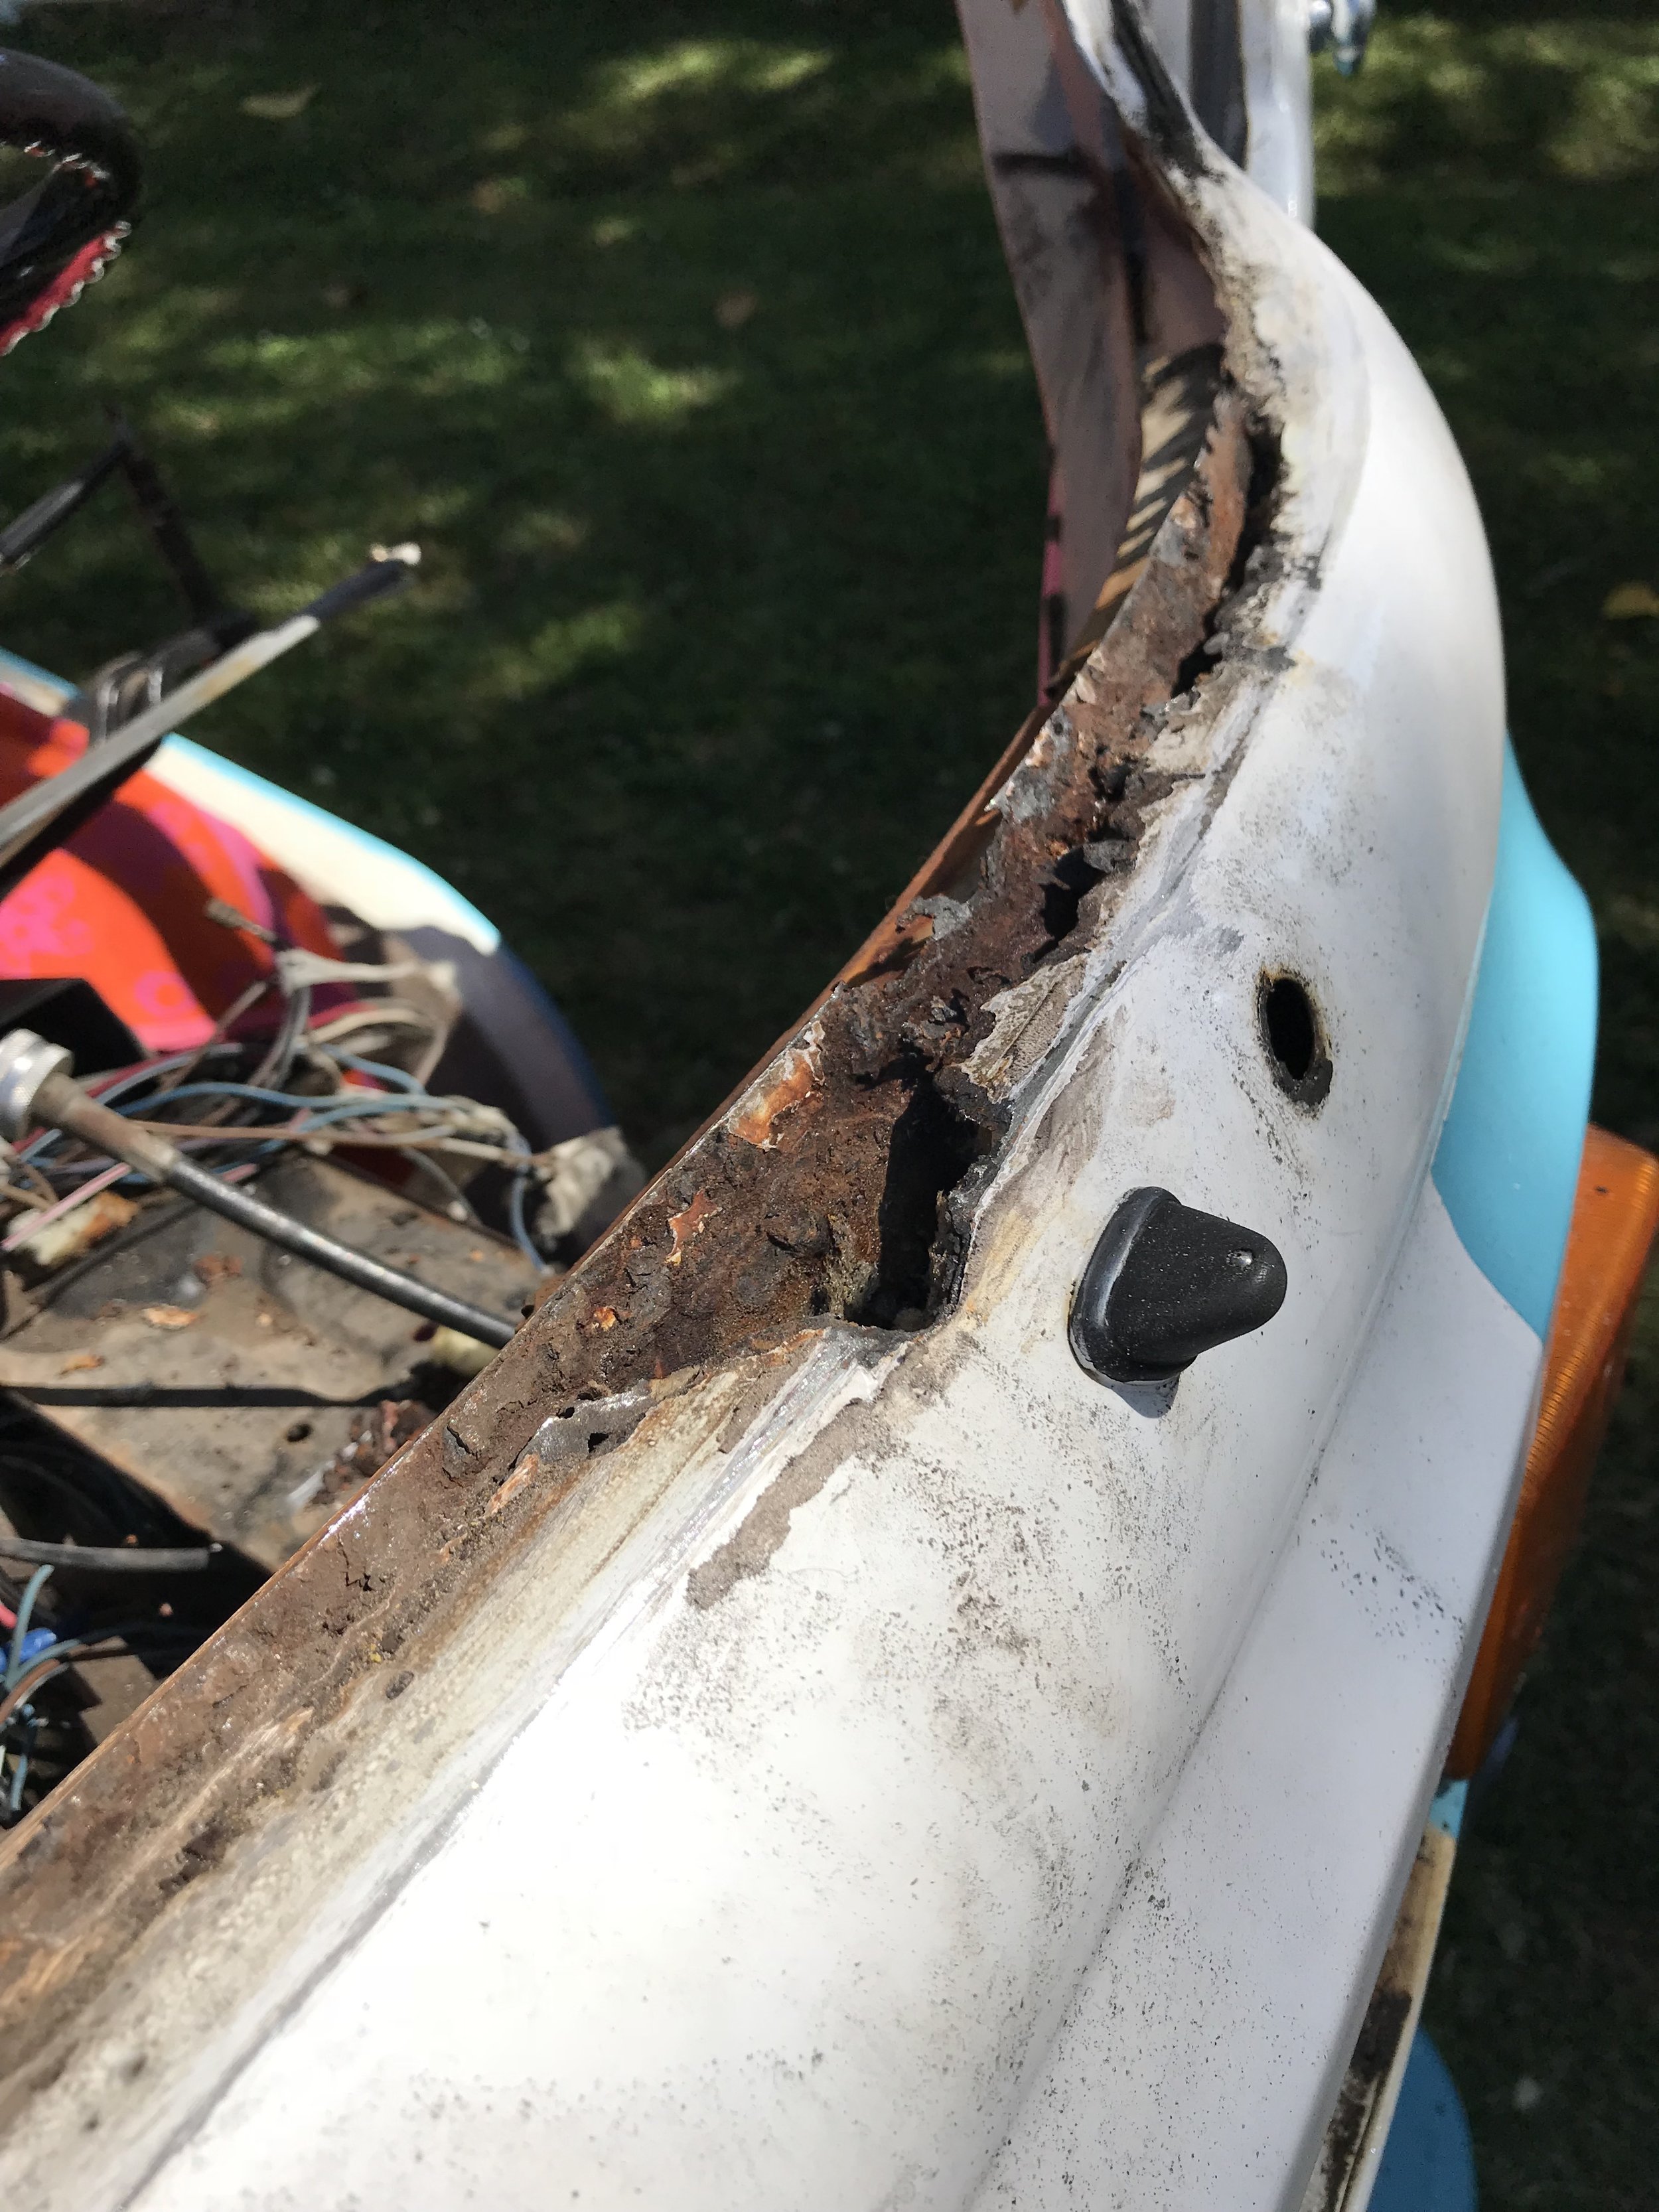
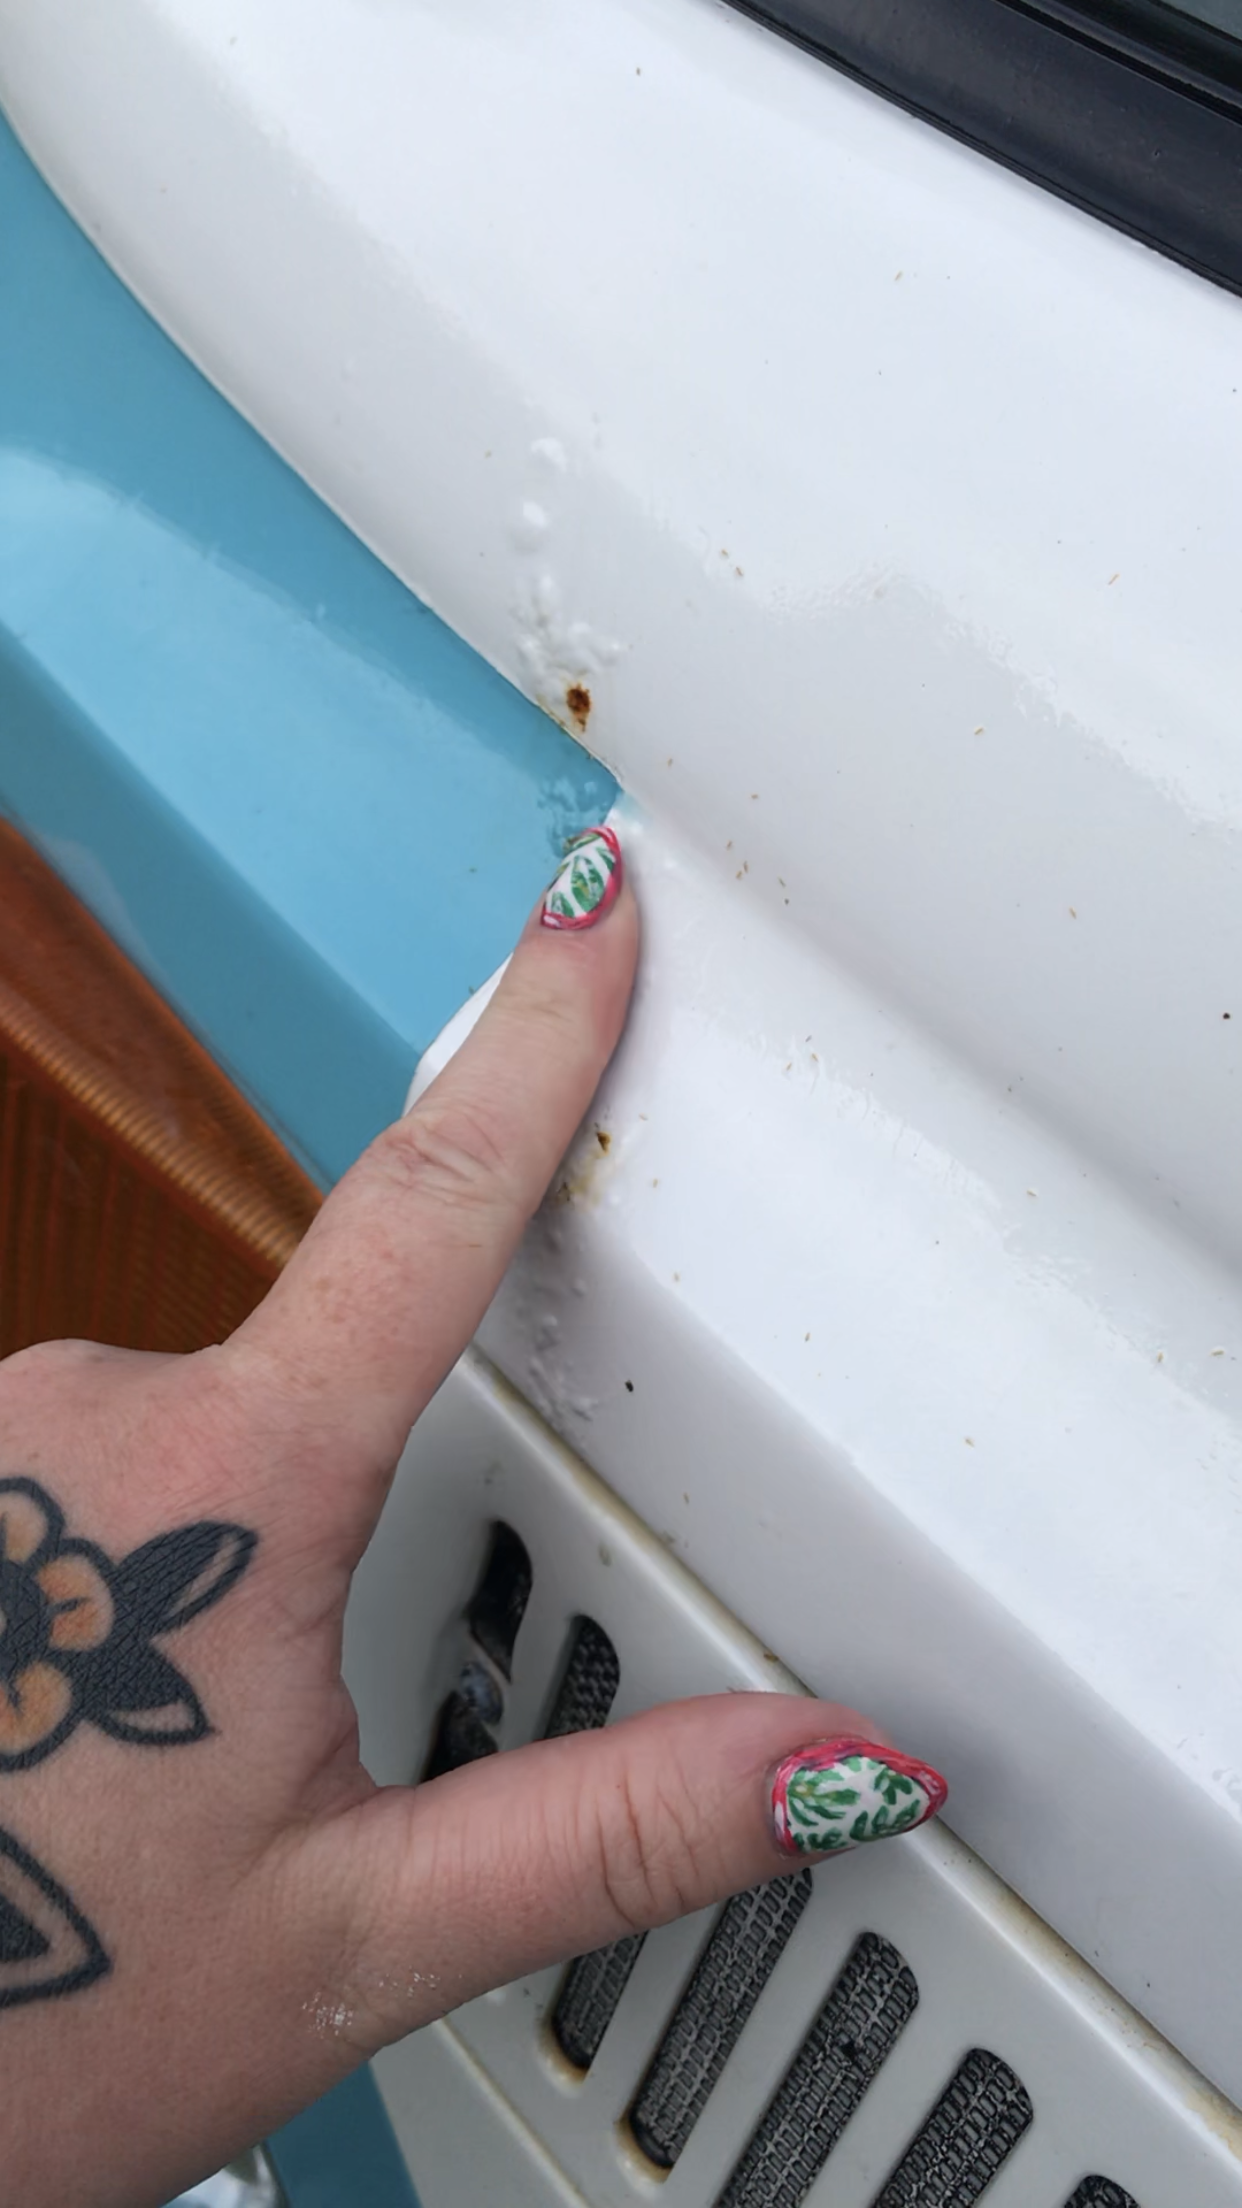
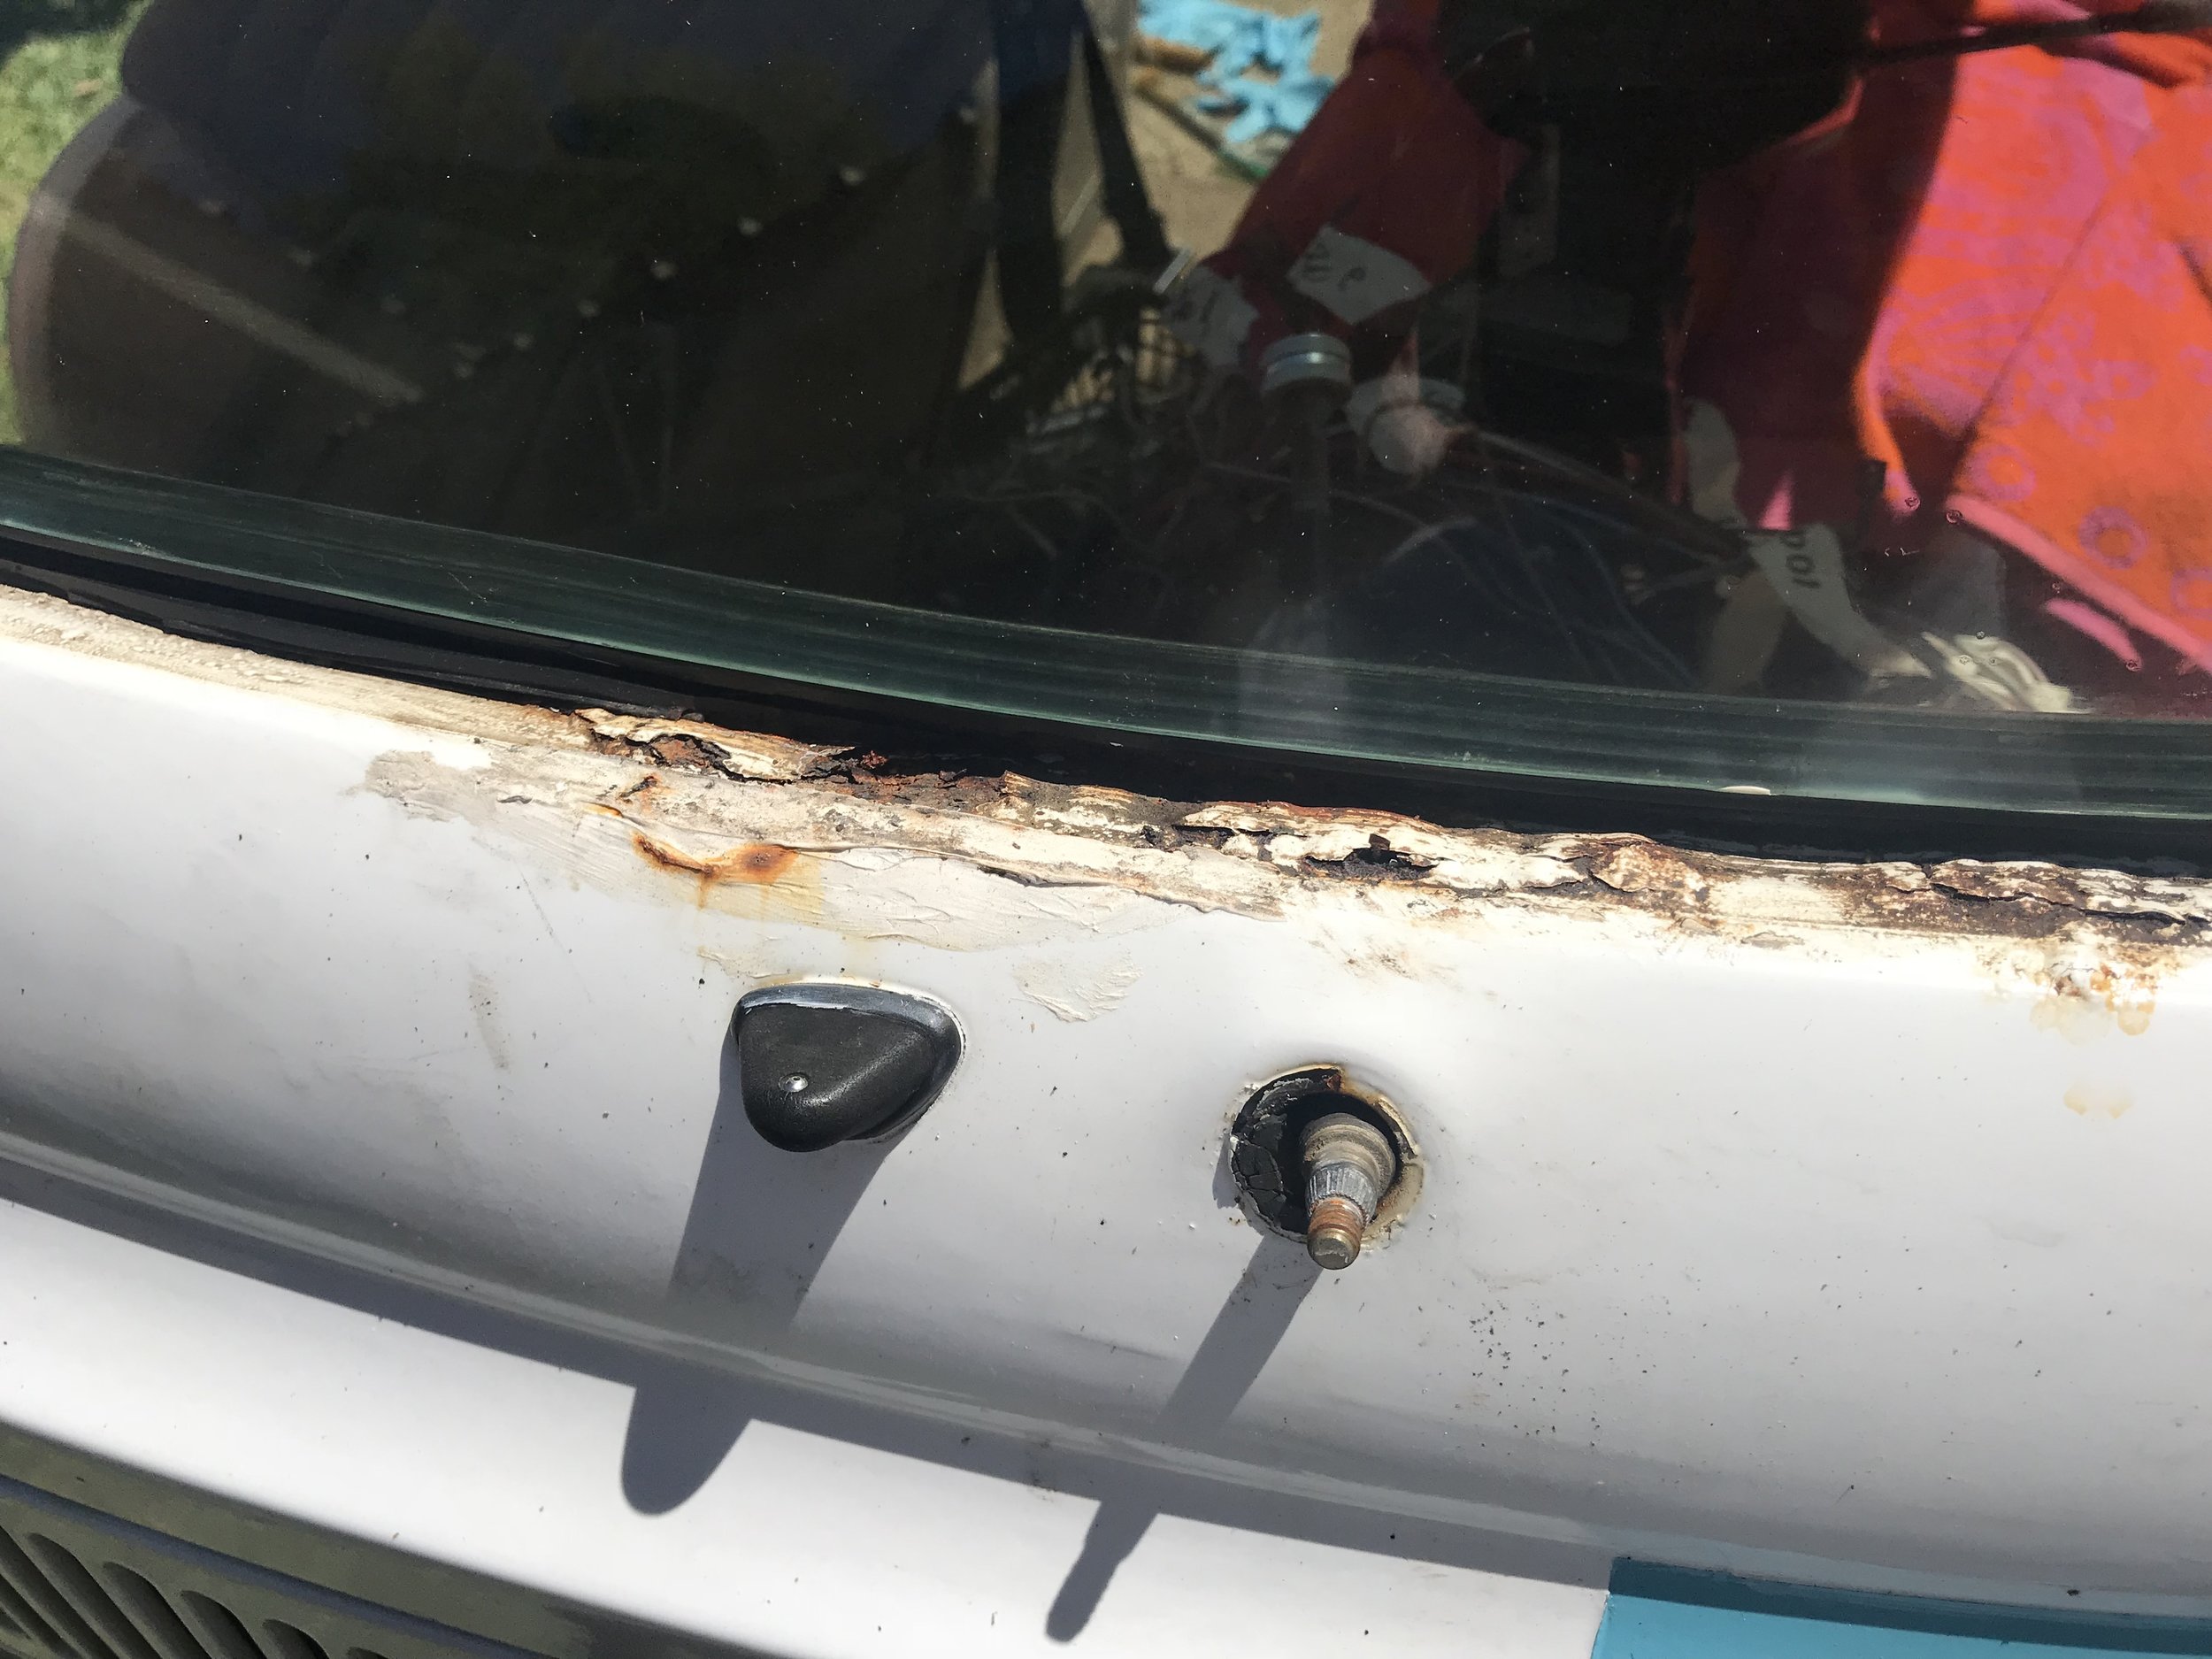
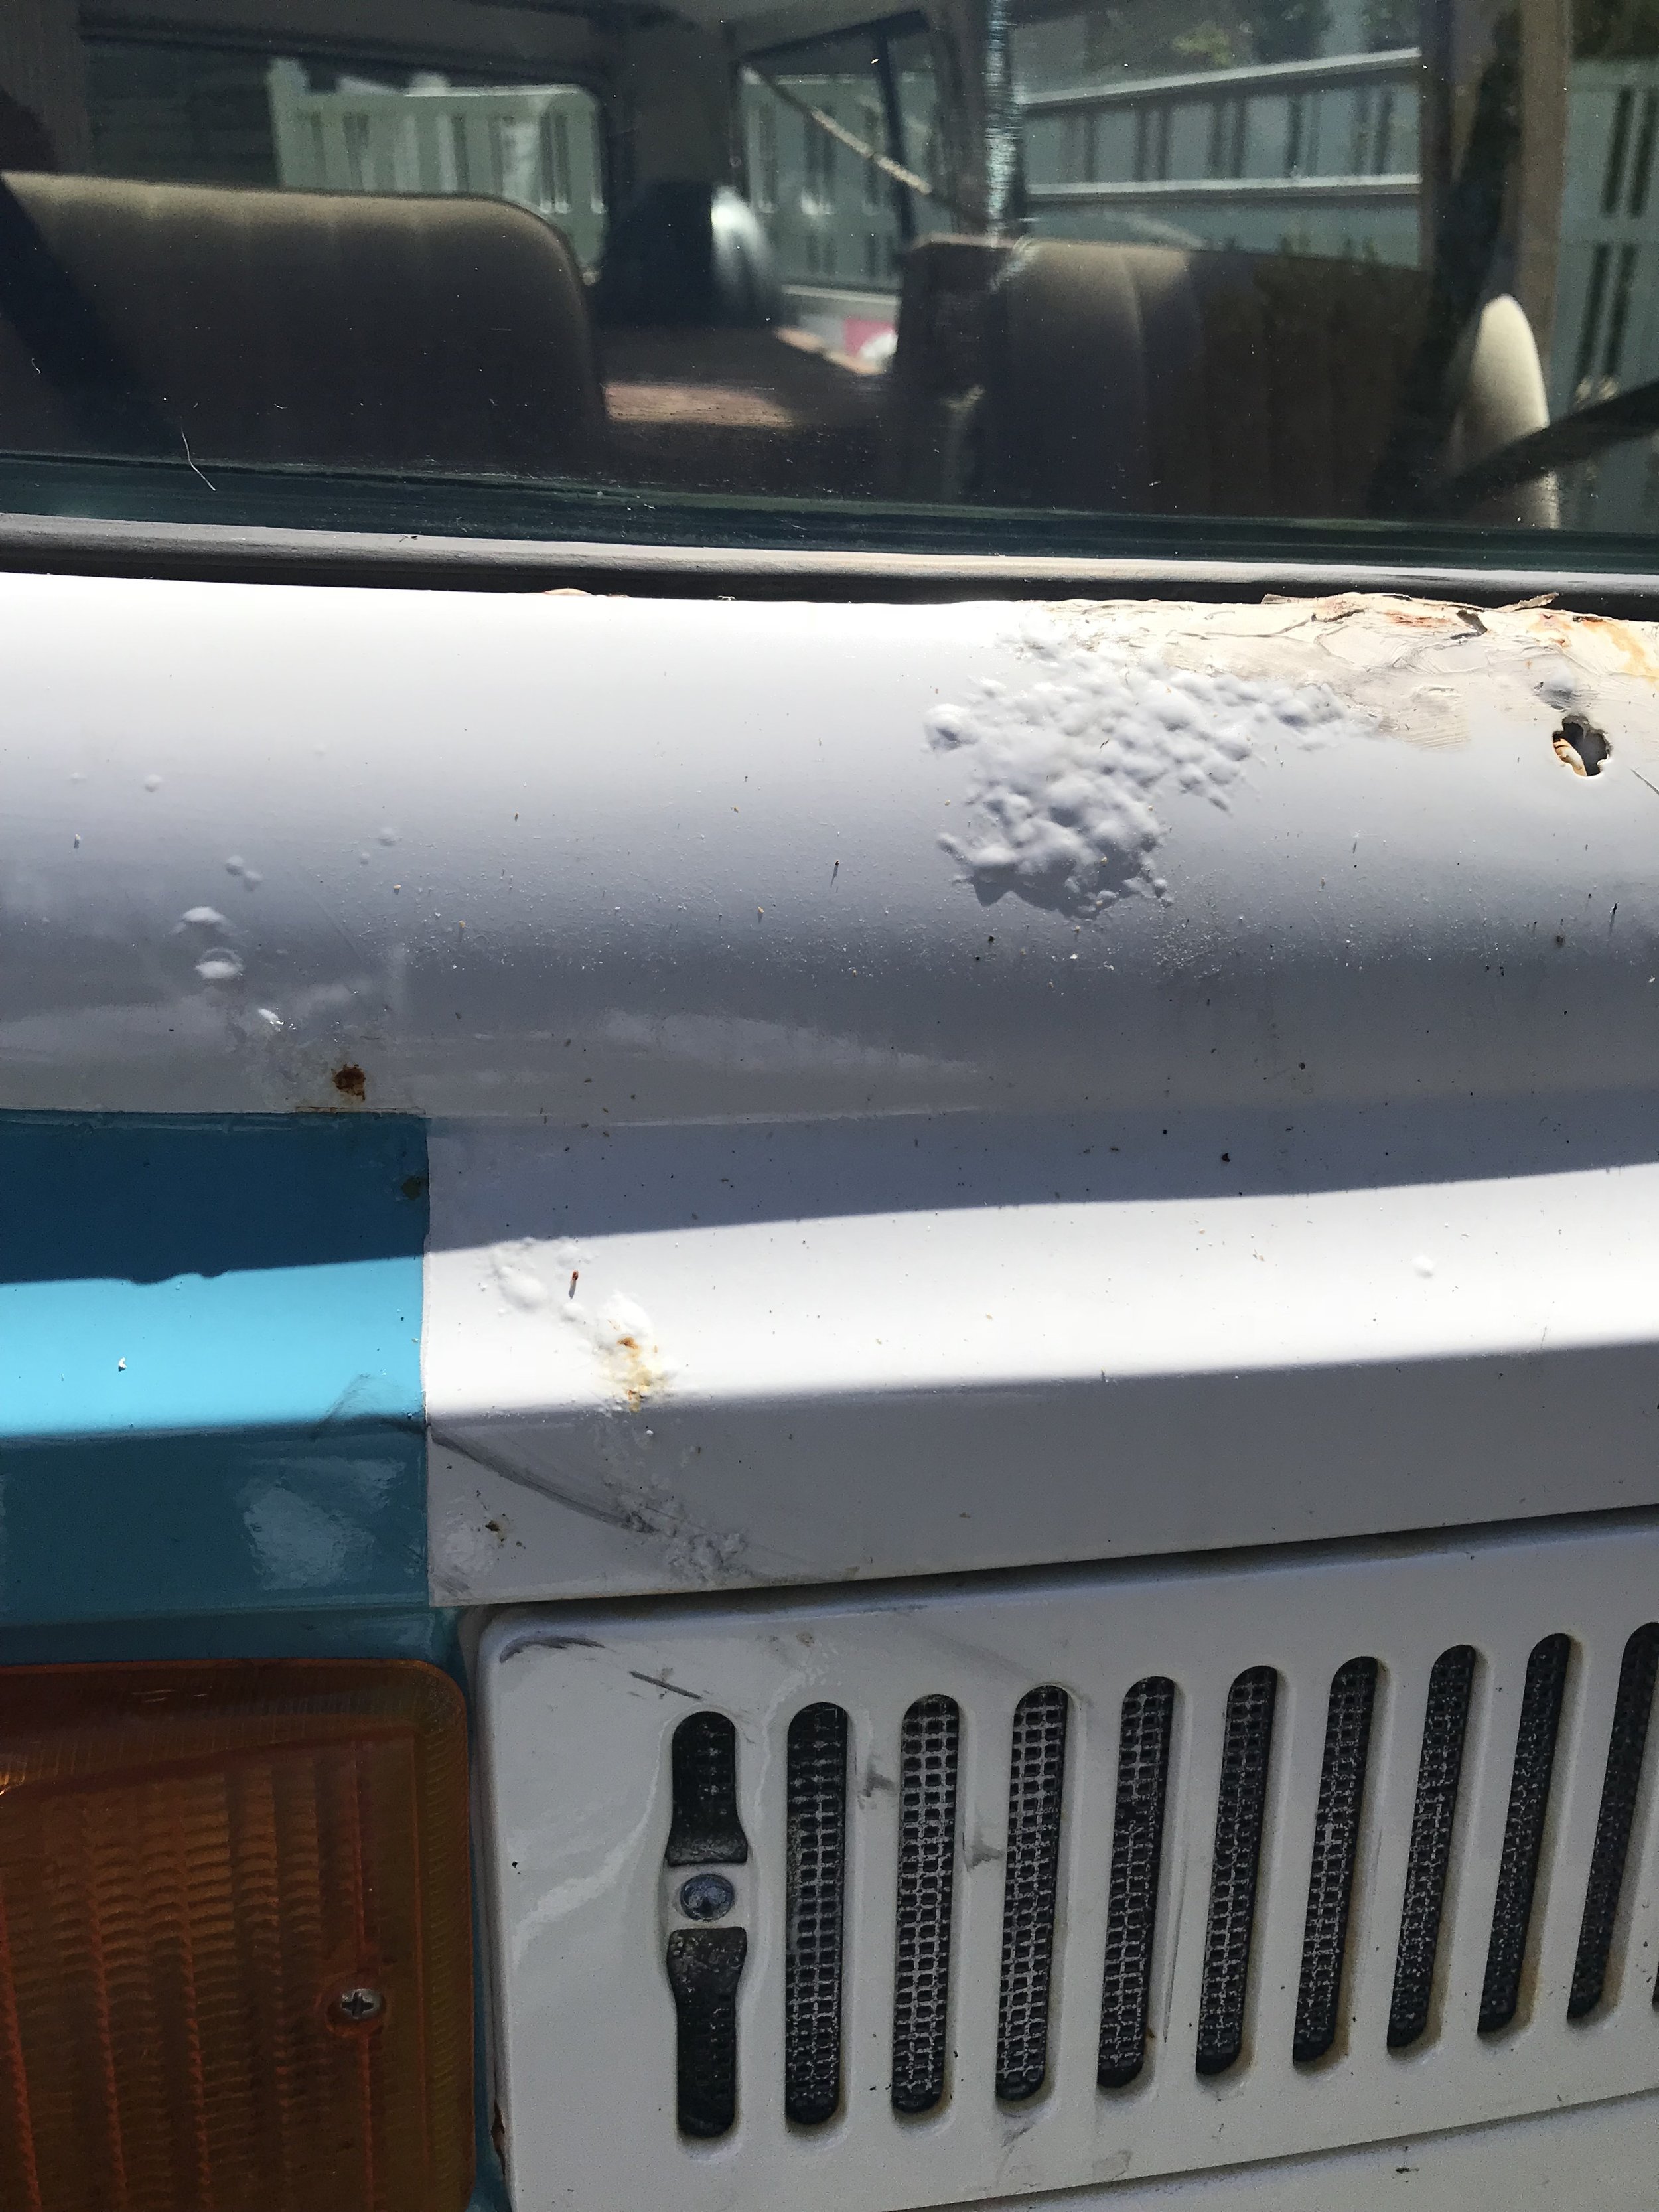
So what I've heard from multiple people is usually if theres a rust problem-- there's hidden stuff that you won't know about until you really get into it. And that was definitely the case with my bus. I started stabbing the rust and the metal was just breaking to pieces and SPRAY FOAM was revealed to be underneath in the entire cavity below the windshield. Spray foam mixing with water and rust? yeah, no bueno. I wanted to cry. I knew at this point I needed professionals and HALP. I ordered a panel from Busdepot.com that would be replacing that front panel-- but come to find out that after having an owner of a body shop come check it out--- that I need to replace the whole front nose panel AND the inner windshield panel. Which thank glob that the rust was pretty contained to the front. We figured out that it's stemming from the water catch on the side-- leaking down into the hollow beams and seams on the sides of the windshield and just creating a huge ongoing problem. Luckily this bus is in my hands now and I am fixing it because if it were to sit like this for 10 more years like this that rust issue would have destroyed so much more.

So now my bb is parked in the backyard with a huge teal tarp over it. Waiting for more parts to come in so I can get it into the shop! I'll be redoing the look of the bus-- but the front will just be teal- without the V white shape. I also plan on mounting the spare tire on the front so that there is more room in the bed area. My main priority right now is to get the rust killed, weatherstripping replaced throughout the whole bus, replacing a side window, and priming the rusty spots!
I'll keep y'all posted to how it goes next!

